

Written by Dwayne Lessner, Principal Technical Marketing Engineer at Nutanix
Nutanix/Xi Leap
Nutanix Leap is the product for DR Orchestration to another on-prem environment or to Xi Leap which is Nutanix’s hosted DR-as-a-Service. Nutanix has had integrated data protection since NOS 3.0 which relied on the use of protection domains. Protection domains gives the ability to drag-and-drop the VMS into a grouping of applications with a similar Recovery Point Objective . This was good because you didn’t have to worry about mapping the backend storage to LUNS and other tedious tasks. Protection domains however, did not have boot ordering and network mappings that could preserve or change IP addresses upon restore.
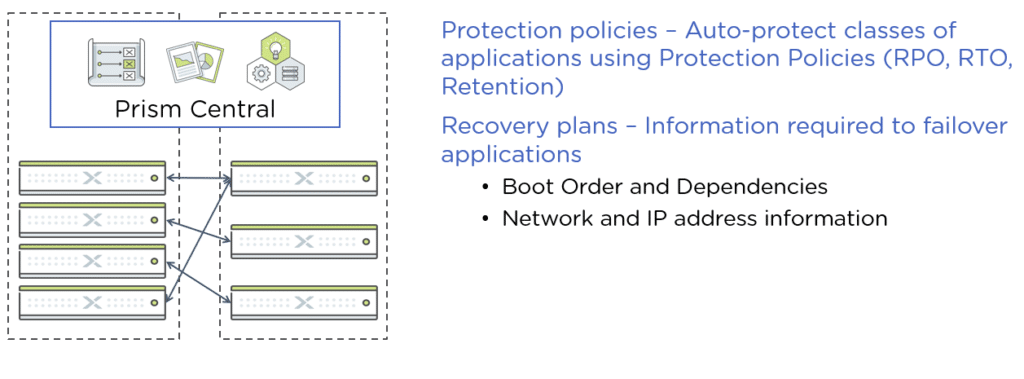
Leap gave new abilities for data protection while simplifying large deployments by moving the management to Prism Central (PC). Leap gave way to protection policies for assigning RPO’s and destination location and recovery policies for good order and network mappings so your workloads could be brought up in the correct order and with new or the same IP address. Moving the management to PC gave you one location to apply a policy for all your virtual machines, regardless of which cluster they were on.
To move to Leap you first had to remove the virtual machines from the original protection domains if you are using the feature and then put those virtual machines into their own category, which later could be used for a protection policy. The good news is that switching between protection domains and leap is easy and that you do not have to re-replicate any of the data. The bad news is if you have hundreds or thousands of virtual machines already protected the chance for human error realistically could be quite high.
The Requirements
Inspired to help a current customer and with the help of Chris Rasmussen we went to work to provide the script. I was delighted when Chris offered to help as I was asking questions because the end result was a lot cleaner than what I would’ve enabled to hack together, not to mention getting the script to actually work.
How it Works
There is a parameters json file where you can include your old protection domain that you want to migrate to Leap along with your Prism Element virtual IP, your PC virtual IP, the local admin account name and the name of the category you’re going to use for the protection policy. The script assumes you will be using the same account name for both Prism Element and PC and also requires you to have the category already created before running the script.
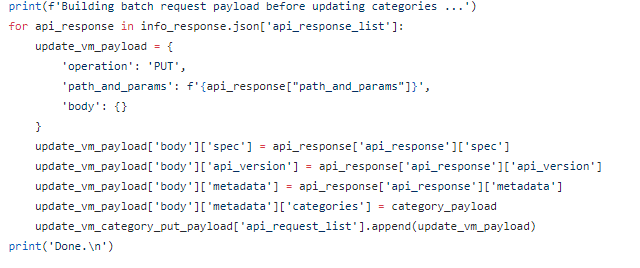
The first half of the script is talking to Prism Element to get all of the virtual machines from the protection domain and then removes them from the protection domain using our version 2 API. The second half of the script takes the UUID from the VM’s to create version 3 API call to prism central to add the VM’s to the correct category. After the script is done you just need to add the category to the protection policy and the protection policy will be applied. Do not delete the protection domain until you are sure that you have at least one good replication using leap.
What it Does
Move on over to Leap using the script provided on GitHub.
*** This script is NOT supported by Nutanix Support. Please test before using in production.
See it in Action
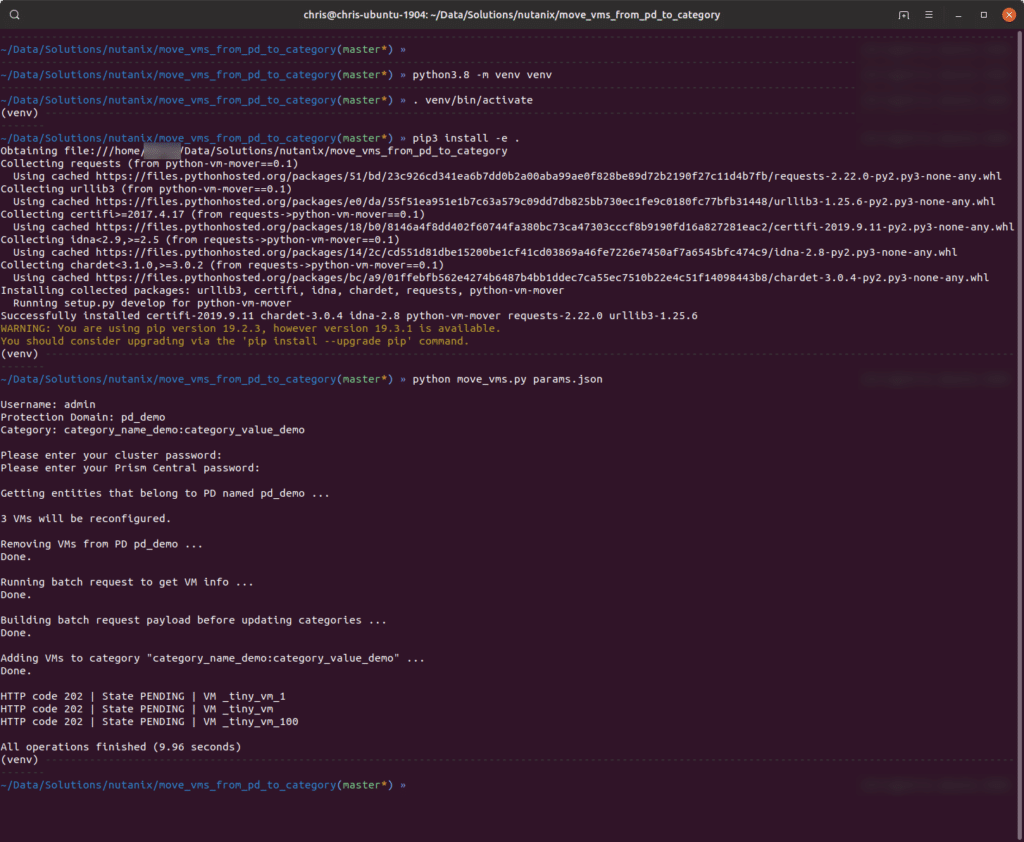
Below you’ll find two media samples. First, a screenshot of the script being run on Ubuntu Linux 19.04 (although you can run it on any system supporting the requirements) and then a video of Dwayne running the script. Both clearly show how to setup/install the script and its dependencies and then what the script looks like being run.
Final Words from Chris
This small (ish) but useful script makes what could be a cumbersome task into something that can be run fairly quickly. There’s no need to manually remove VMs from Protection Domains and then assign them to a category – that’s all done for you. The only “disclaimer” is that batch requests impose a maximum number of 60 requests per batch. This will need to be taken into account when building the batch request lists.
Hopefully looking at this script will also provide some insight into the sorts of things that can be achieved with the Nutanix APIs.
Thanks for reading!