

A while ago I published the first two parts of a beginner’s series. This series is aimed at getting started with the Nutanix Prism Central v3 REST API and covered the two following topics at the time:
- GET all the things – Setting up your first Nutanix REST API v2.0 request
- POST a package – Building your first Nutanix REST API v3 POST request
For the next part in this series we’re going to use a similar VM to the one created in the POST article and then use the same API to update that VM. Let’s go!
Deploy our testing VM
Before we jump too far forward, we’ll need to deploy a VM that can be altered. If you are following this article in your own environment, there’s no reason why this can’t be done with an existing VM. Please just make sure altering that VM won’t cause any problems.
To deploy a test VM we’ll use the Prism Central v3 vms API as follows. Make sure to alter the relevant settings to match your environment.
- Prism Central IP address: 10.133.16.228
- Request method: POST
- Request URL: https://10.133.16.228:9440/api/nutanix/v3/vms
- Request payload/body:
{
"spec": {
"name": "vm_from_v3_api",
"resources": {
}
},
"metadata": {
"kind": "vm"
}
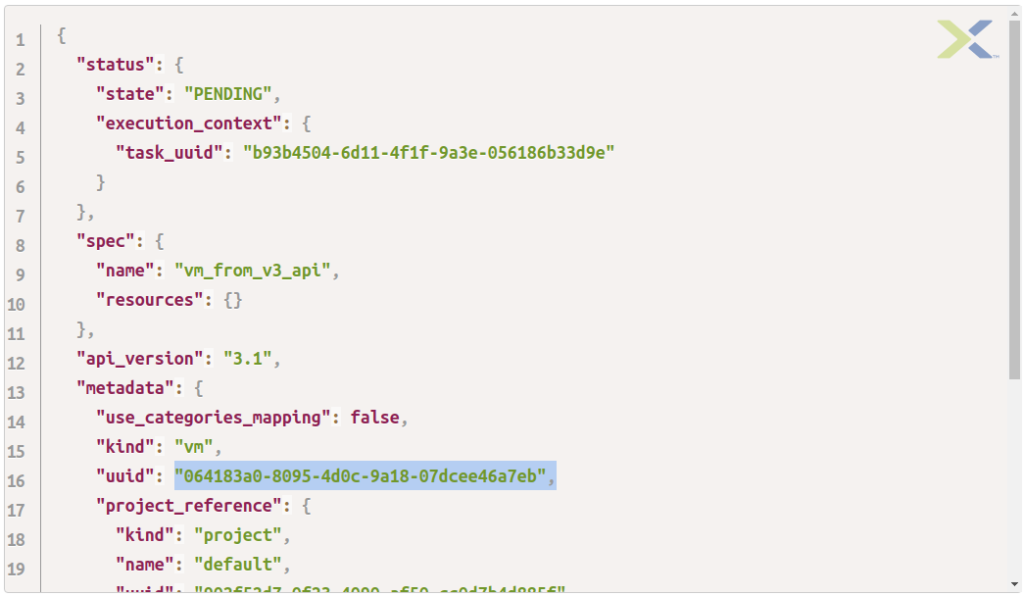
}This simple API request, when submitted via Postman and sending required parameters only, will create a very basic VM. We have not specified the number of sockets, cores per socket or memory; this means default values will be used by the API i.e. 1x socket, 1x core per socket and 1GiB memory.
The partial JSON response is shown below, with the new VM’s UUID highlighted.
Required Changes
The VM we’ll use for this article, as mentioned above, was configured by default with a single socket and a single core. The completely made-up requirement for this article is to change the VM so that it has 2x sockets, each with a single core. Not a big change, but more than enough to demonstrate the VM update steps.
Prepare the Request
Many of the Nutanix REST v3 API requests shown on Nutanix.dev until now have been GET and POST requests. The first difference we’ll encounter is that our VM update will require a PUT request. For additional information on HTTP methods and what they’re intended for, please see the Mozilla HTTP Request Methods resource.
To start this process, it is first necessary to get the VM’s current spec. This is critical because a PUT request that does not specify the entire spec, including the parts we don’t want to change, will not work as expected. More on that later.
To get the current spec we can use the same API i.e. vms, but with a simple GET request. This request specifies the UUID for the VM created earlier, i.e. 064183a0-8095-4d0c-9a18-07dcee46a7eb.
- Request URL: https://10.133.16.228:9440/api/nutanix/v3/vms/064183a0-8095-4d0c-9a18-07dcee46a7eb
- Request method: GET
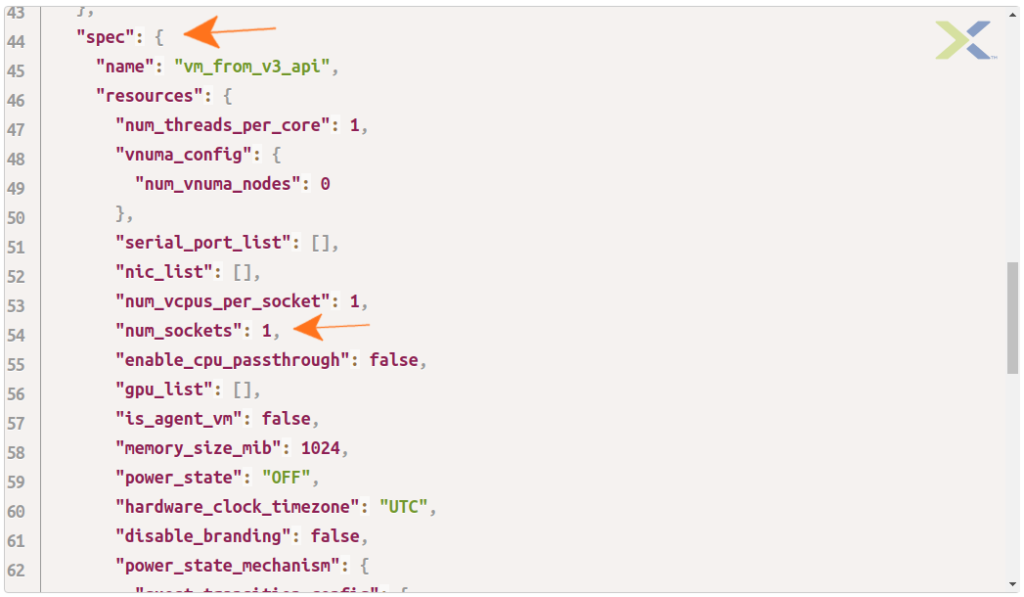
Looking through the response we can note a couple of key points. First, there is a spec object and, within that object, a num_sockets property.
The point earlier mentioned that the VM spec object, in its entirety, must be passed as part of the PUT request. This includes the parts of the VM spec that we don’t want to change. In this example we must pass the entire spec object but change the value of num_sockets from 1 to 2.
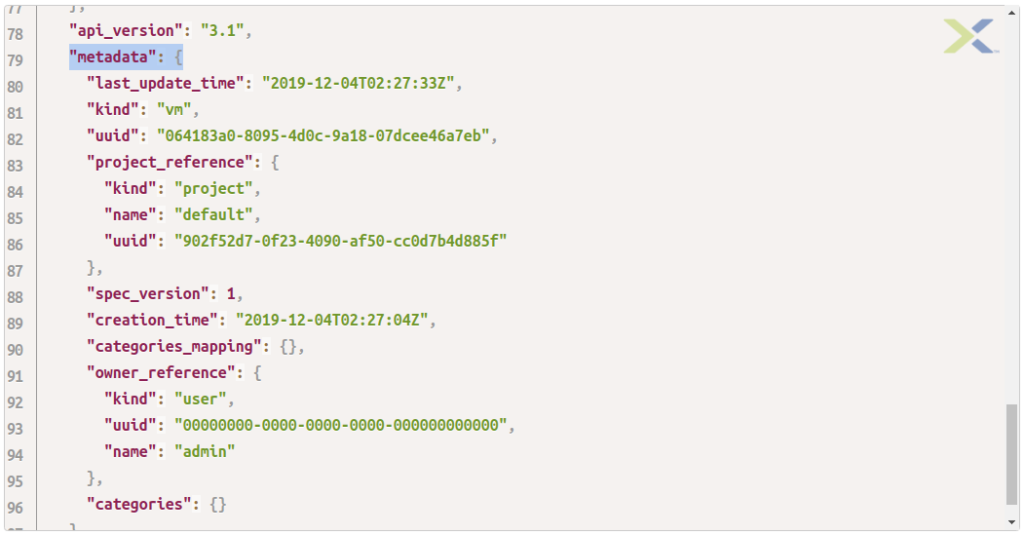
When using the v3 vms API, it is also mandatory to specify the metadata for the entity in question. The easiest way to do this in today’s example is to just leave the metadata in the initial response unchanged. It is true that leaving the last_update_time and creation_time unchanged may seem counter-intuitive, but these don’t need to be manually set.
For those interested, here’s what happens if you omit the metadata object:
{
  "api_version": "3.1",
  "code": 422,
  "message_list": [
    {
      "details": {
        "": [
          "'metadata' is a required property"
        ]
      },
      "message": "Request could not be processed.",
      "reason": "INVALID_REQUEST"
    }
  ],
  "state": "ERROR"
}
With all this in mind, it is now a simple case of adjusting the value of num_sockets and setting the value to 2 instead of 1. The entire spec and mandatory metadata payload is shown below.
Because this is also the entire JSON payload we’ll use for the upcoming PUT request, please note that I have enclosed the JSON data in appropriate curly-braces. The JSON isn’t compliant until that’s done.
{
"spec": {
"name": "vm_from_v3_api",
"resources": {
"num_threads_per_core": 1,
"vnuma_config": {
"num_vnuma_nodes": 0
},
"serial_port_list": [],
"nic_list": [],
"num_vcpus_per_socket": 1,
"num_sockets": 2,
"enable_cpu_passthrough": false,
"gpu_list": [],
"is_agent_vm": false,
"memory_size_mib": 1024,
"power_state": "OFF",
"hardware_clock_timezone": "UTC",
"disable_branding": false,
"power_state_mechanism": {
"guest_transition_config": {
"should_fail_on_script_failure": false,
"enable_script_exec": false
},
"mechanism": "HARD"
},
"vga_console_enabled": true,
"disk_list": []
},
"cluster_reference": {
"kind": "cluster",
"name": "NTNXDemo",
"uuid": "000577ea-d914-f7b2-1dac-002590ad0f00"
}
},
"api_version": "3.1",
"metadata": {
"last_update_time": "2019-12-04T03:40:04Z",
"kind": "vm",
"uuid": "064183a0-8095-4d0c-9a18-07dcee46a7eb",
"project_reference": {
"kind": "project",
"name": "default",
"uuid": "902f52d7-0f23-4090-af50-cc0d7b4d885f"
},
"creation_time": "2019-12-04T02:27:04Z",
"spec_version": 5,
"categories_mapping": {},
"owner_reference": {
"kind": "user",
"uuid": "00000000-0000-0000-0000-000000000000",
"name": "admin"
},
"categories": {}
}
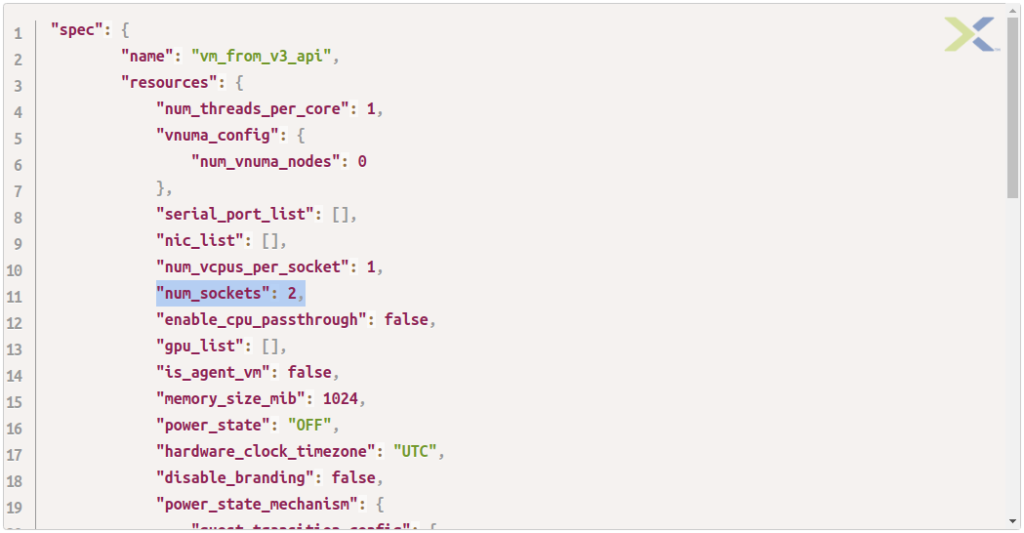
}Note the new value of num_sockets:
Why include the entire spec?
Earlier I mentioned that a PUT request to update a VM must include the entire VM spec. This includes the parts we don’t want to change. Why is this important? Take a look at the JSON snippet below:
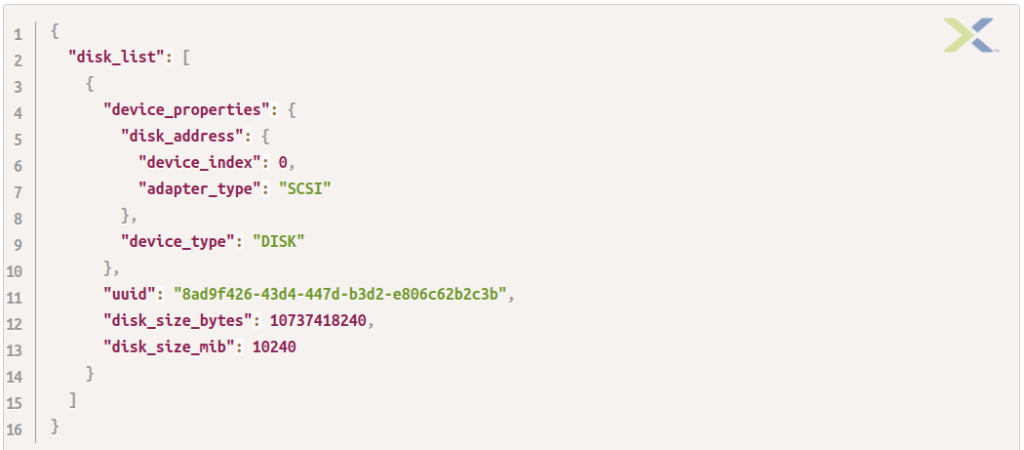
That is the disk configuration for a VM with a single 10GiB SCSI disk. When we update our VM, it would be quite nice if the VM still had the original 10GiB disk attached, right? However, if the updated VM spec omits parameters that are in the original spec, that’s exactly the opposite of what will happen. In this case, omitting the disk_list property or leaving it empty will end up with our VM having no disks attached, at all. That’s really not good.
TL;DR … make sure you include the entire original VM spec, only changing the parts that need changing.
Update the VM
From here the steps are identical to every other API request we’ve submitted in other articles. For ease of use, we’re going with Postman for our testing.
- Request URL: https://10.133.16.228:9440/api/nutanix/v3/vms
- Request method: PUT
- Request payload as shown above
Check the Results
After the request is submitted, we’ll get the expected JSON response. It shows the current status (PENDING), the UUID of the task that’s handling the VM update and an updated VM spec.
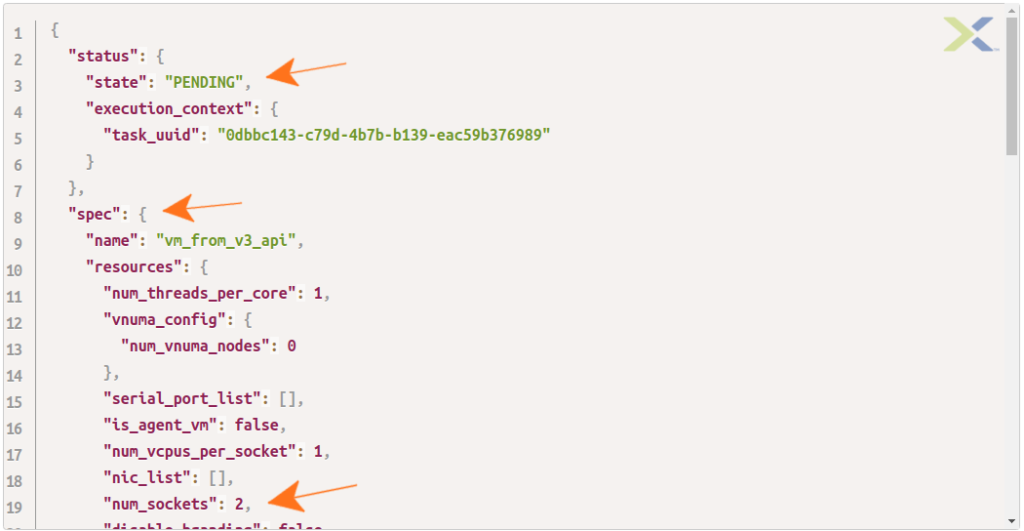
As you can see, our test VM now has 2x sockets. Done!
Wrapping Up
Admittedly, this was a very long-winded way of showing what could have been just a PUT request payload example. However, it is important to understand why some things are done the way they are, especially things like including the entire spec.
Hopefully this information will come in useful as you write your own apps and scripts!
Thanks for reading and have a great day. 🙂