

First thing that comes to mind when talking about Video On Demand, aka VOD, are the typical video platforms like Netflix, Disney+ and others.
Consumption of media content has grown globally since early this year due to the current situation around COVID-19. This increase on demand requires having a platform that scale when needed. Many traditional organisations in the media services industry still remain using x86 bare-metal servers making difficult for them to have this level of scalability on a cost-effective manner.
The Nutanix Cloud Native platform brings the good of public cloud like agility and scalability but on-premises, improving security and reducing the cost. In this way these traditional organisations can start modernising their VOD platforms while benefiting with the same cutting edge technology that their top competitors enjoy today.
A modern VOD platform uses many of the following technologies:
- Containers
- Object storage
- Databases
- Functions
- Automation
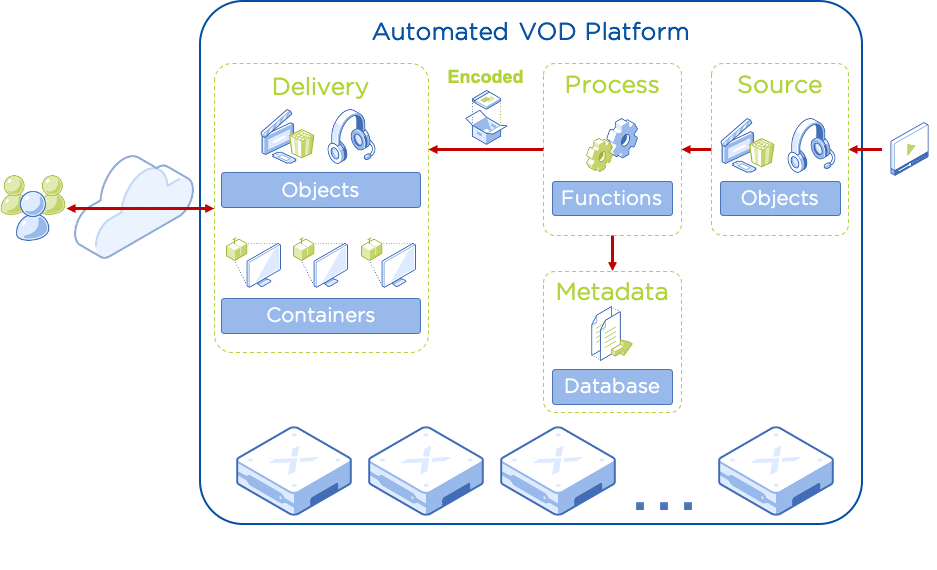
This first article focuses on the delivery stage only. The media content is already encoded and ready to use.
Architecture
The Nutanix products part of this solution for the delivery stage are:
- Hyperconverged Infrastructure. Intelligent infrastructure for delivering all applications, services and data at any scale.
- AHV. License-free virtualisation for your HCI platform.
- Objects. S3-compatible object storage that can be enabled with one-click.
- Karbon. License-free CNCF certified enterprise Kubernetes that can be enabled with one-click.
- Calm. Deliver hybrid cloud infrastructure and application services with automation and self-service.
The HCI platform runs AHV with Objects, Karbon and Calm services enabled. For the video content hosted in Objects as well as the frontend running in Kubernetes, I’m using a trial version of Unified Origin by Unified Streaming.
Via Calm you will be able to deploy VOD as a Service as well as scale-out/in the service. Additionally, load simulations can be also done.
Installation
This article assumes that you already have available the following resources:
- Cluster with AHV
- Prism Central 5.17 or above with these services enabled: Calm 2.10 or above; Objects 2.2 or above; and Karbon 2.0.1 or above
- A new Karbon Kubernetes cluster
- KUBECONFIG file for the Kubernetes cluster
- Kubectl client
- A working Objects instance
- A trial license for Unified Streaming software
- VLC media player
Create Bucket and Grant Access
In this step you will create an Objects bucket and an application user to grant access to this bucket for uploading the media content later.
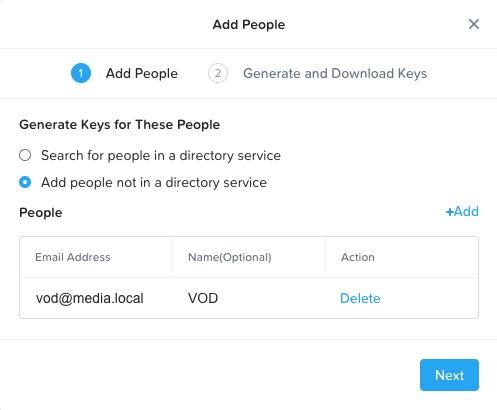
First let’s create the application user and download the access keys:
- Click Prism Central _> Services _> Objects
- Click Access Keys
- Click Add People
- Select Add people not in a directory service
- Email Address: vod@media.local
- Name: VOD
- Click Next
- Click Generate Keys
- Click Download Keys
- Click Close
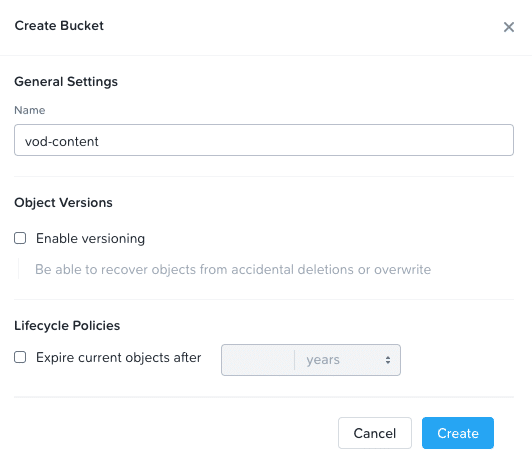
Next step is to create the bucket:
- Click Object Stores
- Click on your Object Store instance (if you haven’t created one yet, follow the link shared at the beginning of the Installation section)
- Click Create Bucket
- Name: vod-content
- Click Create
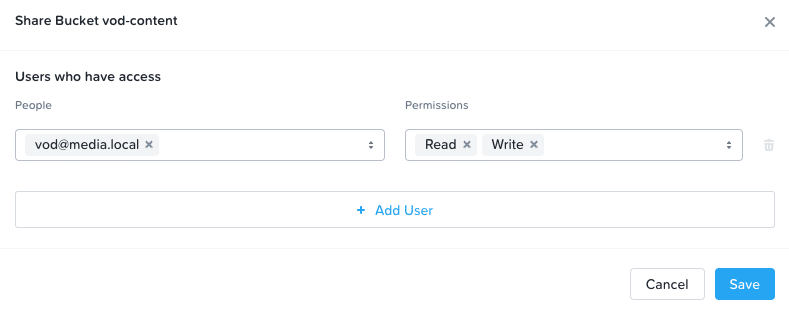
Finally, let’s entitle the user to read/write:
- Select vod-content bucket
- Click Actions _> Share
- People: vod@media.local
- Permissions: read/write
- Click Save
Prepare Unified Streaming software
In this step you will download a media sample and upload it into the storage bucket you created before. After that you will check that can access the content in the bucket.
First let’s download the media sample content from:
http://repository.unified-streaming.com/tears-of-steel.zip
Once downloaded extract it to a directory with the name tears-of-steel.
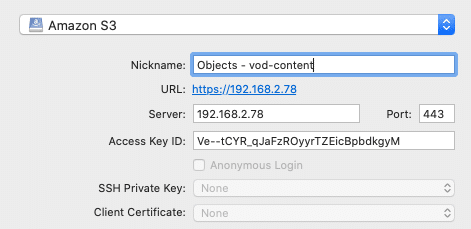
For uploading the content you will need a client like Cyberduck. This is how looks like my configuration for my bucket:
- Type: Amazon S3
- Server: IP address of your Objects instance
- Access Key ID and Secret Access Key: You can get it from the keys file you downloaded when created the application user
- Nickname: Objects – vod-content
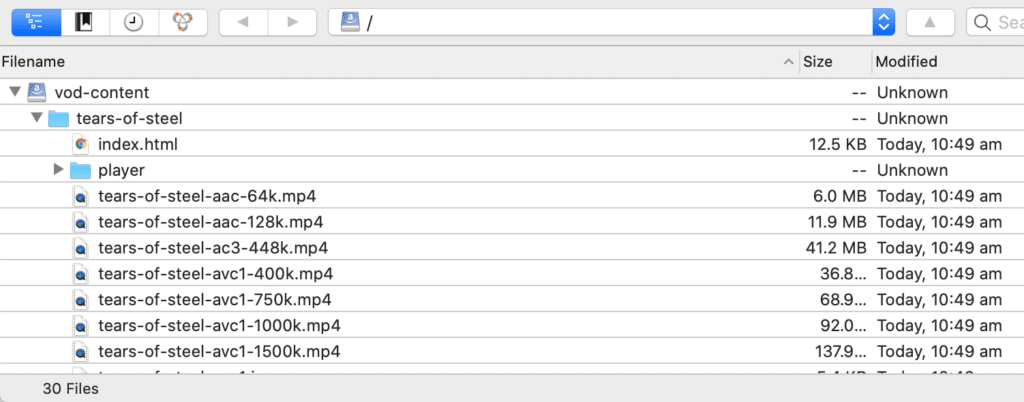
Accept the warning about Objects certificate. You should see the bucket with the name vod-content. Drag and drop the directory tears-of-steel into the bucket.
Create Self-Service Blueprint
In this step you will create a Calm blueprint that deploys the Unified Streaming Origin software as a containerised application on a Karbon Kubernetes cluster. Once the blueprint is ready, you can publish it on your Calm marketplace and offer VOD as a Service to your business.
Before creating the blueprint make sure you meet the following pre-req:
- Karbon Kubernetes cluster created
- Kubernetes cluster is configured as a provider in Calm
- Calm project entitled to use the Kubernetes cluster provider
For creating the application blueprint:
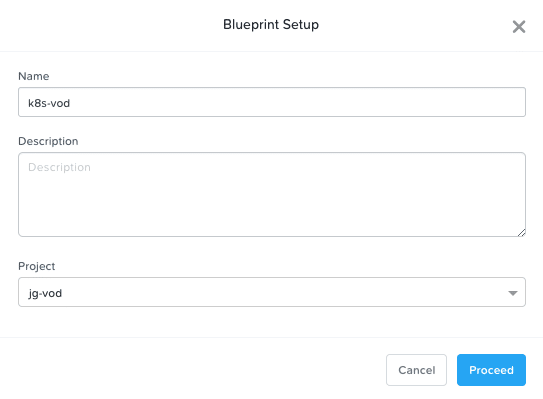
- In Calm blueprints view, click Create Blueprint __> Multi VM/Pod Blueprint
- Name: k8s-vod
- Project: the project entitled to use the Kubernetes cluster provider
- Click Proceed
With the blueprint editor available now, let’s add a Kubernetes Pod and configure it:
- Click the plus (+) symbol near Pod on the left pane
- On the right pane let’s change the following attribute value:
- Pod Name: VOD
- Enable the Spec Editor clicking the switch at the bottom of the right pane
- Click Edit near YAML/JSON
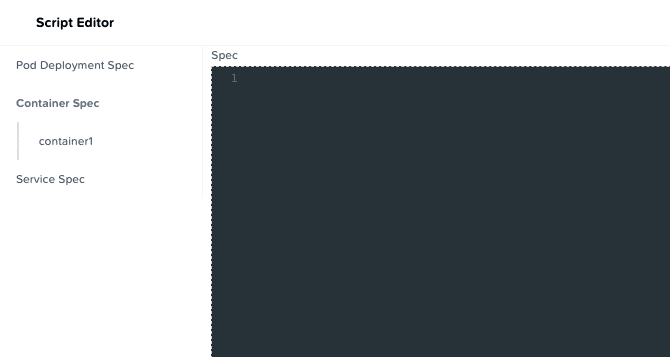
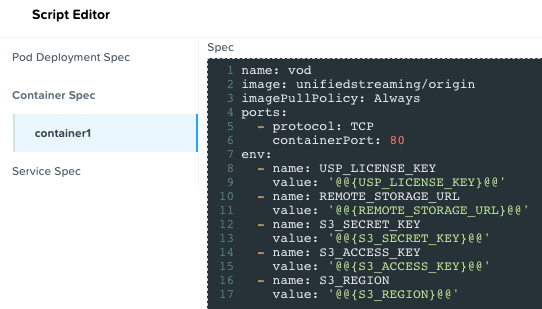
For the Container Spec __> container1, copy and paste the following code:
name: vod
image: unifiedstreaming/origin
imagePullPolicy: Always
ports:
  - protocol: TCP
    containerPort: 80
env:
  - name: USP_LICENSE_KEY
    value: '@@{USP_LICENSE_KEY}@@'
  - name: REMOTE_STORAGE_URL
    value: '@@{REMOTE_STORAGE_URL}@@'
  - name: S3_SECRET_KEY
    value: '@@{S3_SECRET_KEY}@@'
  - name: S3_ACCESS_KEY
    value: '@@{S3_ACCESS_KEY}@@'
  - name: S3_REGION
    value: '@@{S3_REGION}@@'
With this code you are setting up a container running in the Kubernetes pod. The container image is the Unified Streaming Origin software. The Origin software listen on port 80. And finally there is a set of environment variables with Calm macros to configure the Origin software during the launch.
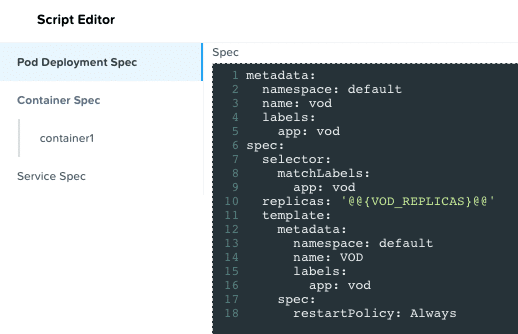
Next is to configure the Kubernetes deployment, click in the Script Editor the section Pod Deployment Spec. Copy and paste the following code:
metadata:
  namespace: default
  name: vod
  labels:
    app: vod
spec:
  selector:
    matchLabels:
      app: vod
  replicas: '@@{VOD_REPLICAS}@@'
  template:
    metadata:
      namespace: default
      name: VOD
      labels:
        app: vod
    spec:
      restartPolicy: Always
The Kubernetes deployment will happen in the default Kubernetes namespace. Also, the number of pod replicas is a Calm macro (VOD_REPLICAS) to allow the user choosing how many replicas want to deploy.
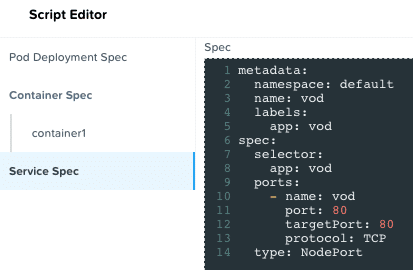
Finally, the Kubernetes service configuration. To simplify this you will be using Kubernetes NodePort, you will see later how to get the IP address of one of your workers as well as the port where the application is listening on.
Click in the Script Editor the section Service Spec. Copy and paste the following code:
metadata:
  namespace: default
  name: vod
  labels:
    app: vod
spec:
  selector:
    app: vod
  ports:
    - name: vod
      port: 80
      targetPort: 80
      protocol: TCP
  type: NodePort
The Kubernetes Service is deployed in the default namespace. The labels matches with the deployment ones to make sure the Kubernetes service routes the incoming traffic to the right pods. The service sends the requests to port 80 in the pod deployment.
Click Done in the Script Editor and click Save to commit the changes.
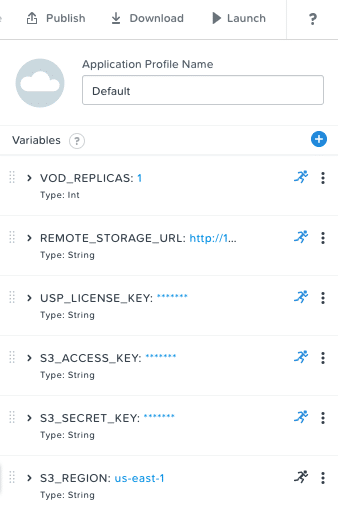
The last part of the blueprint before you can launch it is to configure the input variables. On the left pane click the Kubernetes logo under Application Profile __> Default 6. You should see the following:
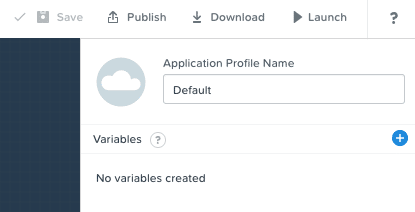
You are going to create the following set of input variables, also known as Calm macros. You can do this clicking the plus (+) symbol near Variables.
Note: Runtime is the small running person near the three dots
| Name | Data Type | Value | Secret | Runtime |
| S3_REGION | String | us-east-1 | Unselected | Unselected |
| S3_SECRET_KEY | String | From objects keys file | Selected | Selected |
| S3_ACCESS_KEY | String | From objects keys file | Selected | Selected |
| USP_LICENSE_KEY | String | From Unified Streaming email | Selected | Selected |
| REMOTE_STORAGE_URL | String | http://<Objects_Instance_IP>/vod-content/tears-of-steel/ | Unselected | Selected |
| VOD_REPLICAS | Integer | 1 | Unselected | Selected |
Click Save to commit your changes and ignore the warnings.
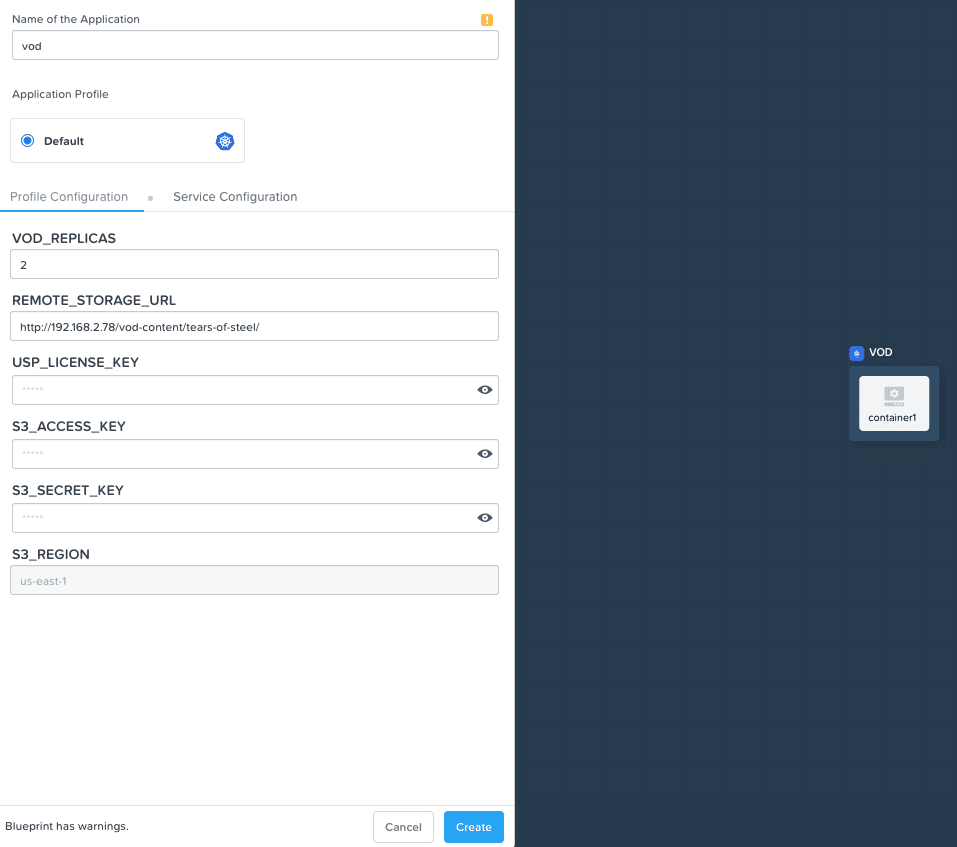
The blueprint is ready. Click Launch and let’s test it.
- Name of the Application: vod
- VOD_REPLICAS: your choice
- You don’t need to change any of the remaining inputs if you don’t want to. It will take whatever value you set as default.
- Click Create
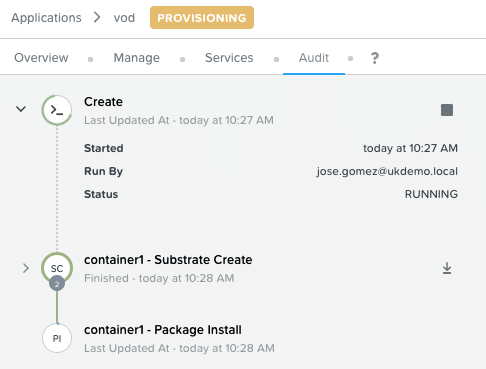
You can follow the deployment process clicking on Audit.
Playing the Video Content
To play the video in VLC you need first to get the IP address of at least one of your Kubernetes worker nodes and the port where the VOD Kubernetes service is listening on.
Open a terminal and with the kubectl client run the following command to get the IP addresses of your nodes:
kubectl get nodes -o wideYou should get a similar output to the following
NAME                                 STATUS   ROLES    AGE    VERSION   INTERNAL-IP       EXTERNAL-IP   OS-IMAGE                KERNEL-VERSION               CONTAINER-RUNTIME
karbon-k8s-vod-73d893-k8s-master-0   Ready    master   3d1h   v1.16.8   192.168.108.63    <none>        CentOS Linux 7 (Core)   3.10.0-1127.8.2.el7.x86_64   docker://18.9.8
karbon-k8s-vod-73d893-k8s-worker-0   Ready    node     3d1h   v1.16.8   192.168.108.248   <none>        CentOS Linux 7 (Core)   3.10.0-1127.8.2.el7.x86_64   docker://18.9.8
Look for the Internal-IP of one of your workers. In my case the IP address is 192.168.108.248
Next is to find the port that is listening the application. Run the following command:
kubectl get servicesYou should get a similar output to the following
NAME         TYPE        CLUSTER-IP      EXTERNAL-IP   PORT(S)        AGE
kubernetes   ClusterIP   172.19.0.1      <none>        443/TCP        3d1h
vod          NodePort    172.19.177.16   <none>        80:32736/TCP   17m
From the service named vod, the external port is 32736 in my case. Now that you have the worker IP address and the listening port, then you can build the IP:Port. In my case it will be 192.168.108.248:32736.
In a web browser if you open http://worker:port/ you should see the welcome page.

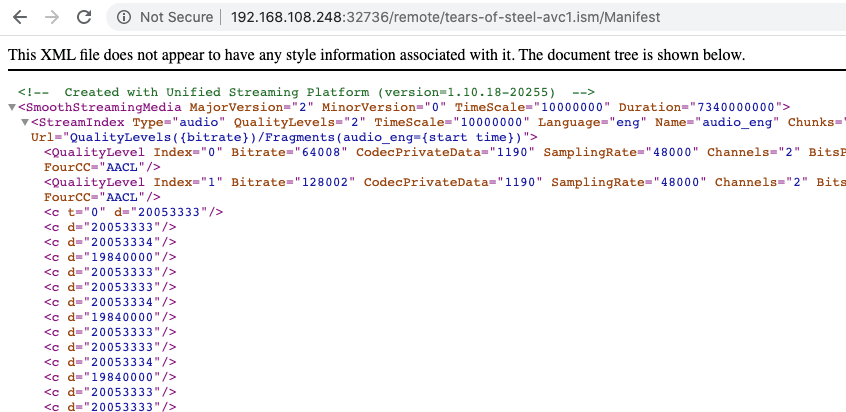
To check if the Origin applications is connecting properly to the Objects bucket hosting the media content, append in the url the path /remote/tears-of-steel-avc1.ism/Manifest
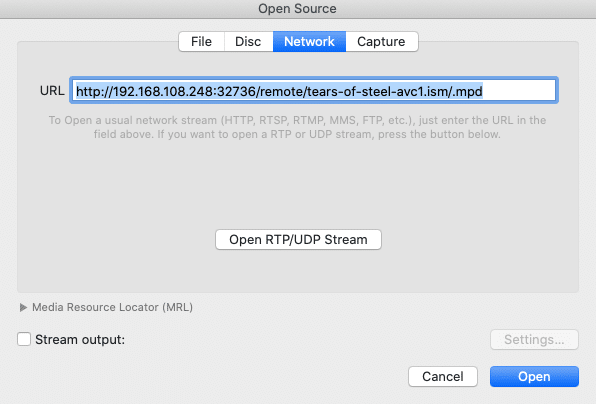
You are ready to play the Tears of Steel movie in your VLC. Open the player and open a network source. The URL will be http://worker:port/remote/tears-of-steel-avc1.ism/.mpd and click Open.
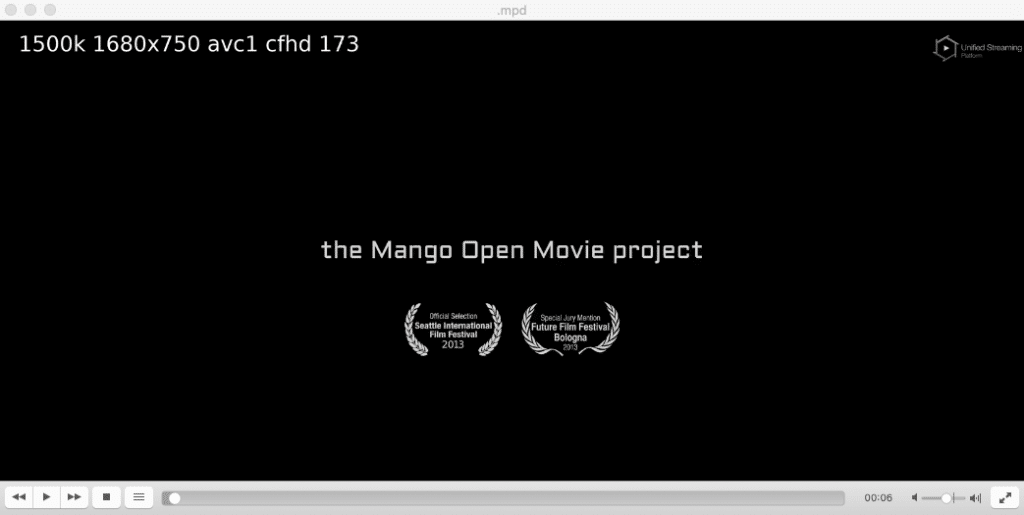
After few seconds the video should start playing in VLC.
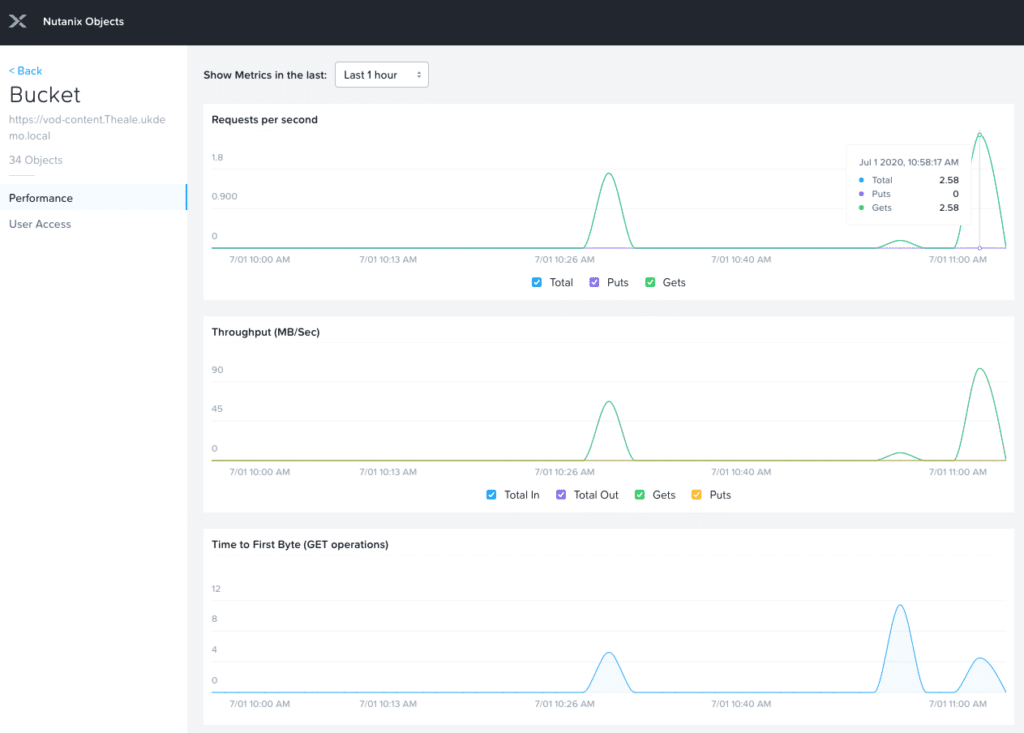
If you would like to corroborate that Nutanix Objects is delivering the content, you can check the performance metrics in the vod-content bucket.
Conclusion
As you could see, deploying Cloud Native applications is not only for public cloud, but also for on-premises with the Nutanix Enterprise Cloud platform. In few steps you were able to create an object storage bucket, upload the media content, create a blueprint in Calm, and watch the movie with VLC.
On future parts will cover how to auto-scale your Kubernetes pods based on the demand, and also how to encode new content using serverless functions. Stay tuned!