

In the first blog of this series, we discussed “Getting Started with Red Hat Openshift on Nutanix HCI”; a good overview was provided of how the Nutanix partnership with Red Hat can help organizations in their Digital Transformation journey toward implementing Cloud Native.
Now that we have a good understanding of Cloud Native on Nutanix (additional resources), let’s move to the next step; how to get a Kubernetes cluster running on Nutanix AHV using Red Hat OpenShift as the Kubernetes distribution.
Overview
At the time of writing this blog, the supported method for deploying an OpenShift cluster is to use the platform agnostic installer. To streamline the installation and lifecycle of an OpenShift cluster on AHV, the Nutanix community has created a set of Nutanix Calm blueprints which automate these tasks. The blueprints can be found here.

This blog walks through the process of deploying an OpenShift cluster on AHV using Calm blueprints for self-service and automation. It’s expected that the reader has a basic knowledge of how to use Nutanix Calm (additional resources).
The resulting OpenShift cluster deployed via Calm is fully compliant with Red Hat’s supportability requirements, which is important in the event that OpenShift issues are encountered.
Prerequisites
Before getting started, let’s make sure our environment has:
- Nutanix cluster with
- AHV 20201105.2175 or later
- Minimum AOS version 5.20.2 or 6.0.1
- Minimum available resources:
- 30 vCPU
- 106 GB memory
- 780 GB disk
- Prism Central 2021.9 or later
- Calm 3.3.1.1 or later enabled
- A project with an AHV account and the IPAM-enabled subnet configured
- An SSH RSA private key (how-to)
- Calm 3.3.1.1 or later enabled
- AHV IPAM-enabled subnet with
- Internet access
- IP pool with at least seven free IP addresses:
- 1x provisioning VM
- 1x bootstrap VM
- 3x control plane VMs
- 2x compute node VMs
- A static address from outside the IP pool (required by the load balancer)
- OpenShift pull secret (Red Hat Portal)
- DNS server with access to create a delegated DNS zone
How it works
The OpenShift agnostic installer method offers two alternative options for bootstrapping a cluster: network PXE booting, or using an ISO.
In our case, we shall use the ISO option. For this, the deployment process is broken down into two stages, using two automation blueprints:
- ISO image preparation
- OpenShift cluster deployment

ISO image preparation
The first blueprint, called OCP-ProvisioningVM, downloads the binaries for RHCOS and OpenShift which are needed to build the custom ISOs for your environment. A single virtual machine is deployed with this blueprint.
The blueprint has a day-2 action called Deploy OCP, used for deploying OpenShift clusters based on user inputs and the generated custom ISO. The action calls the second blueprint, OCP-Installer, passing the user inputs onto that blueprint.
OpenShift cluster deployment
The second blueprint, called OCP-Installer, creates the OpenShift cluster. This blueprint is not meant to be used as in a standalone fashion, rather it should be called from the day-2 action Deploy OCP in the OCP-ProvisioningVM blueprint explained previously. Seven virtual machines are deployed by this blueprint: 1x load balancer & DNS VM, 1x bootstrap VM, 3x control plane VMs, 2x compute node VMs.
Blueprints preparation
At this point we need:
- Both blueprints downloaded to our computer
- SSH RSA private key created
- AHV IPAM-enabled subnet configured in the Calm project
OCP-ProvisioningVM blueprint
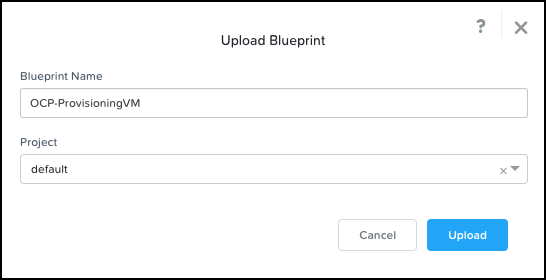
Let’s go ahead and upload the OCP-ProvisioningVM.json blueprint file into Calm, selecting the project with the AHV account and IPAM-enabled subnet. If you’re not familiar with the process check the Uploading a Blueprint section of the Calm documentation.
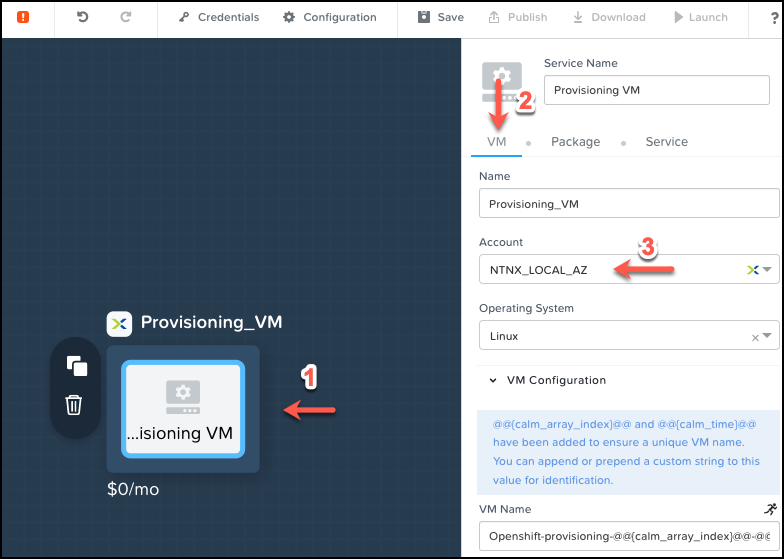
Next, we must configure the Provisioning VM Service with the correct account.
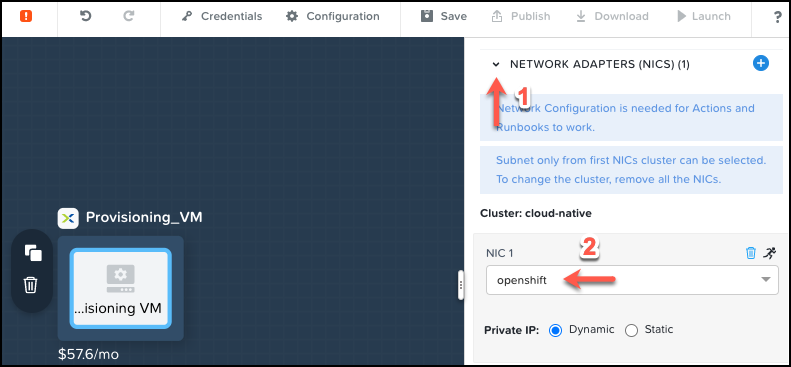
The last setting to be configured for the Provisioning VM Service is the NIC 1 – in the event of there being more than one subnet be sure to select the right IPAM-enabled subnet.
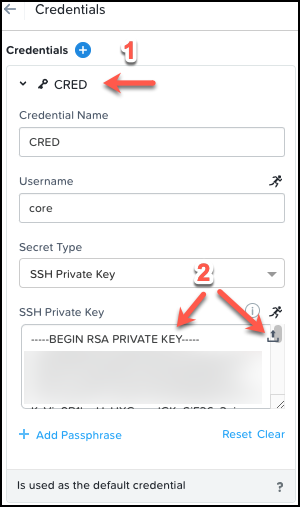
Lastly, the blueprint requires appropriate credentials that will allow Calm to SSH into the virtual machine. Add the SSH RSA private key to the blueprint credentials, CRED.
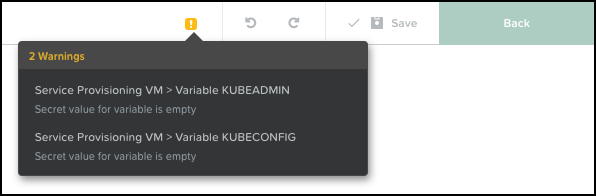
Save the blueprint with the new configuration and ignore the 2 Warnings about KUBEADMIN and KUBECONFIG.
The OCP-ProvisioningVM blueprint is ready, but we are not going to launch it just yet.
OCP-Installer blueprint
Let’s go ahead and upload the OCP-Installer.json blueprint file into Calm, selecting the same project as before. Repeat the same steps for the following Calm Services, but this time configure only the Account in each case; do not make any changes to the default NIC 1 settings:
- LBDNS
- Bootstrap
- ControlPlane
- Compute
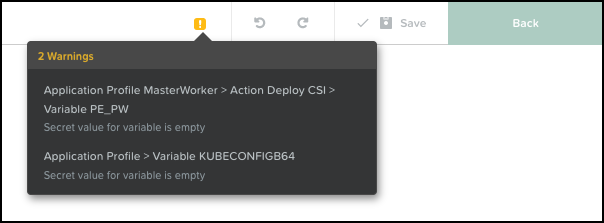
Add the SSH RSA private key to the blueprint credential and save the blueprint. Ignore the 2 Warnings about PE_PW and KUBECONFIGB64.
The OCP-Installer blueprint is ready. It’s time to launch our blueprints (woo-hoo)!
Blueprints launch
Now that we are familiar with the two-stage process and we have our blueprints ready, let’s begin by deploying an OCP-ProvisioningVM application.
Launching OCP-ProvisioningVM blueprint
Remember, this blueprint is responsible for:
- Downloading the required binaries
- Creating a custom ISO
- Hosting the custom ISO
- Deploy OpenShift clusters using the Deploy OCP day-2 action, which launches the OCP-Installer blueprint using the user inputs provided within the action.
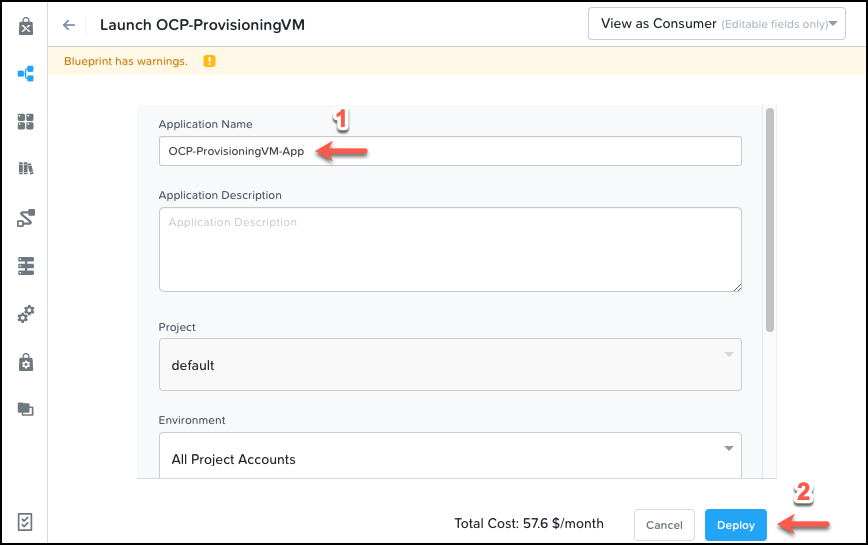
From the Calm blueprint page, let’s launch the OCP-ProvisioningVM blueprint.

Give it a unique name and deploy it.
Wait until the application is in Running state. You can view detailed information about the provisioning process by visiting the Audit tab. Depending on Internet speed, it can take about 10 minutes to complete the deployment.
Creating an OpenShift cluster
This is the moment we’ve been waiting for! To make sure our deployment goes smoothly with no failures along the way, we need the following information to hand:
- Static IP address for the LBDNS service
- OpenShift pull secret
- DNS domain name
- DNS subdomain name
- Used for OpenShift cluster name
- Used for the various OpenShift DNS records
- Used for the Kubernetes applications deployed in OpenShift
- This DNS zone will be hosted in the LBDNS service
- Virtual machine network subnet (format x.x.x.x/x)
- OCP-Installer blueprint name (only if it was changed during uploading)
At this stage, it’s important to make sure the subdomain DNS zone exists in your DNS server and that it’s pointing to the static IP address the LBDNS Service will be configured with. As an example, if you are using Microsoft DNS, and your subdomain name is ocp1, which is also used as the OpenShift cluster name, you can run a PowerShell command similar to the one below (your own values will of course vary from those shown).
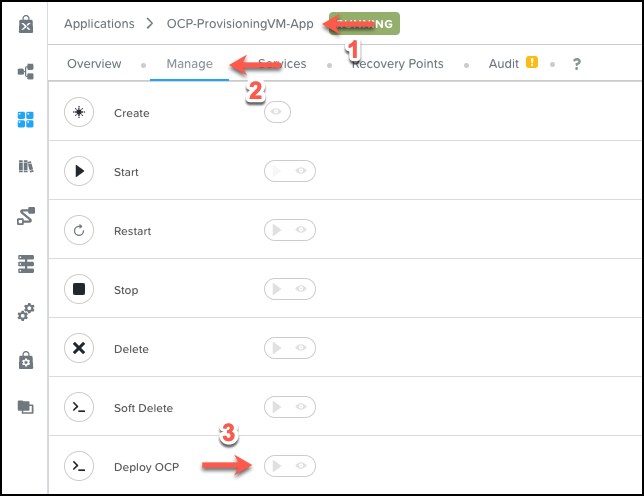
Add-DnsServerZoneDelegation -Name "ntnxlab.local" -Nameserver "lbdns-ocp1.ntnxlab.local" -ChildZoneName "ocp1" -IPAddress 10.42.26.11 -PassThru -VerboseTo launch an OpenShift cluster we must go to the running application that we deployed with the OCP-ProvisioningVM blueprint. In the application Manage tab there is an action called Deploy OCP.
When we click the play button, we are prompted with a list of inputs to complete.
| Input | Description |
|---|---|
| Load Balancer & DNS static IP | Free static IP for the LBDNS service (format x.x.x.x) |
| Number of compute nodes | Must be 2 or more. Control plane only deployment is not supported yet in Calm blueprint. |
| OpenShift Pull Secret | Pull secret can be downloaded from https://console.redhat.com/openshift/install/pull-secret (format JSON) |
| Domain name | This is your base DNS main name (format xxx.yyy) |
| OpenShift subdomain name | This is a dedicated subdomain for hosting your OpenShift cluster. The zone has to be delegated in your DNS server to the LBDNS static IP address |
| Virtual machine network subnet | This is the network subnet where OpenShift virtual machines will be deployed (format x.x.x.x/x) |
| Kubernetes Service network | Internal Kubernetes network for Services objects (format x.x.x.x/x). Make sure this network does not overlap with Pod network, or networks in your datacenter |
| Kubernetes Pod network | Internal Kubernetes network for Pod objects (format x.x.x.x/x). Make sure this network does not overlap with Service network, or networks in your datacenter |
| OpenShift host pod network prefix | The subnet prefix length to assign to each node. For example, if the prefix is set to 23 then each node is assigned a /23 subnet out of the given Kubernetes pod network (format xx) |
| OpenShift installer blueprint name | This is the name for the second blueprint which is used for deploying an OpenShift cluster |
Once the action shows as completed in the Audit tab, we return to the Calm Applications page where we will find a new application named OpenShift <subdomain_name> in a provisioning state.
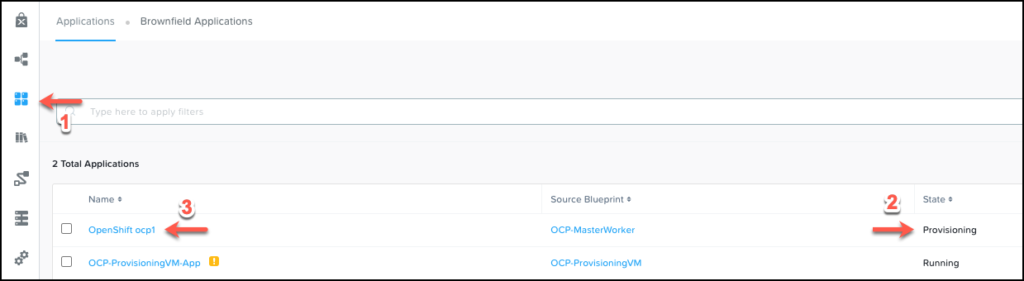
Depending on Internet speed, the deployment takes around 30 minutes to complete. The entire process can be followed from the Audit tab.
Once the application is in a running state, we go to the Audit tab page, expand the Create stage, expand the task OS_Status_Check Start, and click OS_Status_Check – Show Login Information to find the connection details for accessing the OpenShift cluster.

Cluster access
It might feel like we’ve come a long way, but actually we’ve shortened the time it takes to create OpenShift clusters at scale from hours to minutes. Now, OpenShift cluster deployments are consistent, fully audited, and accessible in a self-service context via the Calm marketplace (if required) thanks to the powerful self-service and automation capabilities that the Nutanix solution delivers.
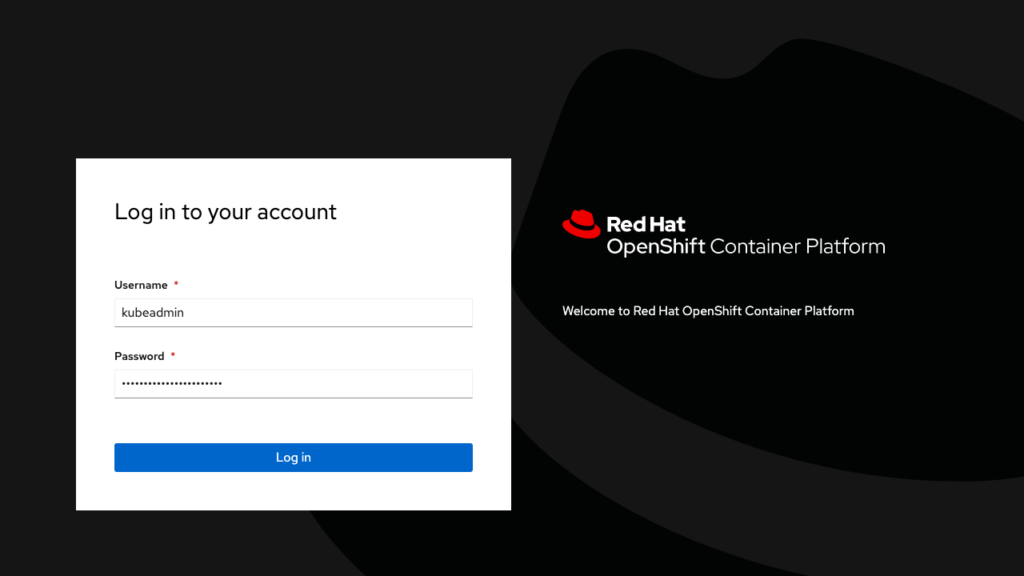
Now you can enjoy the new OpenShift Kubernetes cluster running on Nutanix AHV, the industry’s leading hyperconverged cloud platform. Open a browser, use the URL and credentials captured during the previous step and start testing the preferred Kubernetes distribution for running on Nutanix.
Part 3, Using Red Hat OpenShift with Nutanix Unified Data Services.