

In the second blog of this series we discussed “Deploying Red Hat OpenShift on Nutanix AHV”; a detailed overview was provided of how to deploy an OpenShift cluster on AHV using the Nutanix Self-Service feature (formerly Nutanix Calm) – a process that takes under 30 minutes end-to-end.
In this third part of the blog series, we’ll focus on how to install the Nutanix CSI driver in our OpenShift cluster using the Nutanix CSI Operator.
The Nutanix CSI driver is also available as a Helm chart for other Kubernetes distributions, but that’s beyond the scope of this blog.
Before getting into the nitty-gritty of how to install the CSI Operator, let’s take a look at how Nutanix has evolved the platform through the development of a rich set of data services. The purpose of these services is to cater for the persistent storage requirements of modern cloud-native applications.
Evolution
As you may know, when containerized applications came out, it was all about stateless applications. However, it wasn’t long before organizations sought to realize the potential benefits of containerizing services of a more persistent nature. The challenge for those services at the time was that for them to benefit from this new technology they needed their associated data to somehow persist when the containers running them were restarted due to upgrades, failures, or any other reason.
Back in early 2017, Nutanix released its first plug-in for Docker volumes, allowing customers to leverage persistent storage from their HCI platforms with Docker containers through the use of Nutanix Volumes and iSCSI.
Five years later, Nutanix has evolved its portfolio of storage services for modern cloud-native applications. From providing solely block storage to delivering a rich unified data services platform capable of supporting any application on its modernization journey. With the combination of Nutanix Unified Storage and Nutanix Database Services, customers can furnish their cloud-native application running on Kubernetes with access to distributed block and/or file storage using the Nutanix CSI driver for Kubernetes… and without needing the CSI driver the Nutanix platform also supports provisioning S3 object storage to the apps as well as SQL and NoSQL databases. All this in a single platform, the Nutanix Cloud Platform.

Prerequisites
It’s time to install the CSI Operator, but before that, let’s make sure our environment has:
- OpenShift cluster 4.6 or later
- If you don’t have one, check Deploying Red Hat OpenShift on Nutanix AHV
- Make sure the iscsid service is enabled – required for block storage. If you deployed the cluster using the article above, iscsid is already enabled.
- Nutanix cluster with
Installation
There are two methods for installing the CSI Operator: using the OpenShift CLI (oc), and using the OpenShift GUI.
In our previous blog, Deploying Red Hat OpenShift on Nutanix AHV, we used Nutanix Self-Service (formerly Calm) to create our OpenShift cluster – you may recall that the blueprint we used also includes day-2 actions out-of-the-box. To continue in line with this approach (using the automation blueprint we already have), the installation of the CSI Operator will be done using the built-in day-2 action named “Deploy CSI”. This action uses the OpenShift CLI method under the hood.
True to the Nutanix ‘one-click’ experience, the “Deploy CSI” action saves IT sysadmins time by eliminating the need for them to run several “oc” commands, or navigate through several pages in the OpenShift GUI.
If you’re interested in knowing more about how to install the CSI Operator using the OpenShift GUI, check out the demo available at the end of this blog.
Deploying the CSI Operator
Be sure to collect the following three pieces of information, which are required inputs for the day-2 action:
- Prism Element VIP address
- Prism Element user with admin role
- Prism Element user password
To install the CSI Operator, open the OpenShift application in Calm, and head to the Manage tab.

As you may have noticed, there are several day-2 actions included in the application. These ones labeled ‘system-actions’ come bundled with every single blueprint. There is also the possibility of creating custom day-2 actions to meet your specific automation needs. In our case, the OpenShift blueprint has been enriched with the action Deploy CSI, however in addition to that we could easily enable the image registry in OpenShift, or scale-out/in our OpenShift cluster with just a single click.
Look for the Deploy CSI action in the list, and click the play button.

Type the values in the different boxes, and click Run.

The process for installing the CSI Operator can be found in the Audit tab under the Deploy CSI action. The action creates:
- Namespace: ntnx-system
- Secret: ntnx-system
- OperatorGroup: ntnx-system-<id>
- Subscription: nutanixcsioperator
- NutanixCsiStorage: nutanixcsistorage

Once the task finishes, let’s head to the OpenShift console and check that the Operator was successfully installed in our cluster. In the OpenShift console expand the Operators menu, click on Installed Operators to confirm.

Next let’s confirm that an instance of the CSI driver has been deployed along with the Operator. In the OpenShift console click the Nutanix CSI Operator, click on NutanixCsiStorage to confirm.

The Nutanix CSI driver is now installed in the OpenShift cluster. At this point, a StorageClass can be created to make use of the CSI driver. Once a StorageClass exists, a PersistentVolumeClaim can then be requested as part of the application manifest.
To learn more about how to create a StorageClass and a PersistentVolumeClaim for testing the driver, you can follow module 4 “Create Kubernetes StorageClass” in the demo below.
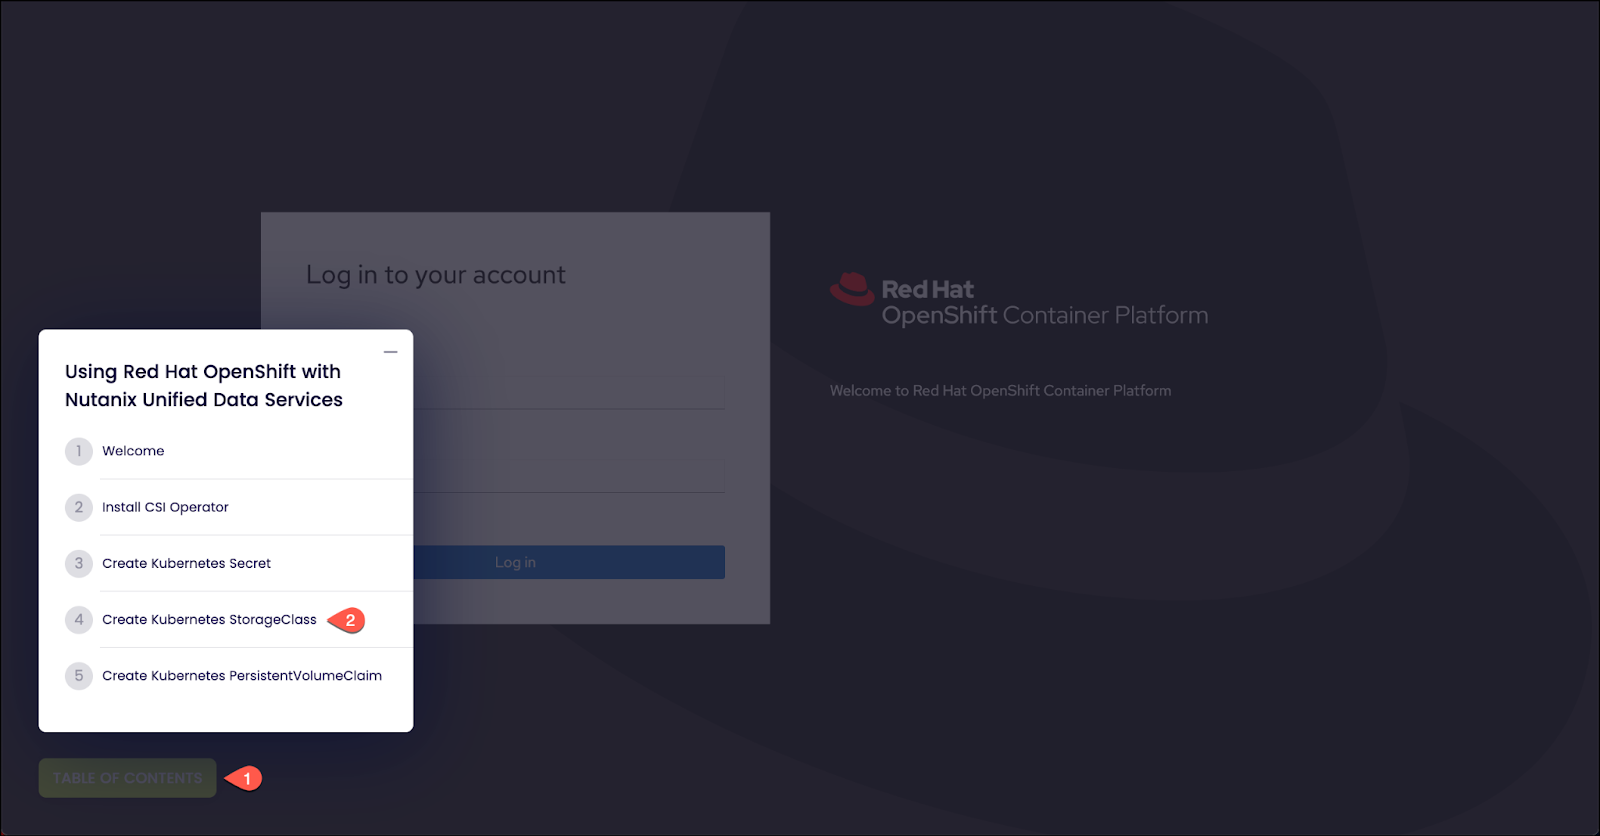
Demo
This demo illustrates how to install the Nutanix CSI Operator and create your first persistent volume without having to deploy your own OpenShift cluster.
You decide where to start; if it’s from module one, the demo will walk you through the process of installing the CSI Operator using the OpenShift GUI. Otherwise, if you used the Deploy CSI action in, you can skip straight to module 4 where you will see how to create the StorageClass and the PersistentVolumeClaim.
Go to OpenShift CSI Operator Demo

Part 4, Running stateful applications with Red Hat OpenShift on Nutanix HCI.