

Intro
In the previous post, we connected our NKE cluster to Azure Arc; in this part 2 of the series we will start to operate and configure the cluster using the Azure Portal.
If everything went well, you should be able to see your cluster under Kubernetes Services:

To be able to read Kubernetes resources from your cluster, we must create a service account and enable Cluster Connect.
Create a service account and Connect your Cluster:
To enable Cluster connect, run the following command:
az connectedk8s enable-features --features cluster-connect -n nutanix-arc -g NutanixARCOutput:
"Successsfully enabled features: ['cluster-connect'] for the Connected Cluster nutanix-arc"After a few minutes, you should receive a message saying that the feature has been enabled.
Now we’ll have to create the service account; you can also leverage Azure AD for authentication. For this lab, we’ll be using a Kubernetes Service Account.
Run the following command in your terminal:
kubectl create serviceaccount admin-userCreate a ClusterRoleBinding and to grant your newly created account the correct permissions:
kubectl create clusterrolebinding admin-user-binding --clusterrole cluster-admin --serviceaccount default:admin-userNow, fetch the service accounts token:
kubectl get serviceaccount admin-user -o jsonpath='{$.secrets[0].name}'Output:
admin-user-token-xxxxxThen by using the output from the previous command, use the following command to fetch your token:
kubectl get secret admin-user-token-xxxxx -o jsonpath='{$.data.token}' | base64 -d | sed $'s/$/\n/g'Copy the token from your terminal and head back to your Azure Portal and click any of the Kubernetes Resources on your left:

You should receive a message asking for your newly created token; paste in the token.
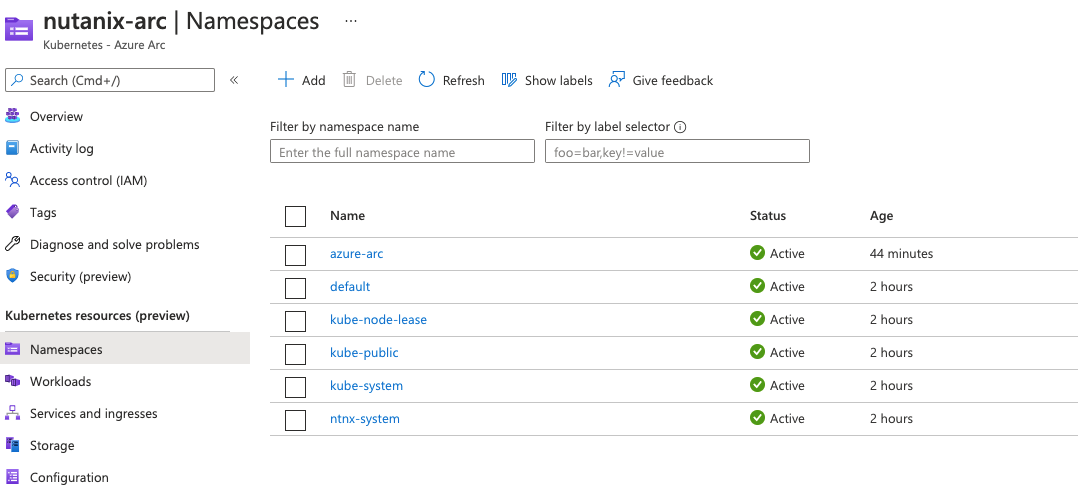
Now you should be able to see all your Kubernetes resources!
Setting up a LoadBalancer for your NKE Cluster:
To get our demo application up and running, we need to set up a LoadBalancer service for our NKE Cluster. This can easily be done using MetalLB, for a step-by-step guide see the following link: https://next.nutanix.com/community-blog-154/utilizing-metallb-to-provide-loadbalancer-services-for-nutanix-karbon-32966
Deploy a test workload using Azure Arc UI
On your left, you can see all the different options that Microsoft Azure gives you. Feel free to look around and get a deeper knowledge of the different features.
The next thing we will do is deploy a test workload.
- Click Workloads, under Kubernetes Resources in the menu
- Click Add

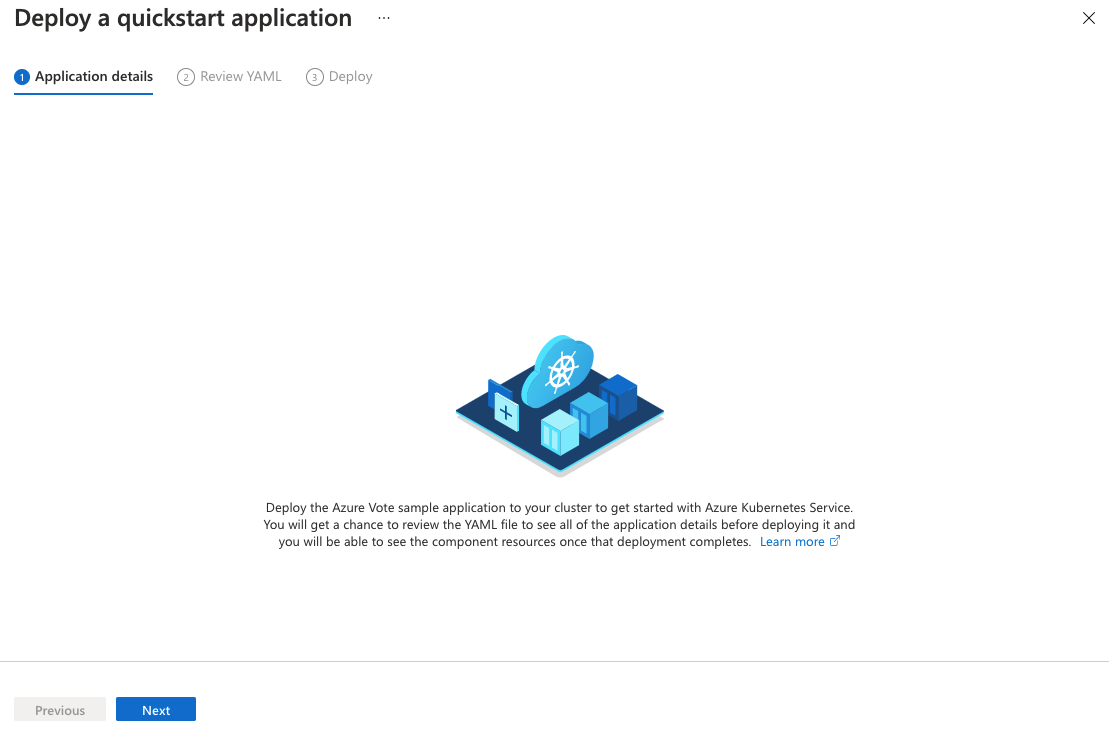
Now you can choose to deploy your own service using YAML or JSON, but for this demo, we will be leveraging the demo application provided by Microsoft Azure.
Click the link: “Deploy a quickstart application to get up and running.”
This forwards you to a wizard walking you through the steps for deploying your first workload.
It also generates a YAML file that will be used to deploy your demo application:
- apiVersion: v1
kind: Namespace
metadata:
name: azure-vote
spec:
finalizers:
- kubernetes
- apiVersion: apps/v1
kind: Deployment
metadata:
name: azure-vote-back
namespace: azure-vote
spec:
replicas: 1
selector:
matchLabels:
app: azure-vote-back
template:
metadata:
labels:
app: azure-vote-back
spec:
nodeSelector:
beta.kubernetes.io/os: linux
containers:
- name: azure-vote-back
image: mcr.microsoft.com/oss/bitnami/redis:6.0.8
env:
- name: ALLOW_EMPTY_PASSWORD
value: 'yes'
resources:
requests:
cpu: 100m
memory: 128Mi
limits:
cpu: 250m
memory: 256Mi
ports:
- containerPort: 6379
name: redis
- apiVersion: v1
kind: Service
metadata:
name: azure-vote-back
namespace: azure-vote
spec:
ports:
- port: 6379
selector:
app: azure-vote-back
- apiVersion: apps/v1
kind: Deployment
metadata:
name: azure-vote-front
namespace: azure-vote
spec:
replicas: 1
selector:
matchLabels:
app: azure-vote-front
template:
metadata:
labels:
app: azure-vote-front
spec:
nodeSelector:
beta.kubernetes.io/os: linux
containers:
- name: azure-vote-front
image: mcr.microsoft.com/azuredocs/azure-vote-front:v1
resources:
requests:
cpu: 100m
memory: 128Mi
limits:
cpu: 250m
memory: 256Mi
ports:
- containerPort: 80
env:
- name: REDIS
value: azure-vote-back
- apiVersion: v1
kind: Service
metadata:
name: azure-vote-front
namespace: azure-vote
spec:
type: LoadBalancer
ports:
- port: 80
selector:
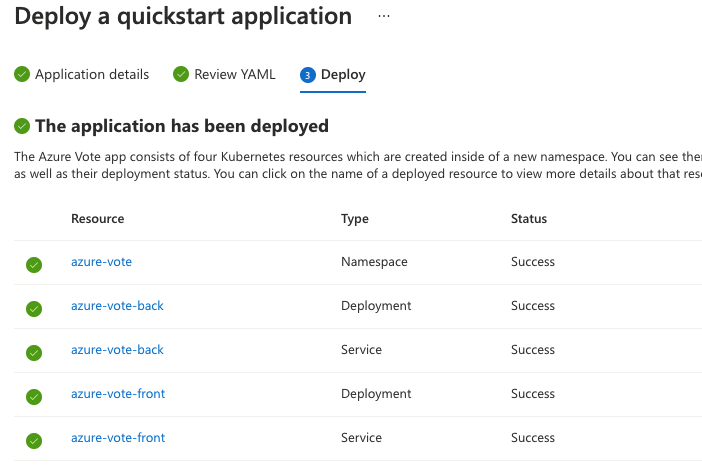
app: azure-vote-frontAfter you’ve clicked your way through the wizard, you should end up with the following message:
If you followed the guide to set up a MetalLB LoadBalancer you should be able to find the external IP address to access your newly created application by running the following command:
kubectl get services -n azure-voteOutput:
NAME               TYPE           CLUSTER-IP      EXTERNAL-IP   PORT(S)        AGE
azure-vote-back    ClusterIP      172.19.0.213    <none>        6379/TCP       12m
azure-vote-front   LoadBalancer   172.19.22.123   10.55.90.90   80:32453/TCP   12m
Well done! You should now have a simple Voting App deployed on your NKE Cluster, managed from Microsoft Azure.
Clean up
Click the Delete button in the Voting App wizard to delete your test application.
Wrapping Up
During this series we’ve covered the following high-level points.
- Overview of cloud-based Control Plane and Kubernetes on-premises deployments
- NKE cluster deployment & Azure Arc configuration
- Deployment of a simple Voting App to demonstrate our configuration
- Cleaning up the demo environment
Thanks for joining us and we hope this series was useful.
Thanks for reading and have a great day! 🙂