
")
The process of deploying every component in a new environment can be somewhat daunting. For example, an application or automation approach may have multiple components such as VMs, API calls that need to be configured, updates that need to be downloaded, etc. Doing all this manually is potentially quite inefficient.
Instead, today’s example will be made easy by integrating two well-known Nutanix® products: NCM Self Service (formerly Calm) and Lifecycle Manager (LCM) and combining them with the new Nutanix v4 EA APIs. Let’s get started.
Introduction
Before setting anything up, let’s lay out the desired end result.
- From a scenario perspective our fictitious customer mandates the use of a local web server for LCM updates. The local web server will host LCM updates as a collection of
.tar.gzand.ziparchives. - The customer requirements mandate the use of Linux as the base operating system for all web servers. Windows + IIS information can be found in the Life Cycle Manager Dark Site Guide.
- Prism Central needs to be configured to use the local web server as the Update Source.
- Administrator systems must run Linux or Mac OS X. This article will assume your system runs Linux or Mac OS X, or a Windows operating system with access to Linux commands.
Why would any customer want to do this? Some possible use cases are:
- In a dark site environment where LCM does not have access to the Internet i.e. Nutanix Portal as an Update Source. For more information on dark sites, see the Life Cycle Manager Dark Site Guide.
- Strict control over which software or hardware versions are available to Prism Central instances and clusters.
Assumptions & Intended Audience
This article has been written based on the assumption that readers have rudimentary knowledge of NCM Self Service (formerly Calm), although step-by-step guides will be given when relevant. In-depth knowledge of NCM Self Service is not required.
Demo Environment
This article and accompanying screenshots were created using the following environment.
- AOS 6.6
- Prism Central pc2023.1.0.1
- Calm 3.6.2 (“Calm” and “NCM Self Service” may be used interchangeably throughout this article)
- Epsilon 3.6.2
Important note: Prism Central pc.2023.1.0.1 features the Prism Central Experience (App Switcher, Apps and Marketplace, Admin Center). All screenshots have been taken from this environment; the Prism Central user interface may look different if your environment is yet to update to Prism Central pc.2023.1.0.1. For more information see the Prism Central pc.2023.1.0.1 release notes.
Components & Software
For these requirements to be met, the following steps will need to be completed.
- Deployment of a web server to serve as the LCM Update Source. The following configuration will be applied using a combination of Cloud-Init and Linux shell scripts:
- VM based on CentOS Linux 7. This article will include Cloud-Init initialisation user data to ensure our credentials work with CentOS Linux 7.
- Appropriate SSH keys added to the VM
- NGINX server
- Minimal security policy applied by configuring
firewalldto only allow access on ports 22 (SSH) and 80 (HTTP) - Selinux configured to allow Nginx in permissive mode
- Additional 100GB disk that will be mounted at
/mnt/lcm, specifically for the storage of LCM updates.
- Download of “latest” LCM updates onto the local web server. In our demo environment a copy of the latest updates have been temporarily hosted on a web server outside this app. The upstream source for the latest updates will depend on client’s security posture.
- Nutanix supports generation of user-specific time-limited download URLs for all LCM packages. While this demo uses a local web server to provide LCM update packages, user-specific time-limited download URLs would be used in production. For more information, see Updating the LCM Framework Using a Web Server.
- Reconfiguration of LCM to use the new local web server as the update source. This will be achieved by leveraging the new v4 EA LCM APIs.
- All the above will be carried out from an NCM Self Service blueprint designed to streamline these processes into one easy deployment.
- The blueprint includes an action that reverts LCM back to the default configuration – using the Nutanix Portal as the Update Source. This will run when the app’s “Delete” action is executed.
Preparation
A critical part of this deployment is being able to connect to the deployed hosts via SSH. While NCM Self Service support connection with username and password authentication, it is strongly recommended to use SSH key pair authentication wherever possible.
Creating SSH Key Pair
Through this article we will use an SSH key pair generated specifically for this deployment. If you are following this article in your own environment you may skip this section and use your own existing SSH key pair. See the Calm Administration and Operations Guide for information on supported SSH keys.
Generate a new key pair:
ssh-keygen -t rsa-sha2-512 -b 4096 -C <your_email_address>In our demo environment, the results are as follows:
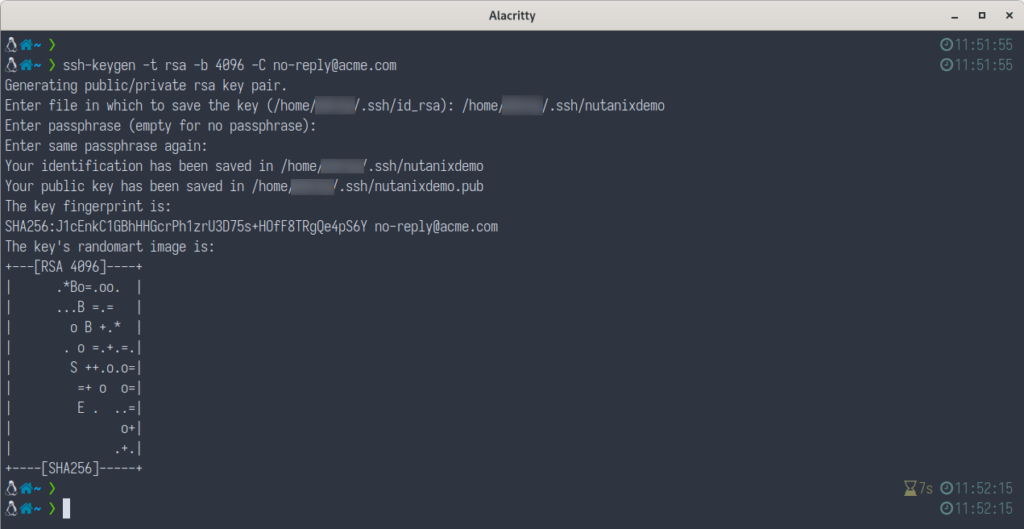
ssh-keygen to create support SSH key pairIn our user’s .ssh directory two files will be created:
nutanixdemo– The generated private key filenutanixdemo.pub– The generated public key file
To continue following this article, make sure you have access to the contents of the nutanixdemo file (or equivalent, if you used a different name).
Prism Central Access
If you are following this article in your own environment, make sure you can login to Prism Central with appropriate permissions. Your user account will need access to Calm and the Admin Center. Prism Central Admin Center is available in pc.2023.1.0.1 or later. Earlier Prism Central versions can access running applications from within Calm.
Blueprint Import
Due to the relative complexity of this blueprint it recommended to download a copy from the NutanixDev Code Sample repository then import it into your environment. This article will step through and explain all important parts of this blueprint.
- Download here: Nutanix v4 LCM APIs & Dark Sites
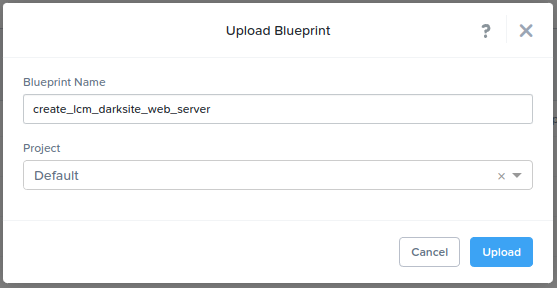
- Login to NCM Self Service and import using the “Upload Blueprint” button.
- Once imported and the blueprint has been given a name (see Fig 1), credentials must be configured.
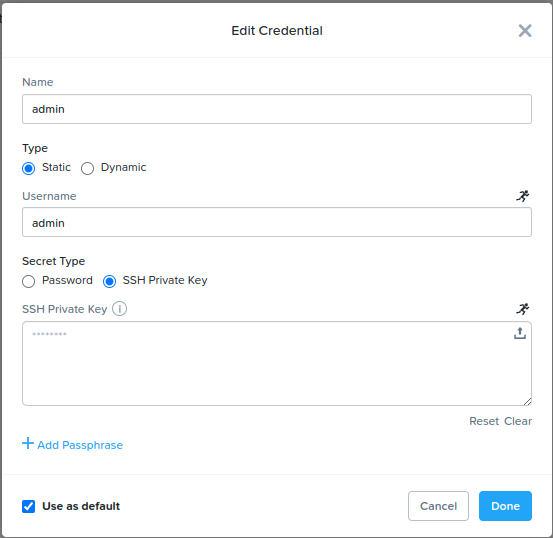
- Click “Credentials”.
- Open the “admin” credential and paste your
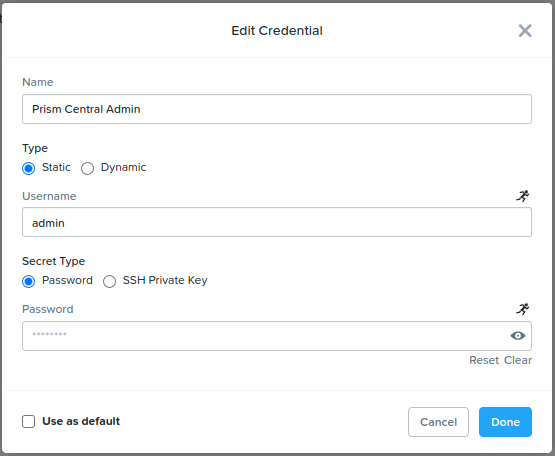
nutanixdemoprivate key into the “SSH Private Key” field. The “admin” credential will be used for VM login via SSH. See Fig 2 below. - Open the “Prism Central Admin” credential and configure your username and password for Prism Central. For this demo, these credentials should be for the Prism Central you are currently logged into. The “Prism Central Admin” will be used for Nutanix v4 API requests. See Fig 3 below.
- Click “Back”.
- Select the “BasicLinuxVM” service and verify the following settings are correct for your environment:
- Account
- Cluster must be set to the name of the cluster that will host this VM
- NIC 1 must be set to a network configured in your environment
- Click “Save”.
The remaining parts of the blueprint will be outlined in upcoming sections.
Local Web Server Deployment
The following sections are explanations of each part of the imported NCM Self Service blueprint.
VM Configuration
During deployment, the local web server will be configured as a basic updated VM only. No LCM configuration is done until requested by the user. To achieve this, the following deployment process is followed.
- NCM Self Service will download a CentOS 7 Linux cloud image, if not already present. If reconfiguration is required, click “Configuration” and edit the properties of the CENTOSIMAGE_2211 image configuration.
- A Linux VM will be created with a boot disk based on the downloaded CentOS 7 image.
- During deployment, the provided SSH private key will be used to specify authorized public keys for a user matching the details configured earlier (the “admin” credential).
- The VM will be connected to the network you connected NIC 1 to when you configured the “BasicLinuxVM” service above
Application Profile Variables
This blueprint makes extensive use of Application Profile variables. Within an NCM Self Service blueprint, variables are used in two main ways:
- As hard-coded, environment-specific variables. These are configured by the NCM blueprint administrator and cannot be changed by the user, should the blueprint be published to the app marketplace.
- As runtime variables, editable by the user. Upon application launch either directly from NCM Self Service or from the app marketplace, run time variables can be modified by the user, enabling launch-specific settings if required.
Step through the application profile variables as follows.
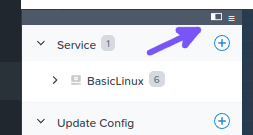
- If the service and profile pane is collapsed, expand it to full size using the expand button. See Fig 4.
- Select the “Default” profile, observing the “Variables” section shown on the right side of the window
- Observe the following variable details:
- FRAMEWORK_BUNDLE: This and most other variables are complete URLs for LCM updates. The provided blueprint uses a temporary local web server as the update package source. In production, user-specific time-limited LCM download URLs would be used here, unless the customer uses a preconfigured package source. The same format is used for NCC, FIRMWARE (etc).
- HOSTNAME: This variable will be used as the hostname for the deployed local web server.
- STATIC_EXPIRATION_DAYS: Default setting for NGINX-hosted static content. Change as necessary, although this variable can be safely left at default for this demo.
Action List
The local dark site web server in this deployment includes three main actions.
“Create” Service Action
The Linux VM’s create action executes a shell script that completes the following steps.
- “Configure Base VM”
- Update installed packages.
- Install some packages such as
git,vimand networking utilities. - Sets the hostname
- “Configure Storage”
- Formats the 100GB and creates an
ext4filesystem - Runs
fdiskand configures the 100GB disk to be mounted at/mnt/lcm.
- Formats the 100GB and creates an
If you are new to NCM Self Service, continue below to view the actions. Users with previous exposure to NCM Self Service may continue to the next section.
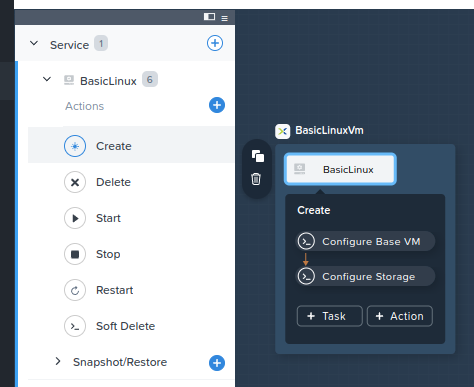
- Expand the “BasicLinux” Service
- Click “Create”
- Observe the “BasicLinuxVM” VM’s create actions: “ConfigureBaseVM” and “Configure Storage”. See Fig 5.
“Reconfigure LCM” Application Profile Action
The “Reconfigure LCM” application profile action can be viewed by expanding the “Default” Application Profile and selecting “Reconfigure LCM”. See Fig 6a.
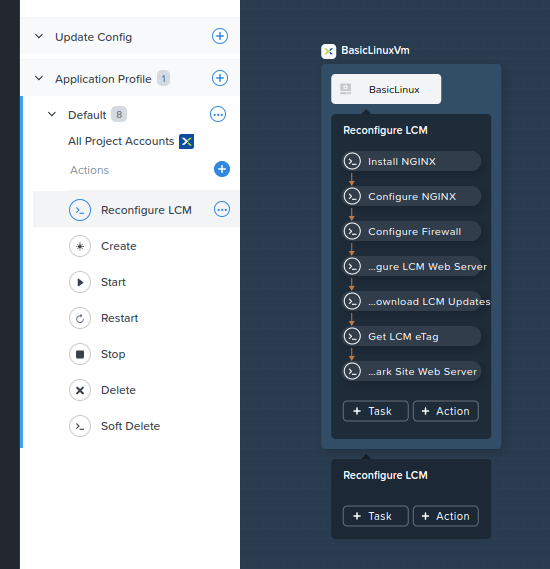
The individual steps in this action are as follows. With the exception of steps 6 and 7, all steps execute Linux shell scripts.
- Install NGINX.
- Install NGINX prerequisites.
- Install NGINX to provide local web services.
- Ensures the NGINX server is running and enabled (start on boot).
- Configure NGINX.
- Apply an NGINX configuration containing some best practice options including worker processes, content compression and cache expiry based on the STATIC_EXPIRATION_DAYS variable set earlier. Note that best practice definitions will likely vary across different environments.
- Creates and configures the NGINX web server’s default site root; in this demo the web server’s root directory is located on the attached 100GB disk mounted earlier.
- Enables directory listing; this setting is disabled by default but is required for LCM to list the contents of the “release” directory.
- Configures
selinuxto allow NGINX in permissive mode.
- Configure Firewall.
- Installs
firewalldpackage. - Starts and enables
firewalldservice. - Add rules to allow the HTTP service through the firewall
- Installs
- Create LCM Web Server.
- Creates the “release” directory. This directory contains all LCM update packages, including the framework bundle LCM uses to know which updates are available.
- Creates a download directory to be used during LCM package transfers. During this demo, the download directory is where downloaded LCM packages are saved, before being moved and extracted into their final destination.
- Restarts NGINX to ensure all previous configuration changes take effect.
- Download LCM Updates.
- Download the LCM framework bundle. This is a critical part of running an LCM local web server. For more information, see the Life Cycle Manager Dark Site Guide.
- Download all LCM update packages as per configured download locations; these are the variables covered earlier in this article.
- Extract the downloaded LCM packages into place.
- Remove temporary LCM packages to ensure a clean web server directory structure.
The last two tasks in our blueprint are where NCM Self Service and the Nutanix v4 EA LCM APIs “converge”. The aim of these tasks is to demonstrate how NCM Self Service can be used to send requests to any API endpoint, examine the response and then take action with the contents of that response.
- Get LCM eTag.
- Use the new Nutanix v4 EA LCM APIs to obtain the current LCM configuration eTag. eTag is a version identifier used during API change requests, including POST, DELETE and PUT. In this case, the eTag will be sent with our next request, ensuring we are updating the current version of the LCM configuration. For a detailed explanation of using eTag with the new Nutanix v4 EA APIs, see Using ETag and If-Match Headers with Nutanix v4 APIs (opens in a new window).
- Reconfigure LCM for Dark Site Web Server.
- Build a Nutanix v4 EA LCM API request to reconfigure LCM. This reconfiguration changes the LCM configuration from the current update source (Nutanix Portal by default) so that LCM will use the new dark site web server as the update source. The request used here will send the current eTag in the request headers, ensuring LCM is updated correctly. The complete request payload is shown below.
{
  "isDarksite": true,
  "enableHttps": false,
  "url": "http://@@{address}@@/release"
}- isDarksite tells LCM that it is now using a local web server as the update source.
- enableHttps is set to false as our demo web server isn’t configured to serve content over HTTPS. In production this would most likely be set to true.
- url is set to the IP address of our newly deployed local web server by using a Calm Macro: @@{address}@@. For additional information about Calm macros, see Calm Macros in the Calm Administration and Operations Guide.
The complete HTTP task is shown below (Fig 6b) – numbered sections outline the important fields within the task.
- Type. Request type – in this demo, an HTTP API request.
- Request URL. The URL that will be used for the upcoming API request. This demo uses the /resources/config LCM API endpoint.
- Request method. This demo sends an HTTP PUT request to alter the LCM configuration.
- Request Body. The payload that will be sent along with this request. Note the use of the @@{address}@@ Calm Macro; this will be replaced with the IP address of the new Linux VM.
- Credential. The username and password that will be used for API HTTP Basic authentication.
- Headers. The LCM API config PUT request requires an If-Match header. The value of this header is the eTag retrieved in step 6 above and is identified by the variable @@{current_etag}@@.
- Expected Response Options. If an HTTP 200 is received from Prism Central, NCM Self Service will identify the request as SUCCESS.
“Delete” Service Action
When the deployed NCM Self Service application is deleted and the deployed LCM dark site web server removed, two additional tasks are run as part of the “Delete” action.
- Get LCM eTag.
- Identical to step 6 “Reconfigure LCM” action outlined above; the current LCM configuration version eTag is returned for use in an upcoming step.
- Revert LCM to Nutanix Portal.
- Reconfigure LCM to use the Nutanix Portal as the update source. The request payload is essentially the “reverse” of the LCM reconfiguration payload used earlier:
{
  "isDarksite": false,
  "enableHttps": true
}- isDarksite tells LCM to use the Nutanix Portal as the update source
- enableHttps is set to true, indicating the LCM should now access the Nutanix Portal over HTTPS
If you are new to NCM Self Service, continue below to view the actions. Users with previous exposure to NCM Self Service may continue to the next section.
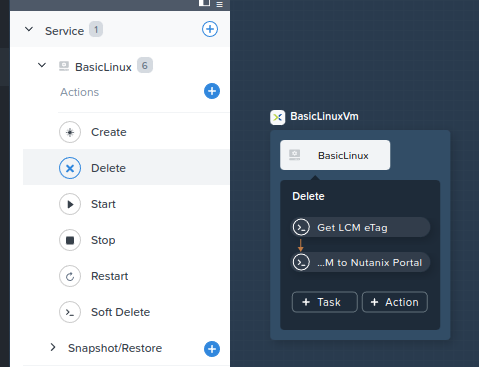
- Expand the “BasicLinux” Service
- Click “Delete”
- Observe the “BasicLinuxVM” VM’s delete actions: “Get LCM eTag” and “Revert LCM to Nutanix Portal”. See Fig 7.
Blueprint Launch
Now that the demo blueprint has been imported, variables configured and actions examined, we can launch the blueprint and observe the results.
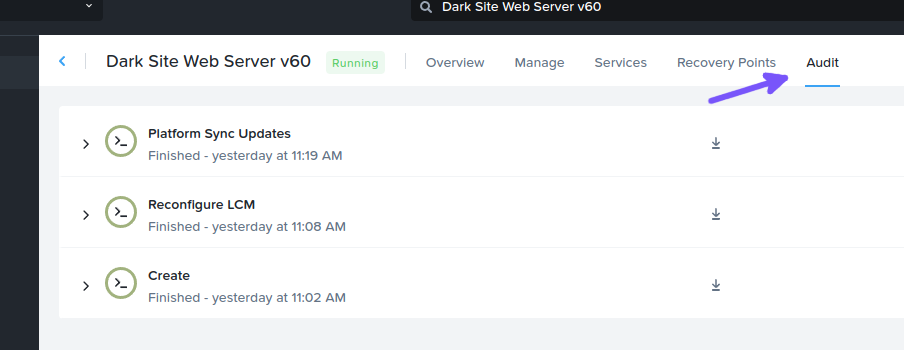
Launching the blueprint itself is somewhat beyond the scope of this article but after clicking the “Launch” button (Fig 9), entering an application name and waiting until the deployment has finished, we can the process NCM Self Service went through. To do this, open the “Audit” tab (Fig 10).
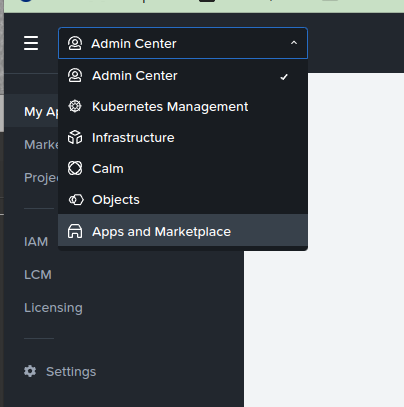
Important note: As mentioned earlier, Prism Central pc.2023.1.0.1 introduced the “Prism Central Experience”. If you are yet to familiarise yourself with the new interface, NCM Self Service apps are now available from “the “Apps and Marketplace” (Fig 8).

Launch Audit: Initial Deployment
With the “Audit” tab open, expand “Create” and then the “BasicLinux Create” action. Observe both sub-tasks have been completed successfully: “BasicLinux – Configure Base VM” and “BasicLinux – Configure Storage”. Clicking each task in turn will show a) the output from each task and, optionally, b) the script that was run during the task (Fig 11).
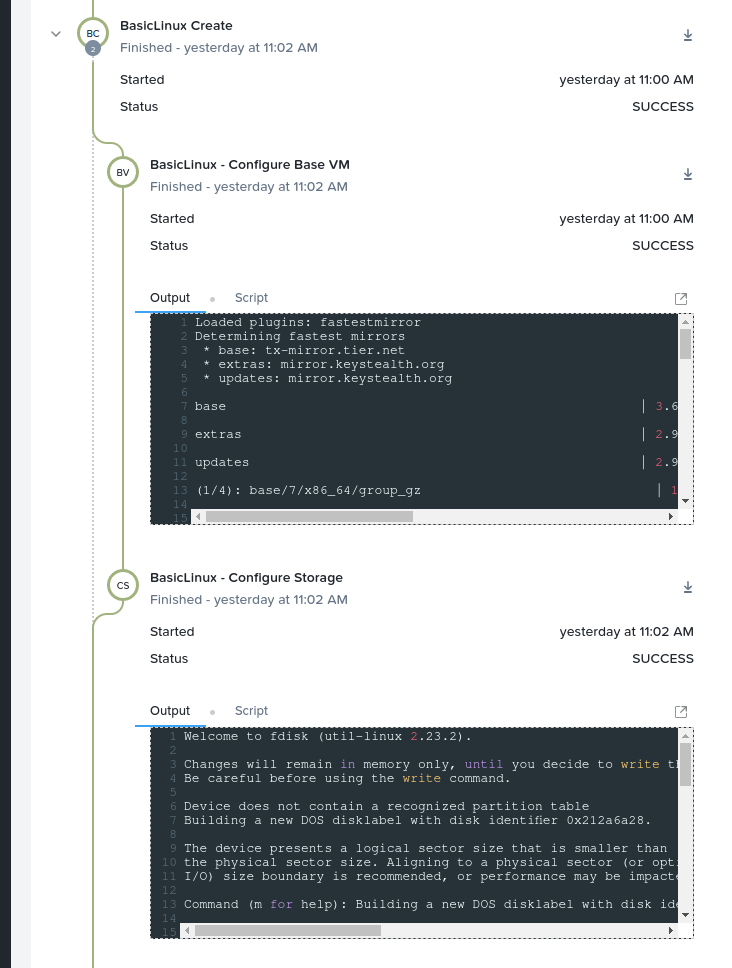
Note: At this point we have successfully deployed the base VM but have not executed the “Reconfigure LCM” action. If we were to login to the VM now, all packages would be updated and the hostname would be configured.
Launch Audit: Reconfigure LCM
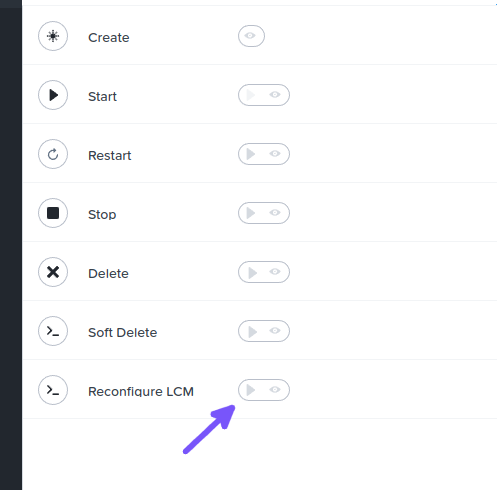
With the base VM deployed successfully, we can now visit the “Manage” tab and click the play icon next to “Reconfigure LCM” (Fig 12). This will begin executing the tasks within the “Reconfigure LCM” task, as outlined earlier.
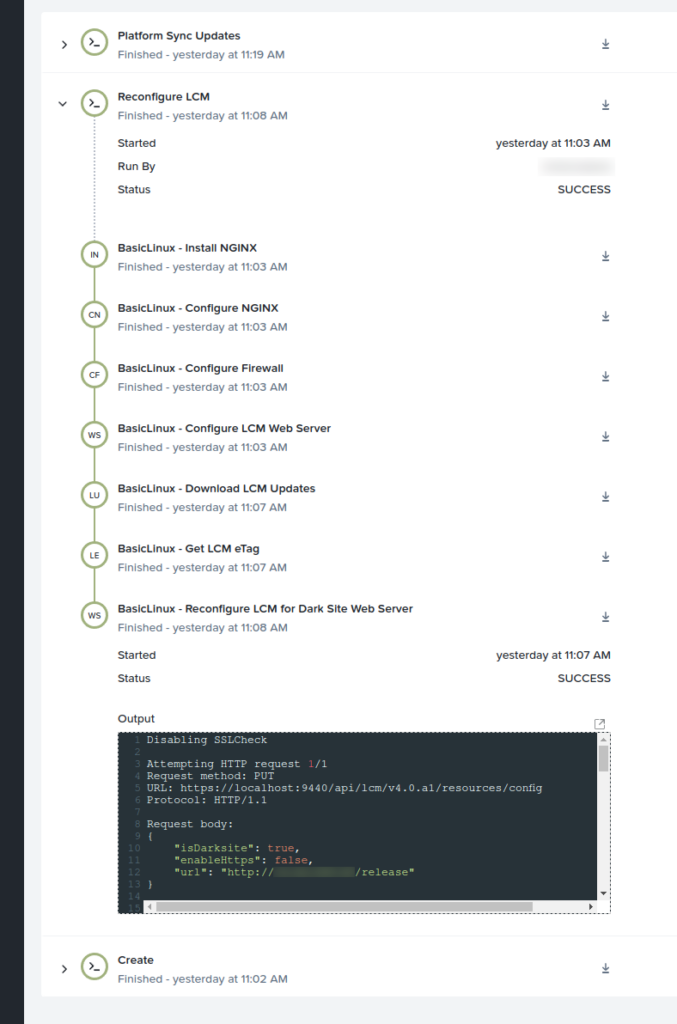
Once complete, the LCM reconfiguration tasks can be observed on the “Audit” tab, as follows (Fig 13). The time taken to complete all tasks may vary depending on a number of factors.
The following screenshot focuses on the task that uses the new Nutanix v4 EA LCM APIs to reconfigure LCM as a dark site and retrieve updates from our new local NGINX web server.
Launch Audit: Check LCM Settings
Now that the “Reconfigure LCM” action has been successfully completed, LCM itself can be checked to make sure the changes have taken effect.
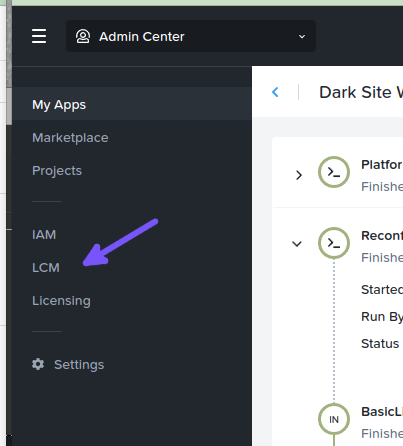
Note: In Prism Central pc.2023.1.0.1 LCM is now accessed via the new “Admin Center” (Fig 14).
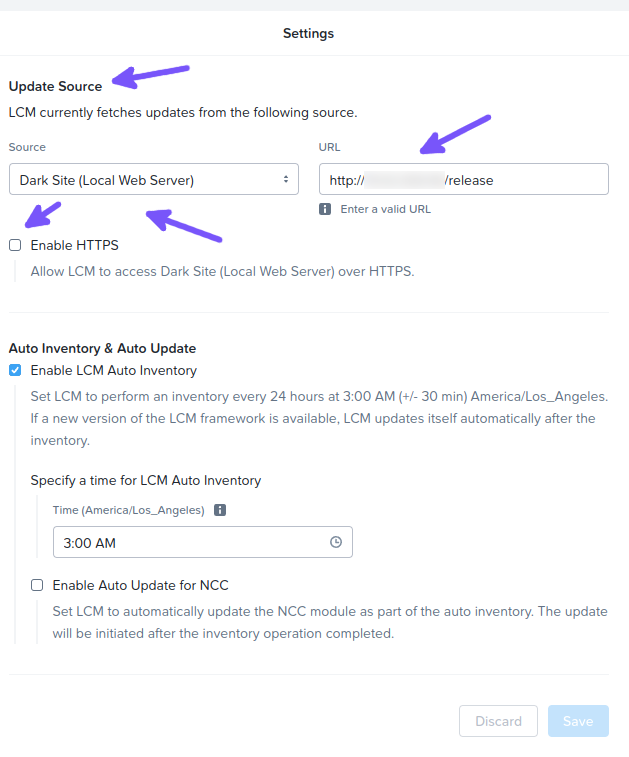
- With LCM open, the “Settings” tab can be viewed and the LCM Update Source observed (Fig 15).
Final Steps
Now that nearly all actions have been executed, the only remaining action would be to execute the Application Profile “Delete” action. As outlined earlier, this is destructive action that will:
- Reconfigure LCM to use the Nutanix Portal as the Update Source (default behaviour).
- Delete the deployed local web server VM.
Note: The “Soft Delete” action can be used if the application should be removed from NCM Self Service without touching the web server and without reverting the LCM configuration back to default.
Conclusion
This article has demonstrated that Nutanix LCM, NCM Self Service (formerly Calm) and the new Nutanix v4 EA APIs can be easily integrated to meet this theoretical scenario’s requirements. To summarise:
- Local Linux web server deployed, running NGINX to serve web content
- LCM update packages retrieved from a temporary web server, replacing the Nutanix Portal for demo purposes
- LCM update packages extracted into place and the NGINX web server configured to serve update information when requested
- Using the new Nutanix v4 EA APIs, LCM reconfigured to use the new dark site NGINX web server as the Update Source
See the following resources for more information on Nutanix LCM, NCM Self Service and the Nutanix v4 EA APIs.