

In a recent article I posted about getting started with the absolute basics of Nutanix REST API requests. Covering HTTP GET requests only, we looked at how to build a request that would return a list of the first 20 virtual machines running on a specific cluster. Advanced users may want to check out our article titled The Five Hundred (500+ VMs via v3 API).
After building the request, we tested it using Postman, looked at the JSON response to find some information about our VMs and saved the request for later use.
At the most basic level, these steps form the “guts” of almost all API requests with Nutanix. Build the request URL, decide what type of entity you want to work with and then “do something” with that entity type.
But I’m a writer and I don’t like reading …
This is a good point. What does it mean, though? From a real-world perspective, reading information via an API is great but at some point you will want to make a change of some sort. This could be creating a virtual machine or changing the name of a storage container; basically anything that involves altering something.
Unlike our first GET request, the type of request we’re talking about now is a POST request. Why POST? For our example, think of it like sending a package – you are posting information to the server.
What do I need?
First, it is recommended to read Part 1 of this mini series first where recommended tools such as Postman are introduced. That article will get you setup to carry on here.
All that said, if you are starting from scratch and need to install the basic requirements for development with the Nutanix APIs, it is recommended to follow this lab, first: Dev Environment Setup Lab 1.0.
Nutanix Cluster & Prism Central
Unlike Part 1 where we worked with Prism Element only, in this part we will work with Prism Central. It is strongly recommended to deploy Prism Central in every Nutanix environment, regardless of size.
From a specific version perspective, this article was tested using the latest version of Nutanix Acropolis (5.11) and the latest version of Prism Central (5.12). Whenever possible and to ensure support, it is strongly recommended to use the latest version of Nutanix Acropolis on Nutanix clusters.
Creating Entities – POST request
For the second part of this mini series we will construct a simple POST request. This request will connect to v3 of the Nutanix REST APIs and submit a payload containing the configuration for a new virtual machine. The first difference you’ll notice after reading Part 1 is that we are going to use v3 of the APIs. Why is this important? v3 of the APIs is supported on Prism Central only.
The parameters for the request in this article are as follows:
- Prism Central IP address: 10.133.16.228
- Cluster login name: admin
- Cluster password: nutanix/4u
- API version: v3
- Request type: POST
- JSON body or payload required: Yes
For Nutanix REST API v3 requests, the base path will be as follows:
https://<prism_central__ip>:9440/api/nutanix/v3/<entity_type>
For our specific request to list the first 20 VMs running on a cluster, that means our complete GET request will look like this:
https://10.133.16.228:9440/api/nutanix/v3/vms
Building the Payload
Because we are now building a POST request, we need to build the associated JSON POST payload. The JSON payload contains request-specific information. Because we are simply demonstrating the concept at this stage, the JSON payload will contain only the required information to create a new VM.
- The name for a new virtual machine
- The type of entity we are creating, i.e. “vm”
- We aren’t even specifying the amount of RAM or CPU for the VM, essentially telling the API to use default values
For our request, the JSON payload is as follows:
{
   "spec": {
     "name": "New_VM_Name_Here",
     "resources": {
     }
   },
   "metadata": {
     "kind": "vm"
   }
 }
Testing using Postman
At this point, please start the Postman application. If this is the first time you have run Postman on your system or if you have started Postman and not logged in, you won’t have any requests configured.
Note: The screenshots below show Postman version 7.5.0 running on Ubuntu Linux 19.04.
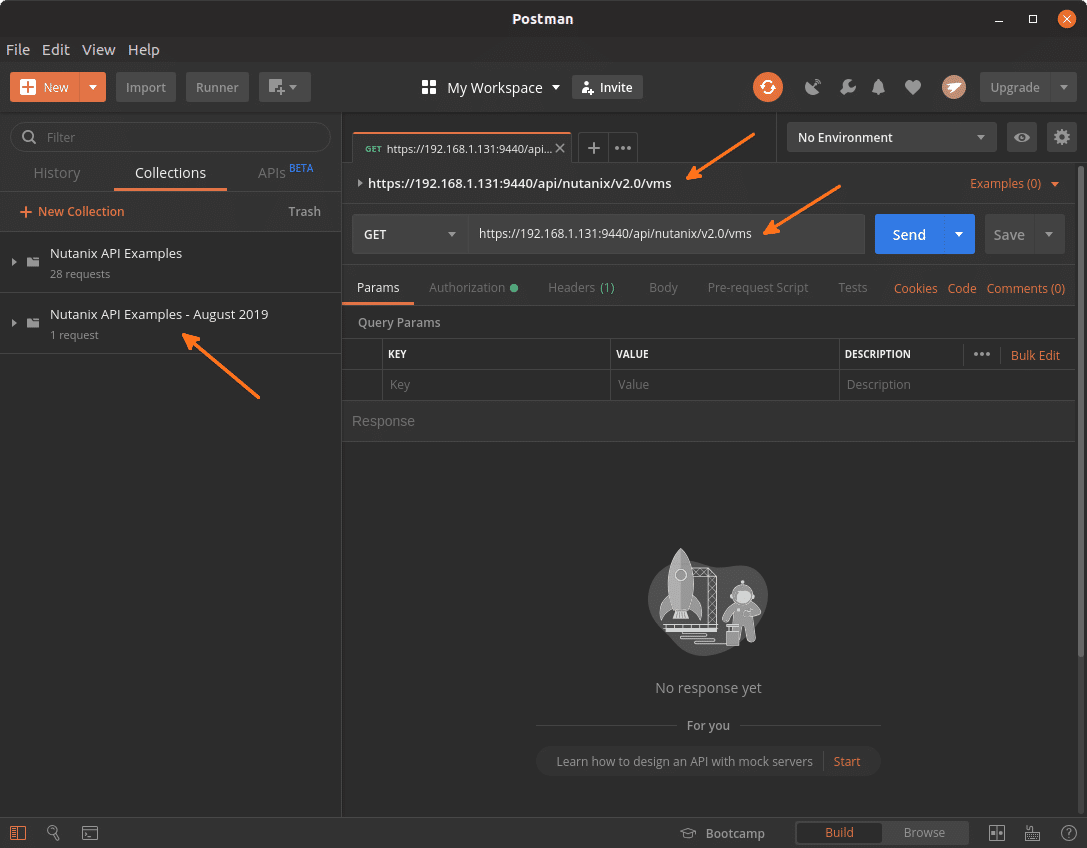
Assuming you have followed Part 1 of this mini series, the first thing you’ll see is that our GET request is still available for use. This is because we saved it in a custom collection; this demo shows a collection named “Nutanix API Examples – August 2019”.
Highlighted with arrows are the key points from Part 1.
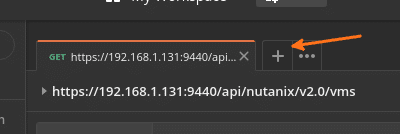
For now, please click the “+” button to create a new request.
As with our first request in Part 1, you’ll see that a new “GET” request tab has been created. The POST request we’ll build today differs in three main ways.
- For this request, the request type will change from “GET” to “POST”.
- The request URL will use our v3 URL instead of the v2.0 URL from Part 1.
- The “Body” tab is where we will add the JSON payload we built above.
For this first POST request, follow the steps below.
- Enter our complete request URL into the field labelled “Enter request URL”. Our complete request is as follows: https://10.133.16.228:9440/api/nutanix/v3/vms. If you are following this in your own environment, remember to change 10.133.16.228 to the IP address of your Prism Central instance.
- Click the “Authorization” tab, change the Type to Basic Auth, then enter the username and password for your environment in the Username and Password fields. For our test, the username is “admin” and the password is “nutanix/4u”.
- Click the “Headers” tab. Click in the first column and enter the key as “Content-Type”. In the Value column, enter “application/json”. As you type into each column, you’ll see Postman auto-complete with suggested values.
- Because we are submitting a POST request now and have already built our raw JSON payload, change to the Body tab, select “raw” as the type and paste the JSON payload into the field provided. As a reminder, here is the JSON payload:
{
   "spec": {
     "name": "New_VM_Name_Here",
     "resources": {
     }
   },
   "metadata": {
     "kind": "vm"
   }
 }
With the new POST request setup and ready to test, please go ahead and click the “Send” button.
Looking At The Response
Assuming there are no network or authentication errors in your request, Postman will return a JSON-formatted response. This response will contain quite a lot of information.
Let’s take a look at the response as it appears in Postman.
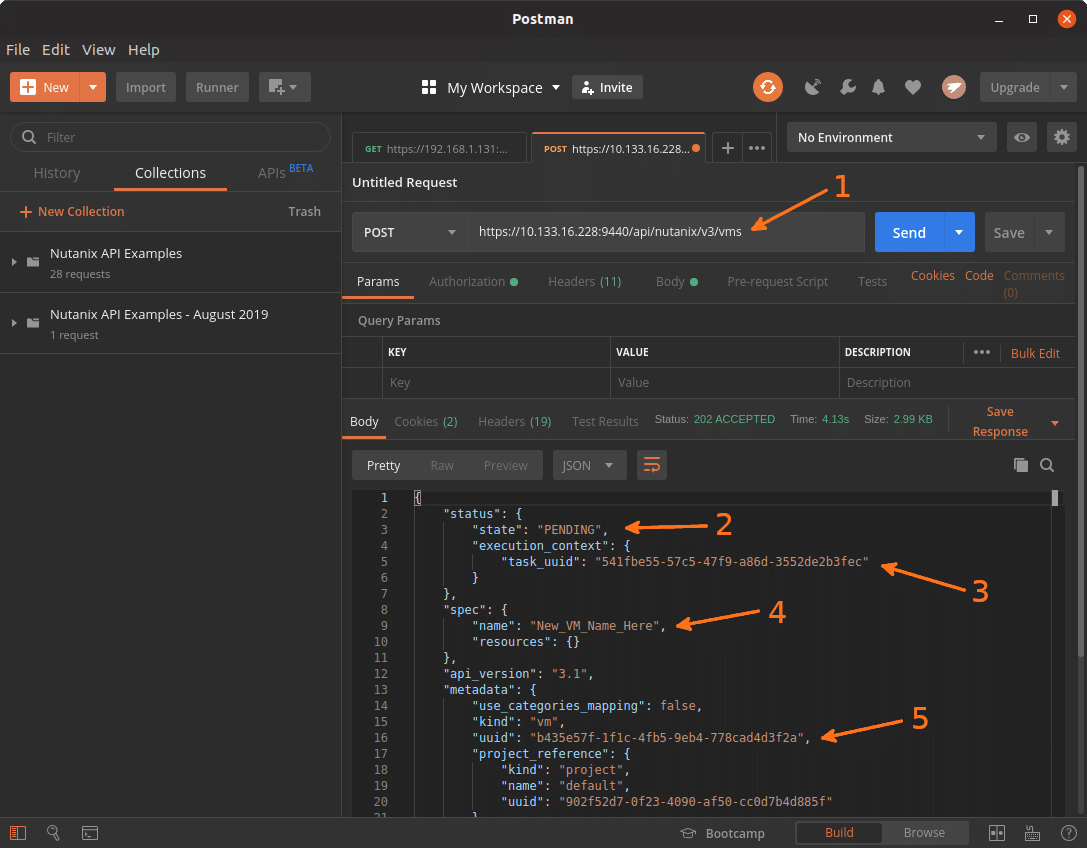
Each of the numbered sections are as follows:
- The complete path for our POST request including the Prism Central IP address, request path and entity type.
- The state of our request, showing that the request is currently “Pending”.
- A unique identifier for the task that is currently pending. Note that the Nutanix REST APIs provide a “tasks” endpoint for you to use, in order to get additional information on an in-progress request.
- The name of our new VM, as specified in the JSON payload.
- A unique identifier for the VM we just created.
Online JSON Parsing Tools
This was already discussed in Part 1 of this mini series, but is worth mentioning again now.
Depending on your experience with JSON-formatted data, this layout and response may seem a little daunting. To make this a little easier, there are many online tools that allow JSON data to be parsed and read in a much easier way. One of the most popular is JSON Editor Online.
Never take data from a sensitive or confidential environment and submit it to ANY public service! This includes JSON Editor Online.
Phew, with that disclaimer/warning out of the way, let’s move on. In all seriousness, though, the risks of sending environment-specific information to a public/online service should be thoroughly considered.
There is no sensitive or confidential information in our response so let’s complete a quick additional test. Opening JSON Editor Online and pasting in the complete JSON response will allow us to browse and analyse the JSON response in an easily-digestable format. Our example is shown in the screenshot below.
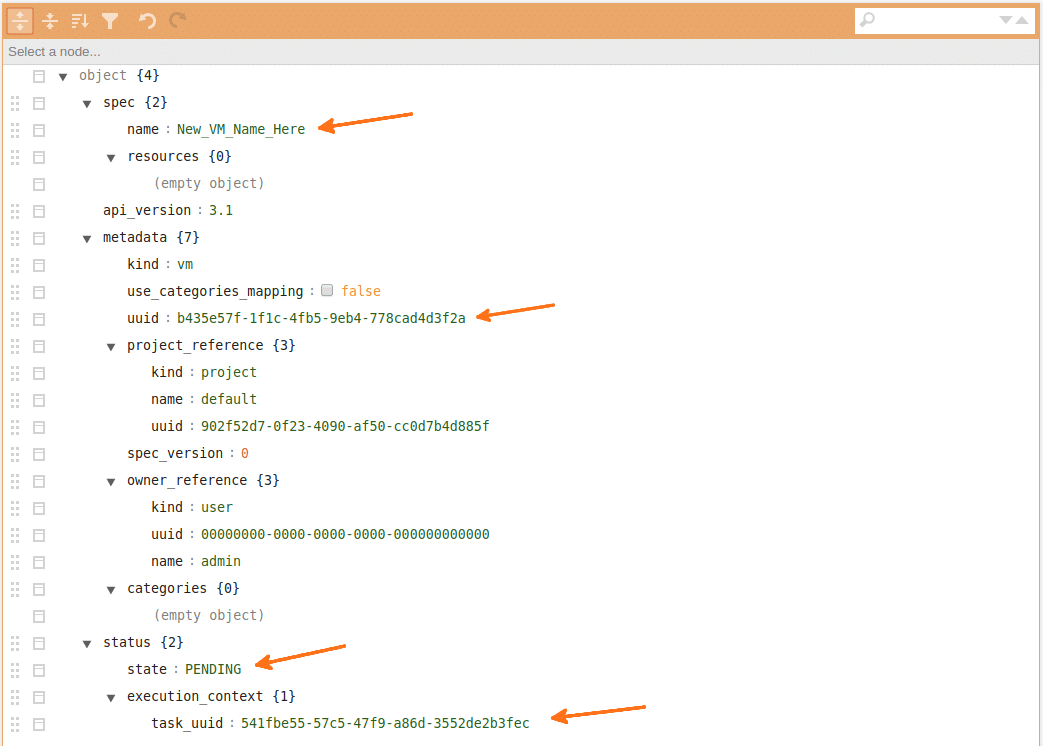
You’ll see above that the exact same information is available, with the key information highlighted.
Checking VM Creation (GUI)
This request is all well and good, but it’s always a good idea to check if the request worked. We have already covered how to request a list of VMs and how to create VM, so let’s quickly check Prism Central and make sure our VM was created successfully.
Using the super fast and very useful (more than you’d think!) Search feature of Prism Central, we can see a new VM named “New_VM_Name_Here” was created successfully.

A Few Comments
If you have been following this process from the start and have been completing the steps in your own environment, you’ll have noticed a few things. In particular:
- The new VM was created but is powered off
- We didn’t specify the number of CPUs or RAM
- The new VM has no local storage at all
Of course, the request we built so far is about as basic as POST requests get. Shown below is a much more in-depth and useful JSON payload that specifies the type of information you’d expect in a real environment.
{
   "spec": {
     "name": "New_VM_Name_Here",
     "resources": {
       "power_state":"ON",
       "num_vcpus_per_socket": 1,
       "num_sockets": 1,
       "memory_size_mib": 8192,
       "disk_list": [
         {
           "disk_size_mib": 8192,
           "device_properties": {
             "device_type":"DISK"
           }
         },
         {
           "device_properties": {
             "device_type":"CDROM"
           }
         }
       ],
       "nic_list":[
         {
           "nic_type": "NORMAL_NIC",
           "is_connected": true,
           "ip_endpoint_list": [
             {
               "ip_type": "DHCP"
             }
           ],
           "subnet_reference": {
             "kind": "subnet",
             "name": "vlan.0",
             "uuid": "00000000-0000-0000-0000-000000000000"
           }
         }
       ],
       "guest_tools": {
         "nutanix_guest_tools": {
           "state": "ENABLED",
           "iso_mount_state": "MOUNTED"
         }
       }
     },
     "cluster_reference": {
       "kind": "cluster",
       "name": "NTNXDemo",
       "uuid": "00000000-0000-0000-0000-000000000000"
     }
   },
   "api_version": "3.1.0",
   "metadata": {
     "kind": "vm"
   }
 }
The highlights are as follows:
- The new VM name, as before
- power_state specifies that the VM is to be powered on after being created
- num_vcpus_per_socket and num_sockets specifies that the VM will have a single socket with a single vCPU core
- memory_size_mib specifies that the new VM will have 8192MiB RAM i.e. 8GiB
- disk_list and its child properties such as disk_size_mib specifies that the new VM will have an attached DISK of 8192MiB (8GiB) as well as an IDE CD-ROM device
- nic_list and its child properties such as nic_type and subnet_reference specify that the new VM will have a single DHCP NIC attached to an AHV subnet with UUID 00000000-0000-0000-0000-000000000000 and the state set to connected. Of course, you would need to replace the subnet UUID with one that matches your environment.
- Nutanix Guest Tools are enabled and mounted
- The new VM will be created on the Nutanix cluster with UUID 00000000-0000-0000-0000-000000000000. As with the subnet UUID, this would be replaced with the UUID of the cluster you want to own the new VM.
Saving The Request
As carried out in Part 1 of this mini series, Postman can be used to save requests for later use. This is a very useful featured as some requests can take some time to prepare – starting from scratch would be particularly inefficient. Saved requests can also be saved in groups e.g. for Nutanix v2.0 APIs, Nutanix v3 APIs and so on.
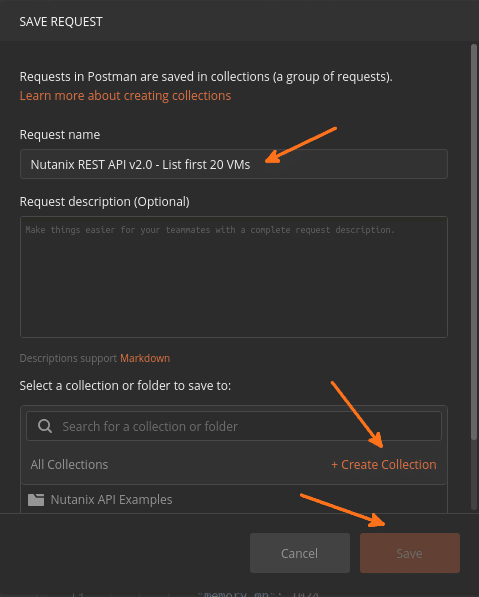
Pressing Ctrl-S (Linux/Windows/PC) or Cmd-S (Mac) will display a popup where your request’s details can be added.
- Enter a descriptive name for the request, e.g. Nutanix REST API v3 – Create Basic VM
- Enter an optional desccription
- If you don’t yet have a collection, click the Create Collection button to group your requests into a manageable structure. The screenshot below shows a collection named Nutanix API Examples that I use for my requests and the process of saving the GET request from Part 1 of this mini series.
- After selecting your new collection, hit the renamed Save button and your request will be available next time you start Postman.
What have we covered so far?
In this slightly longer article we looked at a few key points.
- The base URL for all Nutanix REST API v3 POST requests (via Prism Central)
- The construction of a simple POST request to create a virtual machine via Prism Central
- Testing of the POST request using Postman
- Processing of the JSON response using Postman and JSON Editor Online
- Checking that the new VM was created via the Prism Central GUI and search feature
- A look at a much more in-depth and usable JSON payload that could be used in a real-world environment
- Saving our POST request for later use
Code Samples
To assist you with getting used to writing your own requests, a growing collection of code samples has been provided on the Nutanix.dev Code Samples page. Covering listing and creating entities in both basic and advanced form, it is highly recommended to keep the code samples page on hand so it can be used as a reference.
Summary
Thanks for reading and I hope Part 2 of this min series was useful. 🙂