
")
Managing any platform using a terminal requires the installation of several CLI tools. Sometimes, you even need different versions of the same tool installed on your system, which can become a problem with certain tools.
Nutanix Dev Station aims to solve this issue by using Microsoft Development Containers for managing Nutanix and Kubernetes. It doesn’t matter if you are using Terraform, Ansible, PowerShell, OpenShift, or Calm DSL, you get all these tools in your containerized development environment.
So stop installing… and use development containers to improve your development experience. You can create as many as you need, with all the tools required for your different projects, and eliminate complaints that “it doesn’t work on my machine”.
For a complete list of tools included in the Nutanix Dev Station visit the official repository at https://github.com/nutanixdev/nutanix-devstation
How it works
This is not a container image including the tools that Nutanix builds with and ships. Instead, the Nutanix Dev Station leverages the Microsoft Visual Studio Code Dev Containers extension. The extension communicates with your local container engine building a local container image based on the devcontainer.json definition and runs an instance of this.
Prerequisites
Before you proceed, be sure to have the following components installed on your computer:
- Microsoft Visual Studio Code running on Windows or Mac (Intel or Apple silicon) – https://code.visualstudio.com/download.
- Dev Containers extension – https://marketplace.visualstudio.com/items?itemName=ms-vscode-remote.remote-containers.
- Docker Desktop or Rancher Desktop. For the latter, make sure to set the container engine to dockerd (moby).
- Git CLI.
- (Optional) A Nutanix environment to test some of the examples in this article.
Getting started
Installing the Nutanix Dev Station is as simple as:
- Clone the official repository.
git clone https://github.com/nutanixdev/nutanix-devstation.git --config core.autocrlf=false- Copy the .devcontainer directory into your project root folder. Adapt the command to your operating system.
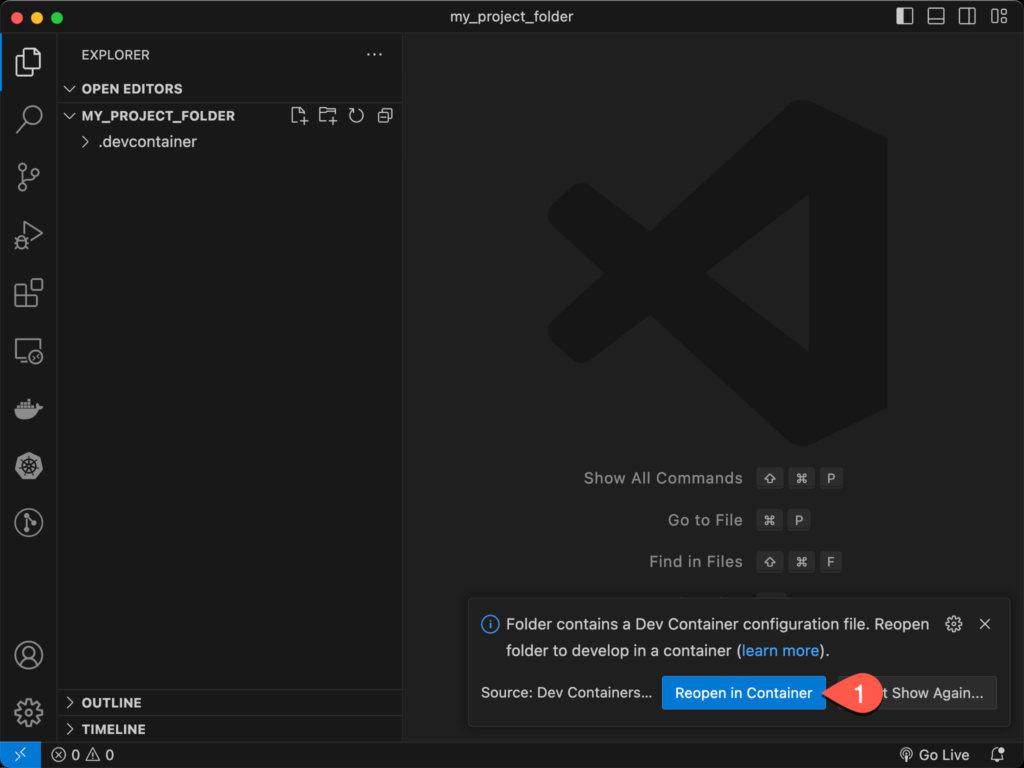
cp -R nutanix-devstation/.devcontainer <my_project_folder>- Open your project in Visual Studio Code. If you don’t have
codein your path, open the folder using the GUI.
code <my_project_folder>- When prompted, confirm you want to Reopen in Container.
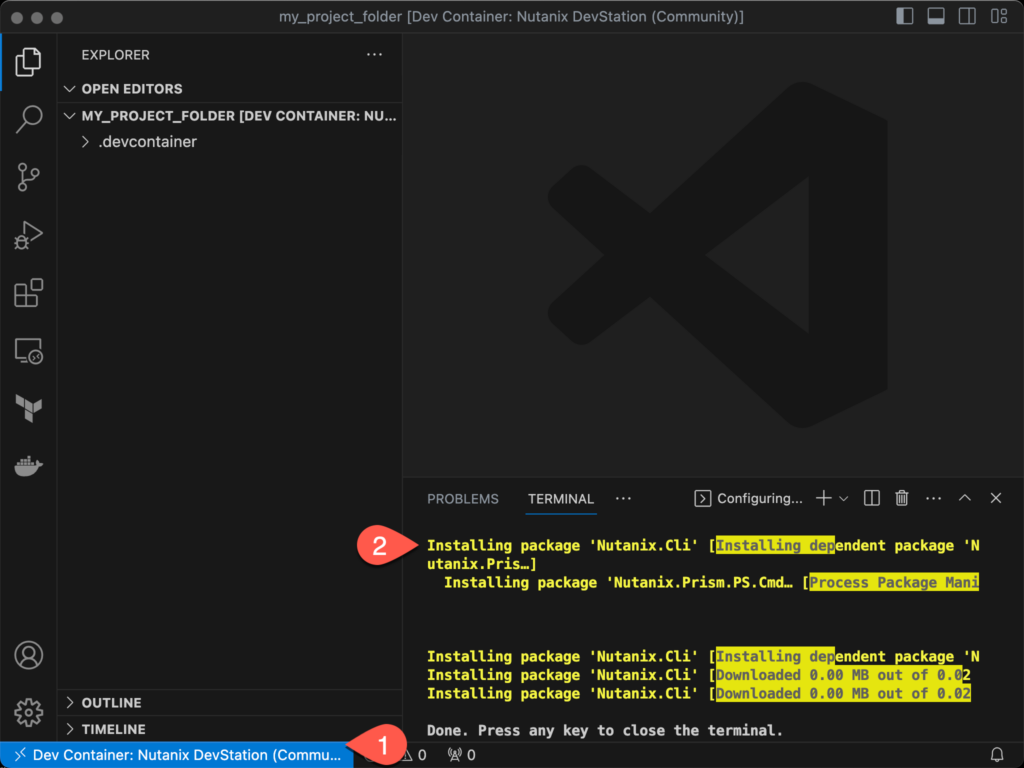
- After a few minutes, your development environment is ready. The status bar shows you are attached to the container, and the terminal output is the Nutanix.Cli PowerShell package.
Examples
Here is a list of quick examples for testing the Nutanix Dev Station. You can also find other examples in the GitHub repository.
Make sure you execute all the commands in a terminal within the container using Visual Studio Code.
Terraform – Getting cluster names
In this example, you will retrieve all the Nutanix clusters managed by a single Prism Central instance and output their cluster names.
- Create the Terraform manifest.
cat <<EOF > clusters.tf
terraform {
  required_providers {
    nutanix = {
      source = "nutanix/nutanix"
    }
  }
}

variable "nutanix_endpoint" {
  type = string
  nullable = false
}

variable "nutanix_port" {
  type = number
  nullable = false
  default = 9440
}

variable "nutanix_username" {
  type = string
  nullable = false
}

variable "nutanix_password" {
  type = string
  sensitive = true
  nullable = false
}

provider "nutanix" {
  endpoint     = var.nutanix_endpoint
  port         = var.nutanix_port
  username     = var.nutanix_username
  password     = var.nutanix_password
  insecure     = true
  wait_timeout = 10
}

data "nutanix_clusters" "clusters" {}

output "cluster_names" {
  value = data.nutanix_clusters.clusters.entities[*].name
}
EOF- Initialize the Nutanix provider for Terraform.
terraform init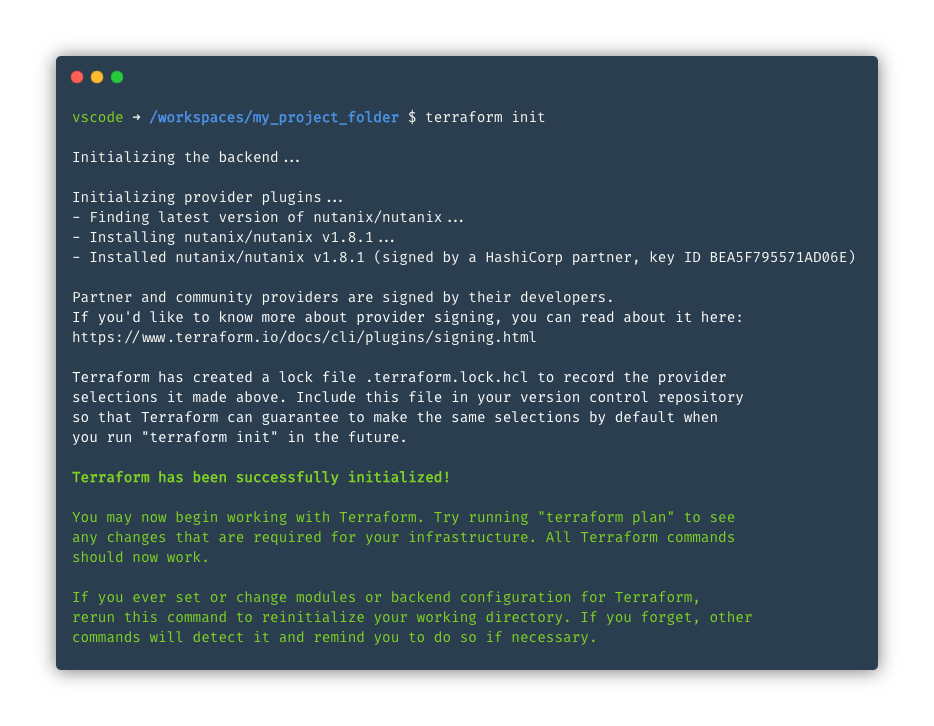
terraform init- Apply the manifest and provide the values for the required inputs.
terraform apply -auto-approve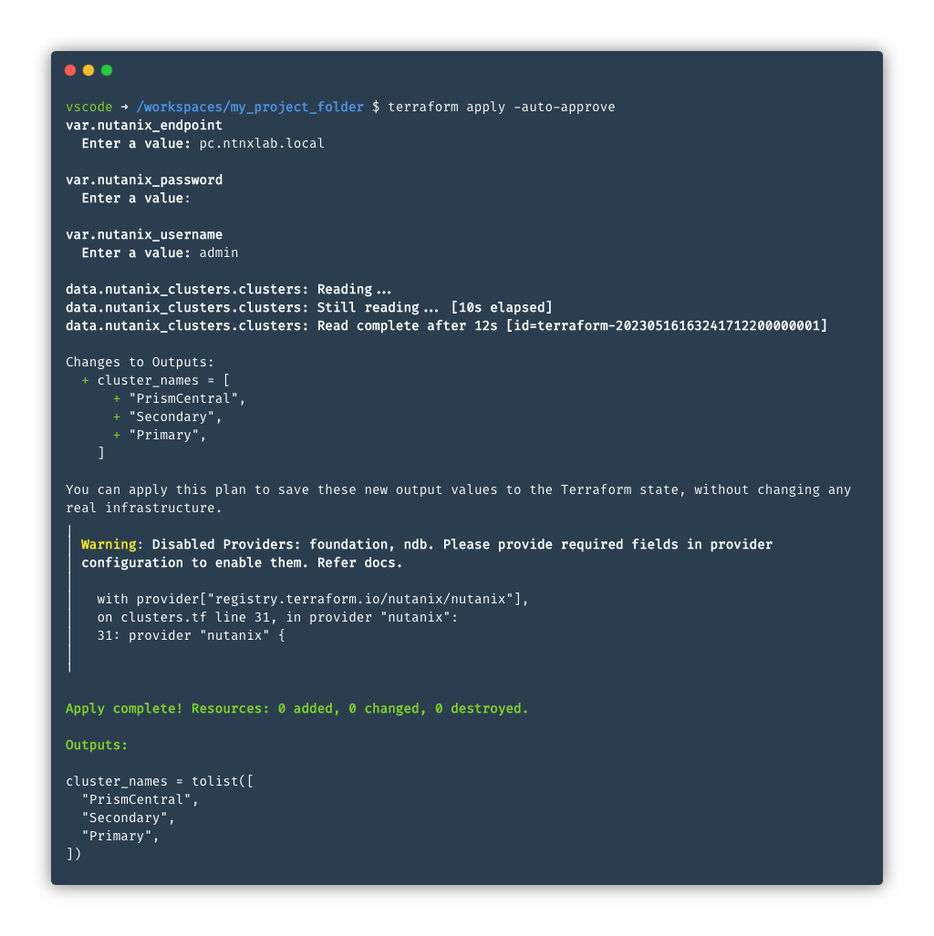
If you’d like to learn more about the Nutanix provider for Terraform, check out the following post; Using the Nutanix Terraform Provider.
Ansible – Getting subnet names
In this example, you will retrieve all the cluster subnets managed by a single Prism Central instance and output their names.
- Create the Ansible playbook.
cat <<EOF > subnets.yaml
---
- name: Clusters Info playbook
  hosts: localhost
  gather_facts: false
  collections:
    - nutanix.ncp

  vars_prompt:
    - name: nutanix_host
      prompt: What is your Prism Central address?
      private: false

    - name: nutanix_username
      prompt: What is your username?
      private: false

    - name: nutanix_password
      prompt: What is your password?

  module_defaults:
    group/nutanix.ncp.ntnx:
      nutanix_host: '{{ nutanix_host }}'
      nutanix_username: '{{ nutanix_username }}'
      nutanix_password: '{{ nutanix_password }}'
      validate_certs: false

  tasks:
  - name: Getting all subnets
    ntnx_subnets_info:
    register: subnets

  - name: Print all subnet names
    ansible.builtin.debug:
      msg: '{{ subnets.response | json_query("entities[*].status.name") }}'
EOF- Run the playbook and provide the values for the required inputs.
ansible-playbook subnets.yaml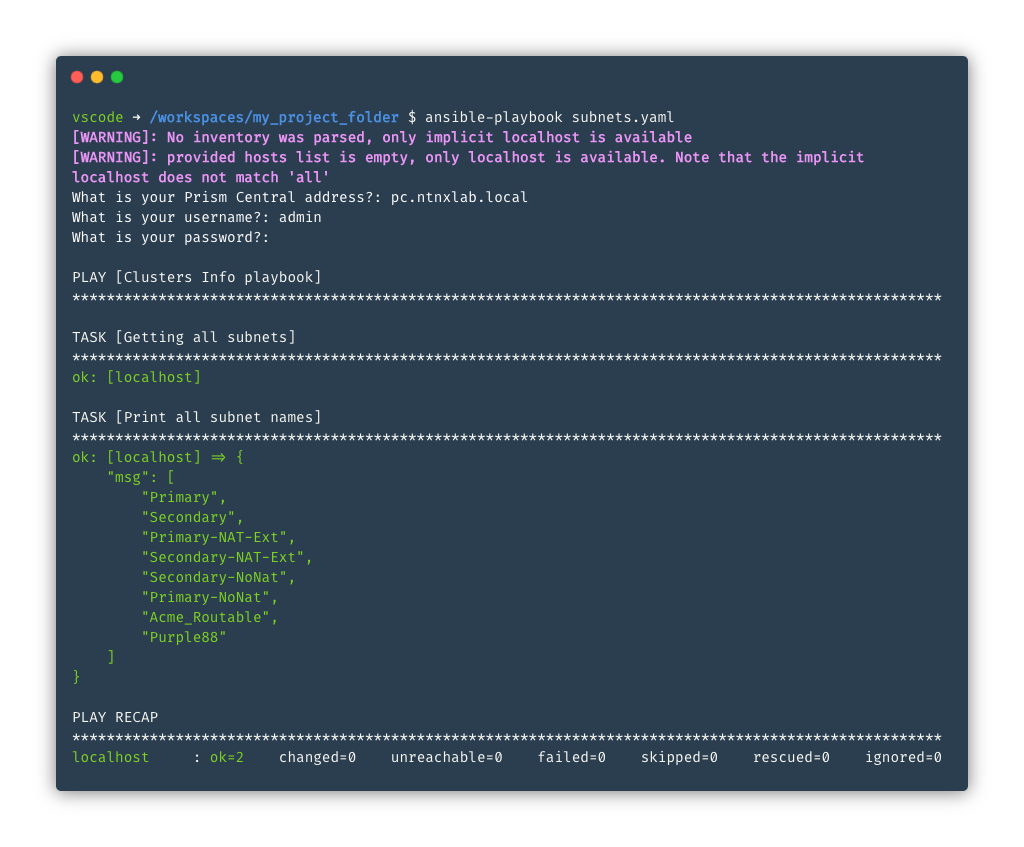
If you’d like to learn more about the Nutanix collection for Ansible, check out the following post; Getting Started with the Nutanix Ansible module.
Calm DSL – Getting project names
In this example, you will retrieve all the Nutanix projects managed by a single Prism Central instance and output their names.
- Configure environment variables for Calm DSL to access Prism Central. Set the following values to match those in your environment.
export PYTHONWARNINGS=ignore
export CALM_DSL_PC_IP=<prism_central_address>
export CALM_DSL_PC_PORT=9440
export CALM_DSL_PC_USERNAME=<prism_central_username>
export CALM_DSL_PC_PASSWORD=<prism_central_password>
export CALM_DSL_LOG_LEVEL=INFO- Run the following command to get all the projects.
calm get projects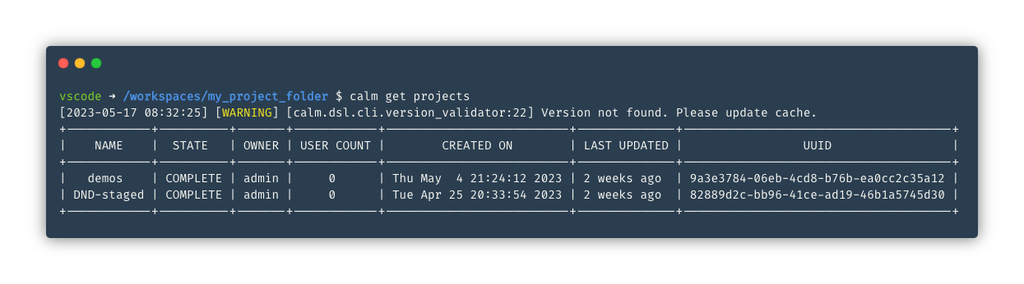
If you’d like to learn more about Nutanix Calm DSL, check out the content here.
Contributing
We gladly welcome contributions from the community. From updating the documentation to adding more functions to the Nutanix Dev Station, all ideas are gratefully received. To find out more visit the official GitHub repository.