

Part 2 in this series: How to Deploy a Fleet of Rancher RKE1 Clusters on Nutanix: The Complete Guide Part 2.
Part 3 in this series: How to Deploy a Fleet of Rancher RKE1 Clusters on Nutanix: The Complete Guide Part 3.
Nutanix is a leading provider of hybrid multicloud solutions that help enterprises simplify their IT operations and reduce costs. One of the key advantages of the Nutanix platform is its ability to provide scalable and high-performance enterprise-grade storage capabilities. In recent years, Nutanix has partnered with Rancher to provide a comprehensive solution for managing Kubernetes clusters on Nutanix infrastructure.
The Rancher and Nutanix partnership provides organizations with a powerful platform for deploying and managing their Kubernetes clusters. Rancher’s Kubernetes platform can consume Nutanix AOS storage solutions, including Nutanix Volumes (block storage), Nutanix Files (distributed file storage), and Nutanix Objects (object storage), enabling organizations to store and manage their data efficiently and securely.
In addition to its storage capabilities, Nutanix also offers Nutanix Database Service (NDB), a database-as-a-service (DBaaS) solution that simplifies database management and deployment. With NDB, enterprises can easily deploy, scale, and manage their databases while taking advantage of the high-performance storage capabilities of the Nutanix platform.
Nutanix enhances Kubernetes security with Nutanix Flow, a software-defined networking solution that offers network visibility, microsegmentation, and application-centric security policies. Integrating Nutanix Flow with Rancher enables fine-grained security controls and protects Kubernetes workloads from threats.
Overall, the partnership between Rancher and Nutanix offers a range of technical advantages for enterprises looking to deploy and manage their Kubernetes clusters. By combining Nutanix hybrid multicloud solutions and storage and database capabilities with Rancher’s Kubernetes management platform, organizations can accelerate their digital transformation initiatives and drive greater efficiency in their IT operations.
Summary
This article describes the process to deploy a fleet of Rancher clusters on Nutanix infrastructure using the Rancher deployment model. We cover the following procedures:
- Initial Rancher Manager deployment
- Nutanix Prism service account configuration
- Nutanix driver installation
- Rancher Nutanix node template creation
- Rancher cluster deployment on Nutanix
- Nutanix CSI driver installation
If you need to configure a File or Dynamic storage class, deploy a Nutanix Files file server before you begin. If you plan to use only the Volume storage class, you can skip this prerequisite.
This guide focuses on Rancher RKE1 deployment. We plan to write another article specifically covering Rancher RKE2 deployment in the future.
For this demonstration, we used the following product versions:
- Nutanix Prism Central 2023.1.0.1
- Nutanix Files 4.2.1.1
- Rancher 2.7.3
Initial Rancher Manager Deployment
To set up and manage an RKE 1 cluster, you must deploy Rancher Manager. There are multiple ways to configure Rancher Manager, but we suggest following the Helm CLI Quick Start guide.
Make sure to deploy a VM that matches the Rancher Manager installation requirements.
It’s important to ensure that the network subnet used for RKE deployment doesn’t conflict with the Rancher pod and service networks. For more information, review Rancher documentation.
We recommend that you set up Rancher Manager with a correct FQDN and signed certificate to improve security and avoid problems related to self-signed certificates.
For this example, we deployed Rancher Manager on Nutanix Kubernetes Engine (NKE). Follow these steps to deploy NKE:
- Connect to Nutanix Prism.
- In the Kubernetes Management section, click Create Kubernetes Cluster.

- Select the deployment method:
- Development
- Production (recommended)

- Specify the Kubernetes cluster name. Optionally, you can also configure specific settings.
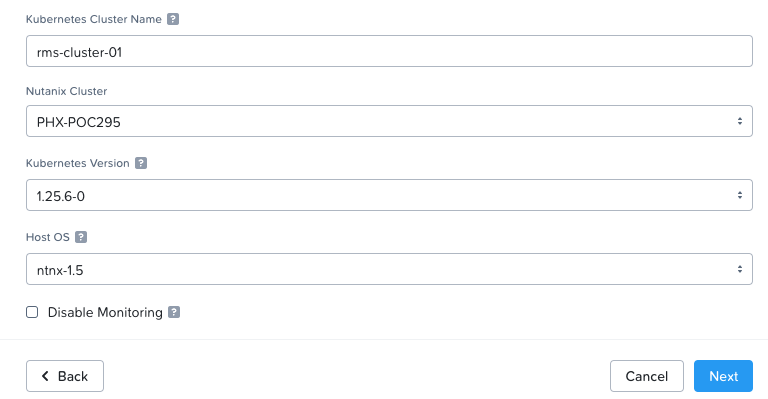
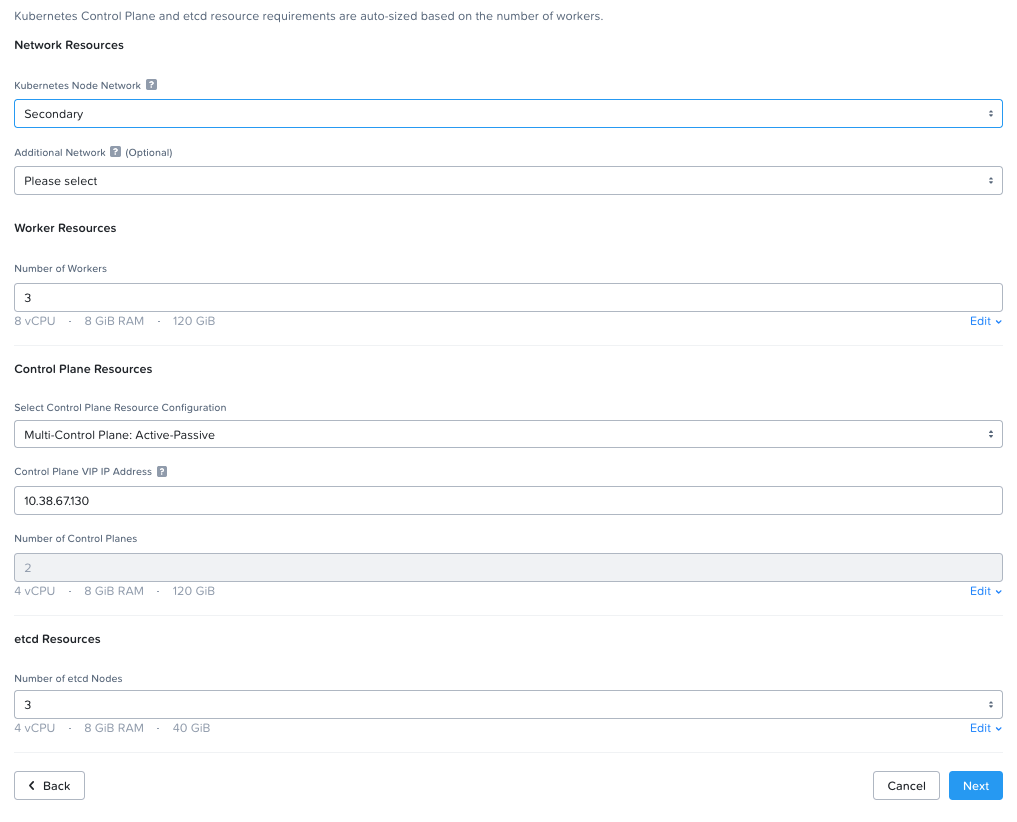
- Click Next and provide the following information:
- Kubernetes Node Network: The network on which to deploy the Kubernetes nodes.
- Number of Workers: At least 2, for high availability.
- Control Plane Resource Configuration: Select Active-Passive.
- Control Plane VIP IP Address: The VIP IP address, which should match the Kubernetes Node Network.
- Click Next and select the network provider. For this example, we used Calico.

- Click Next and define the storage class. For now, keep the default value.
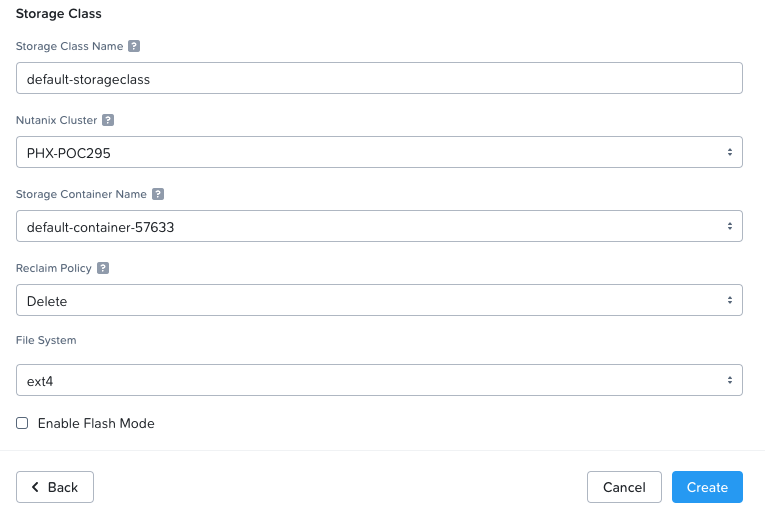
- Click Create.
Your NKE cluster is now deployed and should be ready for use in a few minutes.
Once you’ve deployed the cluster, follow the Helm CLI Quick Start guide suggested earlier to configure the Rancher Manager server.
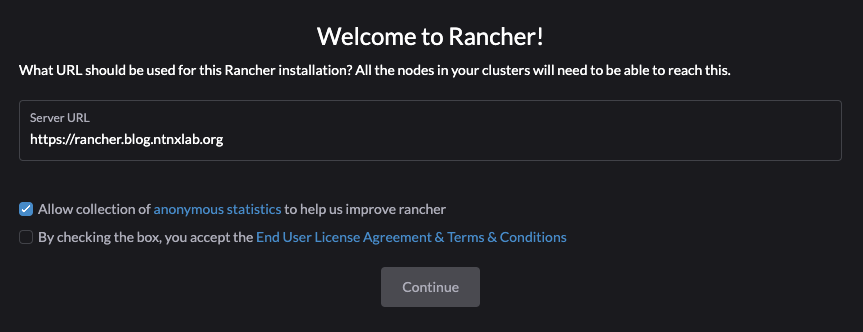
When Rancher Manager is deployed, you can access the Rancher welcome page. After you review and accept the terms and conditions, click Continue.
Nutanix Prism Service Account Configuration
Following the principle of least privilege, create a Prism Central role with the minimum permissions needed to deploy RKE1 clusters. For this example, we created a service account named rancher-sa in the central Active Directory and assigned it a specific Prism Central role named Rancher.
To create the Prism Central role, follow these steps:
- In Prism, click the menu icon in the upper-left corner of the screen.
- Navigate to the Admin Center and select IAM.
- On the Roles tab, click Create Role.
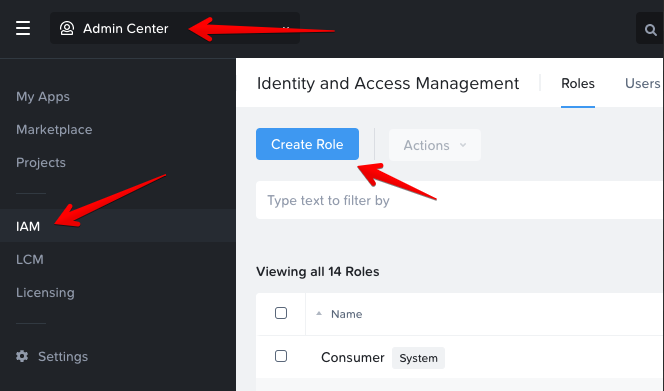
- Enter Rancher as the role name.
- Set the following permissions:
- VM
- Create
- Delete
- View Cluster
- View Subnet
- View VM
- Allow VM Creation
- Image
- View
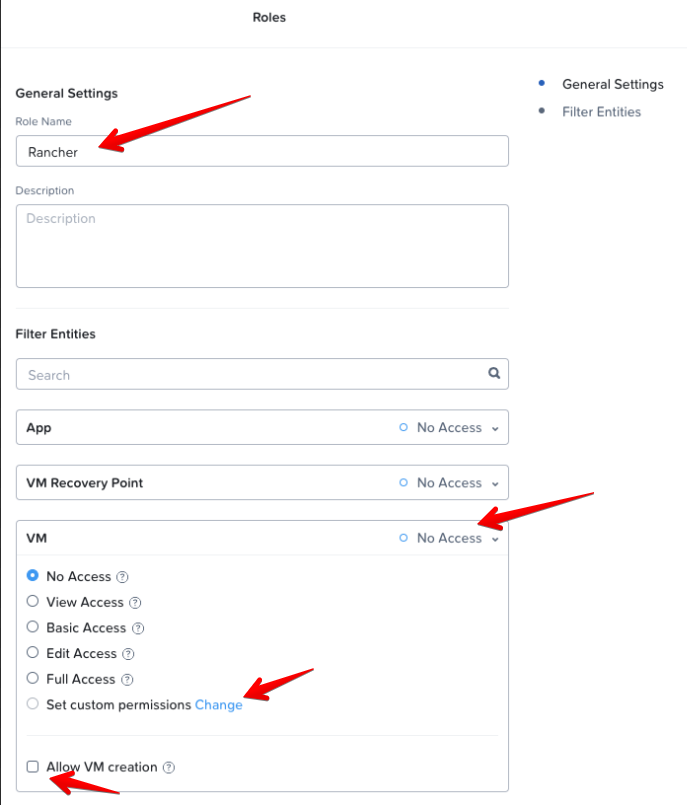
- Click Save.
Once you’ve created the role, assign it to the service account for the required entities. Add assignments for the following entities:
- Clusters
- Images
- Network
Open the Rancher role you just created, click Manage Assignment, and perform the following actions:
- Click Add New.
- Type your Active Directory username in the Search User box on the left side of the screen and select it in the results.
- Select the entity type in the Select Entities dropdown menu on the right side of the screen.

- Select Individual entity in the dropdown menu that appears, then select All <entity type> in the rightmost column.
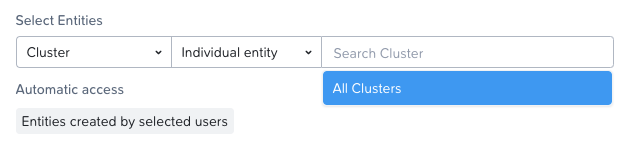
Repeat these steps for each entity type.
When you’re finished, your screen should look like the following screenshot.

You can now use your role and service account for the RKE1 deployment.
In Part 2 of this series we will continue with Nutanix Driver installation.