

Part 1 in this series: How to Deploy a Fleet of Rancher RKE1 Clusters on Nutanix: The Complete Guide Part 1.
Part 3 in this series: How to Deploy a Fleet of Rancher RKE1 Clusters on Nutanix: The Complete Guide Part 3.
Nutanix Driver Installation
To deploy an RKE 1 cluster on Nutanix infrastructure, you must activate the Nutanix Rancher driver.
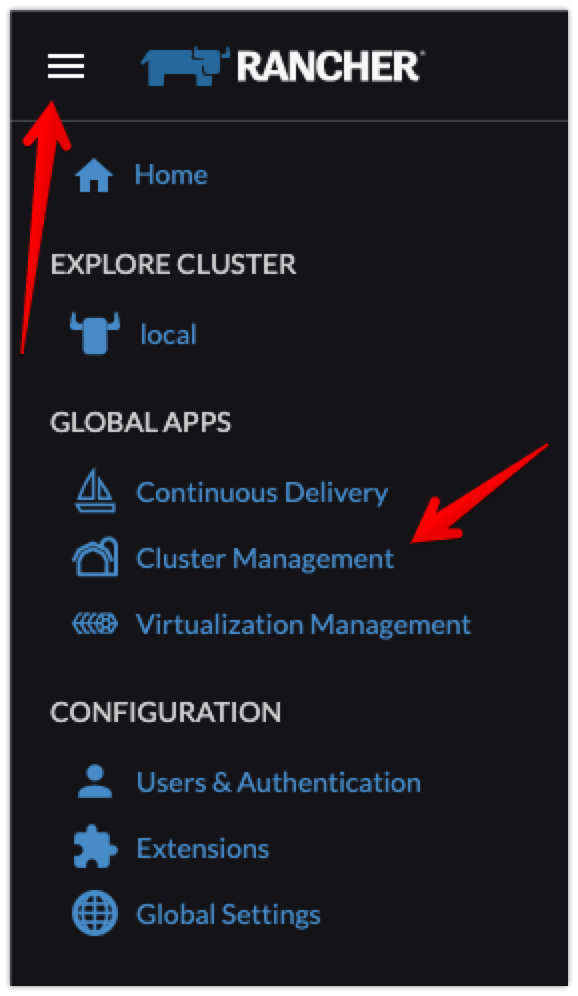
On the Rancher dashboard, click the menu icon in the upper-left corner of the screen and select Cluster Management.
Next, click Drivers and select Node Drivers. At this point, you can see a list of different drivers that are marked active or inactive. To enable the Nutanix node driver, follow these steps:
- Locate the Nutanix driver in the list.
- Click the three-dot icon on the right side of the Nutanix driver entry.
- In the menu that appears, select Activate to enable the Nutanix driver for use.

After a few seconds, the Active icon appears next to the Nutanix driver in the list.

Rancher Nutanix Node Template Creation
By using the Rancher RKE1 node template for Nutanix, you can simplify the deployment of Kubernetes clusters on Nutanix infrastructure without manual node deployment. Because the node template includes all the information Rancher requires to interact with the Prism management plane, it streamlines the deployment process, ensures proper configuration, and maintains consistency.
As node templates also define the resources assigned to nodes, create two different node templates: one for the control plane and another for workers. Check the resource requirements in Rancher documentation before you proceed.
- To create the node templates, follow these steps:
- On the Rancher dashboard, click the menu icon in the upper-left corner of the screen and select Cluster Management.
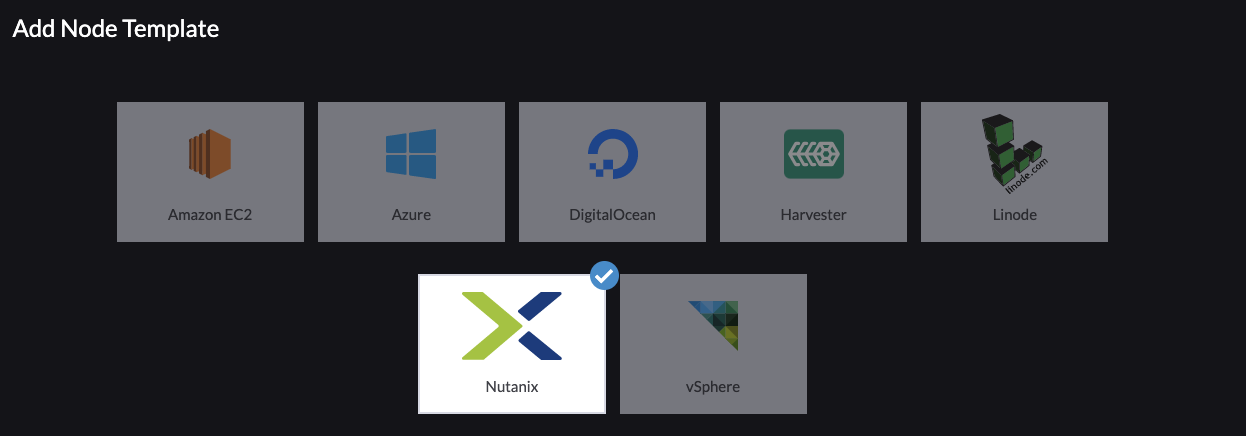
- Click RKE1 Configuration and select Node Templates. If the list is empty, create a new template by clicking Add Node Template in the upper-right corner of the screen.
- Select the Nutanix tile in the first step of the node template wizard.
- Provide the following Nutanix-specific information:
- Management Endpoint: The IP address of the Prism Central that manages the Nutanix cluster.
- Username: The username for Prism Central.
- Password: The password for Prism Central.
- Allow insecure communication to the endpoint: Select this option if Prism Central doesn’t have a trusted and signed SSL certificate.

- Cluster: the Nutanix cluster name in Prism Central

- CPUs: Number of vCPUs.
- Memory: Amount of memory.
- Template Image: Name of the template image, which must match an existing Prism Central image and use a Rancher-supported guest OS with cloud-init enabled. In our example, we used the Ubuntu 22.04 Cloud image.
- VM Disk Size: Size of the initial disk (120 GB is a common size for workers and etcd nodes).
- Additional Disk Size: Size of an additional disk to be provisioned. If you don’t add a disk, enter 0 as the value.
- Storage Container (optional): The Nutanix storage container UUID. If you don’t add a disk, you don’t need to specify a storage container.
- Project Name (optional): The Prism Central project name. If you specify a project name, the VM attaches to it.
- Cloud Config YAML (optional): Your cloud configuration. Don’t use the root user in the cloud-init file. Although entering a configuration here is technically optional, to use the Nutanix Container Storage Interface (CSI) driver, you must install the nfs-common amd iscsid packages:
#cloud-config
packages:
 - nfs-common
- iscsid- Network: Name of the network for the VM, found in Prism.
- VM Categories (optional): Labels for your VMs that you can use in Prism Central for microsegmentation management, RBAC, and other purposes.

After providing the required Nutanix-specific information, enter a Rancher template name and click Create.
Enter a descriptive name for your node template that clearly indicates its characteristics. For this example, we used the following names:
- Rancher template name for the control plane: ubuntu-22-04-control-plane-small
- Rancher template name for the worker: ubuntu-22-04-worker-small

You’re now ready to deploy the RKE1 cluster on Nutanix.
Rancher Cluster Deployment on Nutanix
To deploy the first RKE1 cluster, follow these steps:
- On the Rancher dashboard, click the menu icon in the upper-left corner of the screen and select Cluster Management.
- Click Clusters. You should see the local cluster, which is your Rancher Manager cluster.

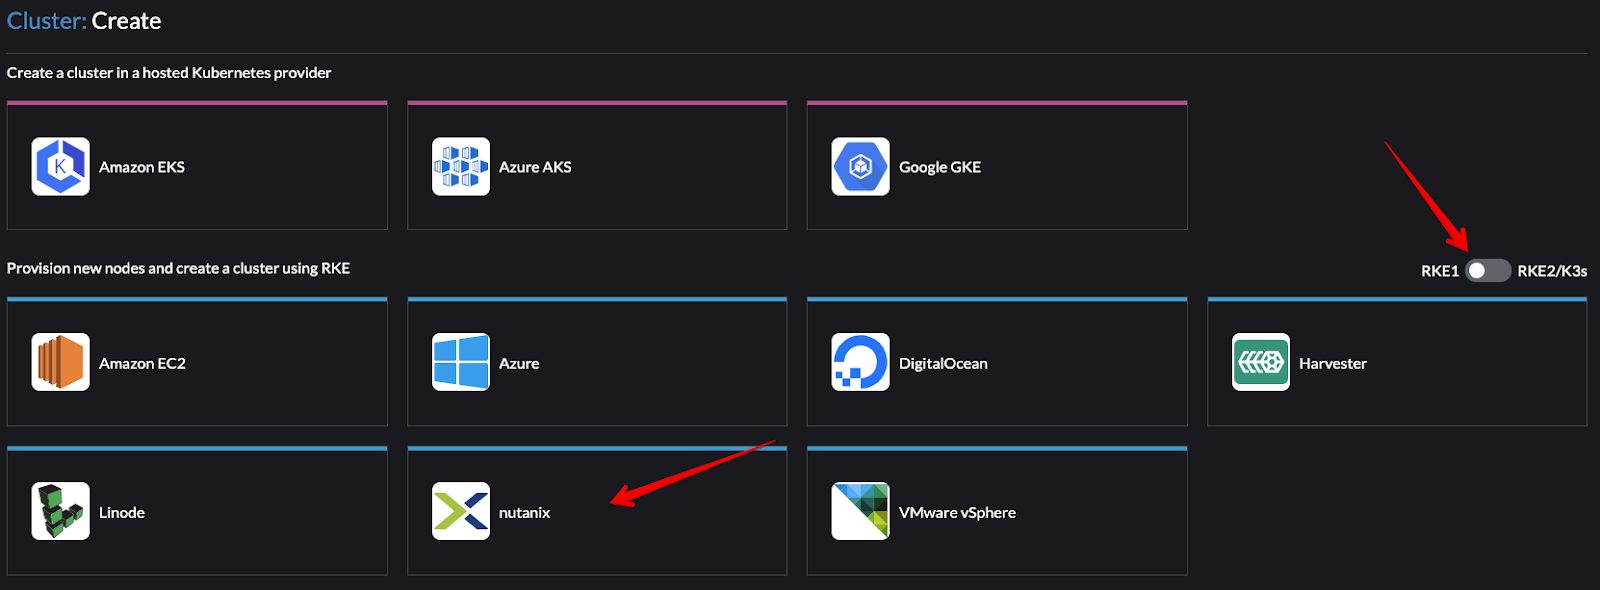
- Click Create in the upper-right corner of the screen.
- Switch the toggle on the right side of the first screen to RKE1 (not RKE2/K3s) and click the Nutanix tile.
- Enter a cluster name. For this example, we used demo-cluster-01.
- Specify the cluster node pools. For this example, we created two different node pools:
- Control-Plane Node Pool: This pool runs etcd and control plane services and uses the ubuntu-22-04-control-plane-small template we created earlier. Deploy three instances of this template.
- Worker Node Pool: This pool runs three worker instances and uses the ubuntu-22-04-worker-small template.

- Kubernetes Version: select the latest available version. For this example, we used v1.25.9-rancher2-1.
- Network Provider: Select the network provider. There are several network providers available, but we used Calico for this example.
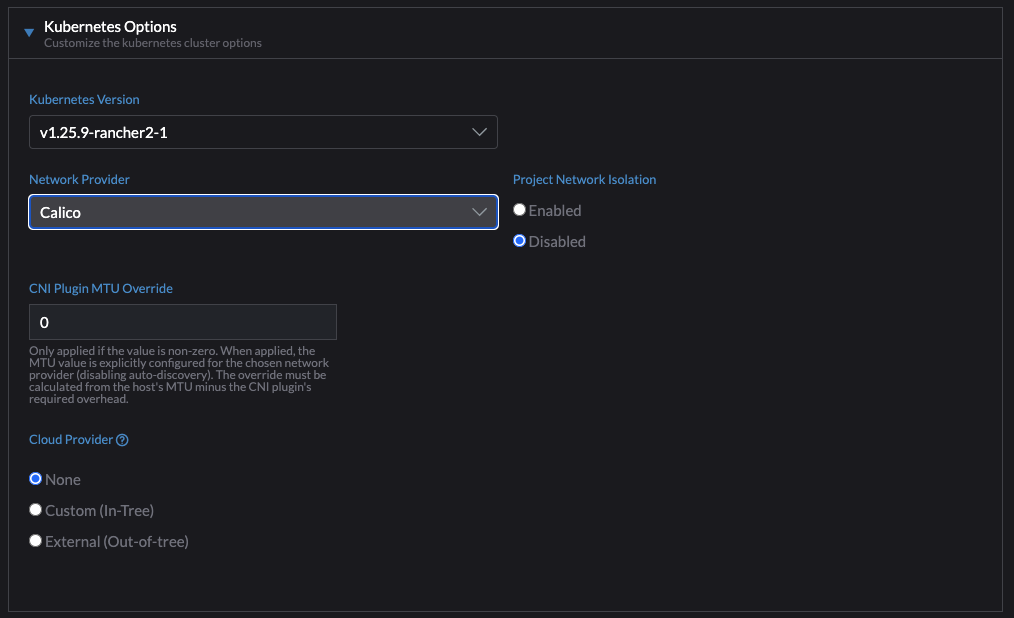
If you want to keep all other settings at their default values, click Create to initiate the cluster creation process and automatically create VMs.
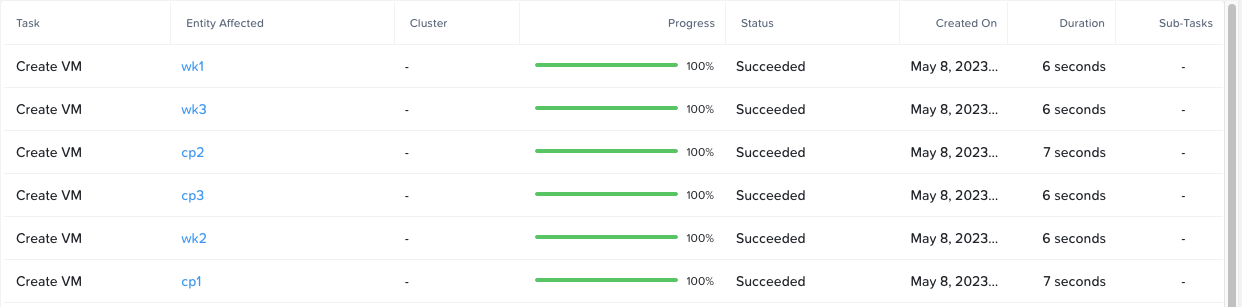
To monitor the progress and view the tasks related to cluster creation, follow these steps:
- Connect to Nutanix Prism.
- Locate the tasks or task list section.
- List the tasks to view the ongoing activities related to VM creation for your RKE1 cluster.

When creation is complete, your RKE should be running and the Clusters section of the Rancher dashboard should look like the following screenshot.

In the third and final part of this series we will continue with Nutanix CSI Driver installation.