

Part 1 in this series: How to Deploy a Fleet of Rancher RKE1 Clusters on Nutanix: The Complete Guide Part 1.
Part 2 in this series: How to Deploy a Fleet of Rancher RKE1 Clusters on Nutanix: The Complete Guide Part 2.
Nutanix CSI Driver Installation
Kubernetes clusters can use Nutanix block storage and file storage seamlessly with the Nutanix CSI driver. The driver provides a standardized interface for managing persistent volumes in Kubernetes, allowing users to easily provision and manage storage resources from Nutanix.
With the Nutanix CSI driver for block storage, Kubernetes pods can request and use block-level storage from Nutanix storage systems. The driver abstracts the underlying storage infrastructure, so you can provision dynamically and attach Nutanix blocks to pods as persistent volumes.
Similarly, the Nutanix CSI driver for file storage allows Kubernetes workloads to access and manage file shares hosted on Nutanix storage systems. It provides a convenient way to provision file-based storage resources and mount them as persistent volumes within pods.
By using the Nutanix CSI driver, Rancher users can take advantage of powerful Nutanix storage capabilities while maintaining compatibility and consistency with the Kubernetes ecosystem. This integration simplifies the management and deployment of stateful applications in Kubernetes, as you can easily provision and manage storage resources through familiar Kubernetes API calls and workflows.
To install the driver, first install the Nutanix CSI Snapshot chart, then the Nutanix CSI Storage chart.
Nutanix CSI Snapshot
To install the Nutanix CSI Snapshot, follow these steps:
- On the Rancher dashboard, click the menu icon in the upper-left corner of the screen and select Explore Cluster.
- Click demo-cluster-01 to access the dashboard of the deployed cluster.
- In the menu on the left side of the screen, click Apps and select Charts.
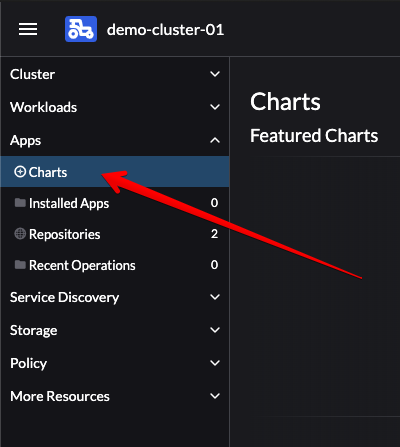
- In the filter box, type nutanix to search for the Nutanix CSI Snapshot chart.
- Select the Nutanix CSI Snapshot result.

- Select the latest version of the chart (for example, 6.2.1) and click Install.

- In the Namespace dropdown menu, select Create a New Namespace and enter the name ntnx-system.


- Click Next, then click Install.
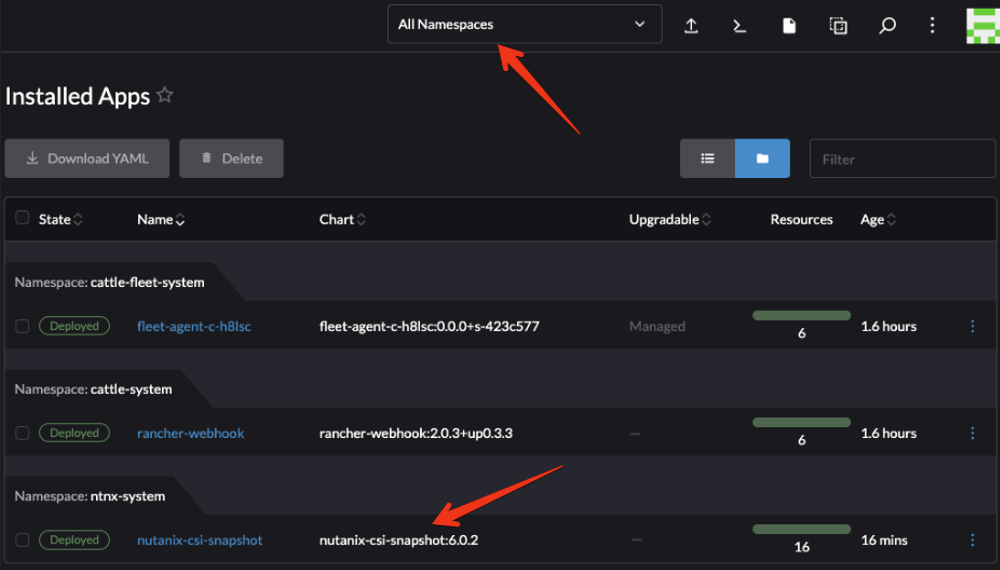
- When the deployment is complete, you should see the Nutanix CSI Snapshot listed on the Installed Apps page. Make sure that you’ve selected All Namespaces from the namespace dropdown menu at the top of the screen.
Nutanix CSI Storage
To install the Nutanix CSI Storage chart and configure the storage classes, follow these steps:
- On the Rancher dashboard, click the menu icon in the upper-left corner of the screen and select Explore Cluster.
- Select demo-cluster-01 to access the cluster dashboard.
- In the menu on the left side of the screen, click Apps and select Charts.
- In the filter box, type nutanix to search for the Nutanix CSI Storage chart.
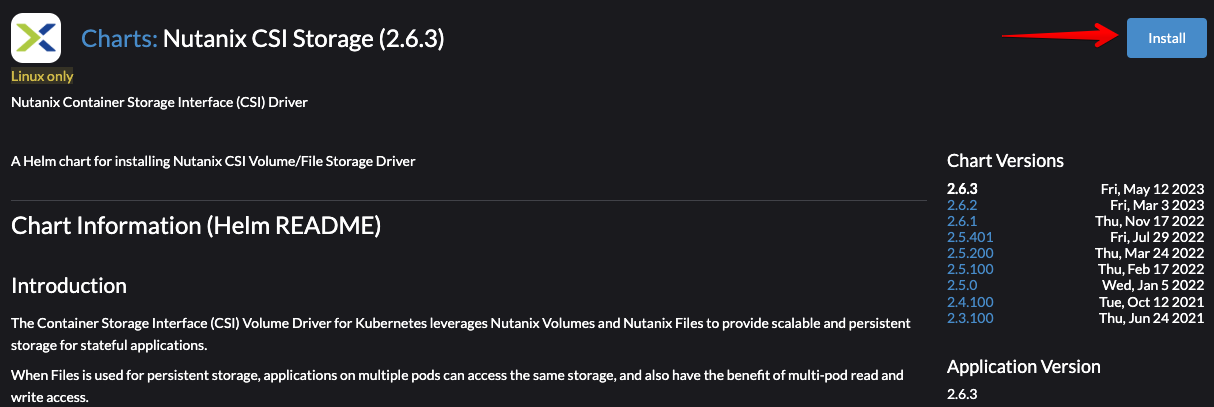
- Select the Nutanix CSI Storage result.
- Click Install.
- Select the ntnx-system namespace and click Next.
- On the global Settings page, you can create up to three different storage classes. Select at least one of the following options:
- Volumes Storage class (block storage)
- Files Storage Class
- Dynamic Files Storage Class
- On the global Settings page, you can create up to three different storage classes. Select at least one of the following options:
Note: If you select the Volumes Storage Class or Dynamic Files Storage Class option, you must provide Prism Central information for communication with Nutanix. The Files Storage Class option doesn’t require this information.

- For the selected storage classes, provide the following information:
- Default Storage Class: The options are volume, file, and dynfile.
- Prism Endpoint: Specify the Prism Element IP address.
- Username: Provide a user who has access to the Prism Element IP address.
- Password: Enter the password for the given user.
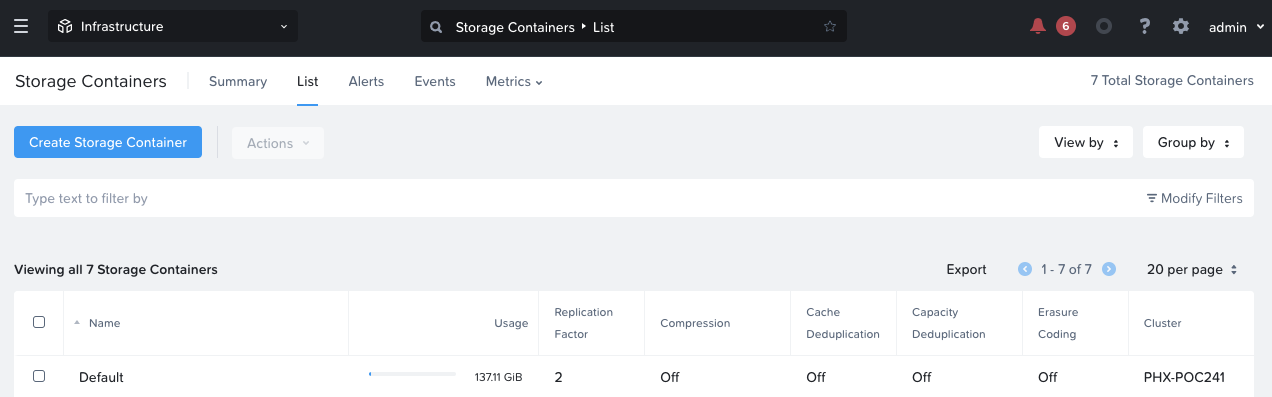
- Click Nutanix Volumes Settings in the menu on the left side of the screen and set the Storage Container to Default. Select xfs as the default filesystem.

Note: You can find the container name in Prism Central under Storage Containers.
- Click Nutanix Files Settings and provide the Nutanix Files file server IP address or FQDN and NFS file server name.
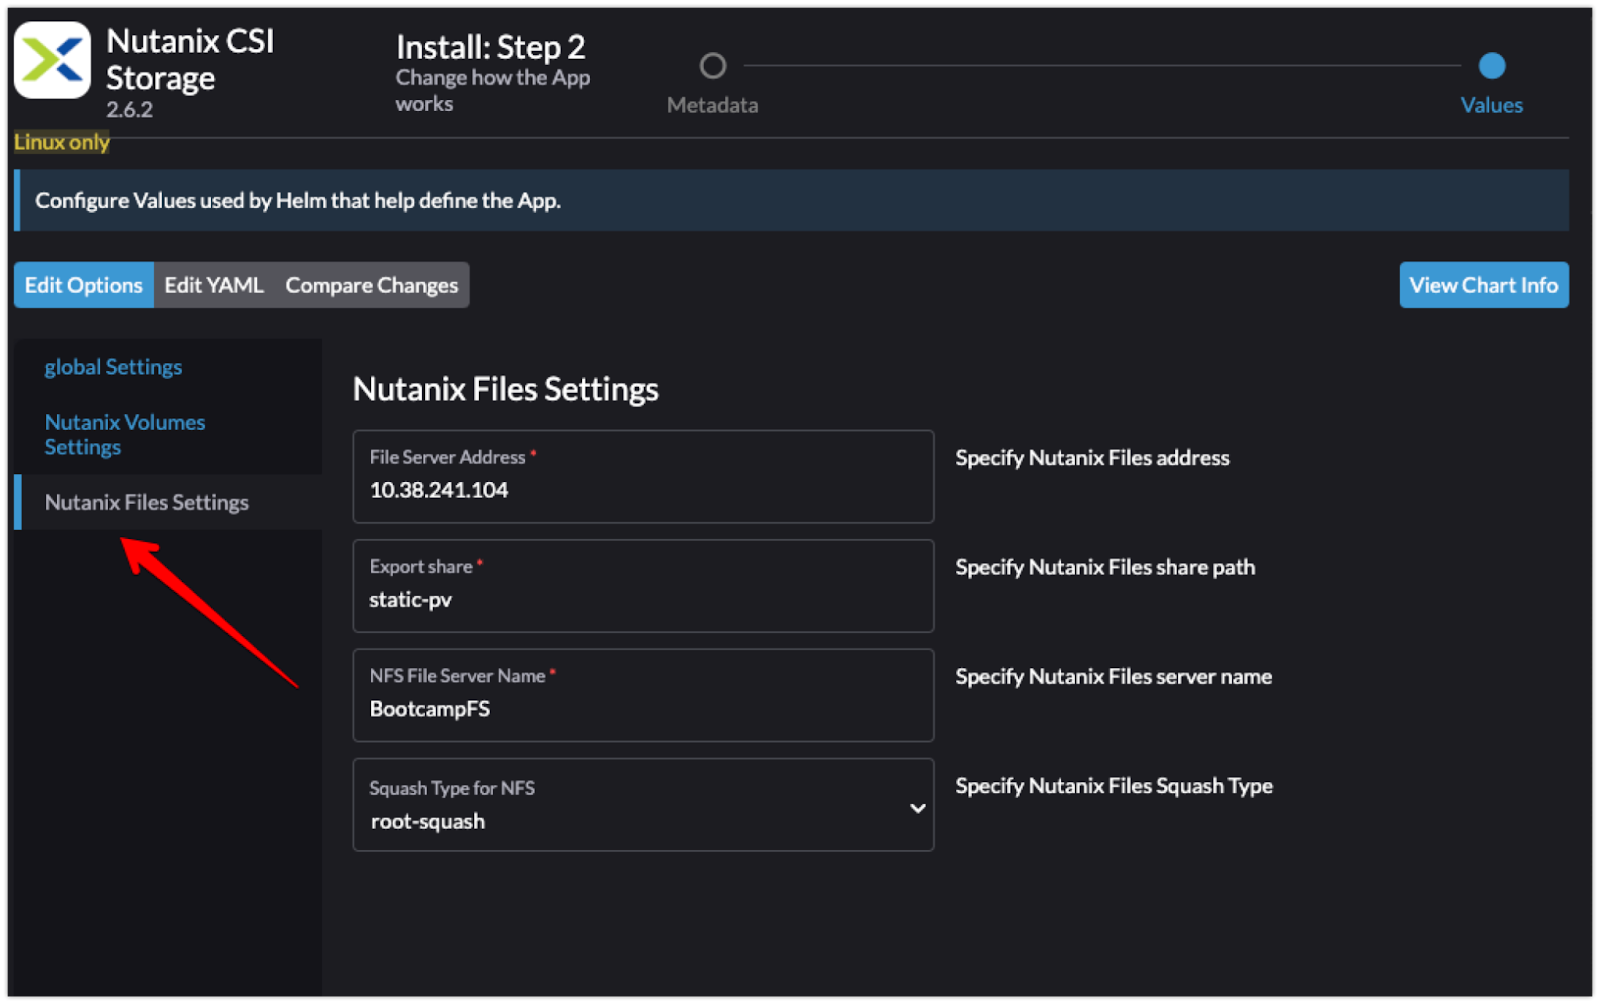
Note: You can find the file server information in Prism Central under Files. Click File Servers in the menu on the left side of the screen, then select the Manage action for your file server.

- Click Install.
After a few seconds, you should see the nutanix-csi-storage application deployed successfully.
To test the CSI driver, follow these steps:
- In the menu on the left side of the screen, click Storage and select PersistentVolumeClaims.
- Create one Persistent Volume Claim (PVC) for each storage class you configured.
To create PVCs, follow the steps in the relevant next subsections.
Block Storage PVC
To create a PVC and verify its status, follow these steps:
- On the Rancher dashboard, click Storage in the menu on the left side of the screen and select PersistentVolumeClaim.
- Click Create to create a new PVC.
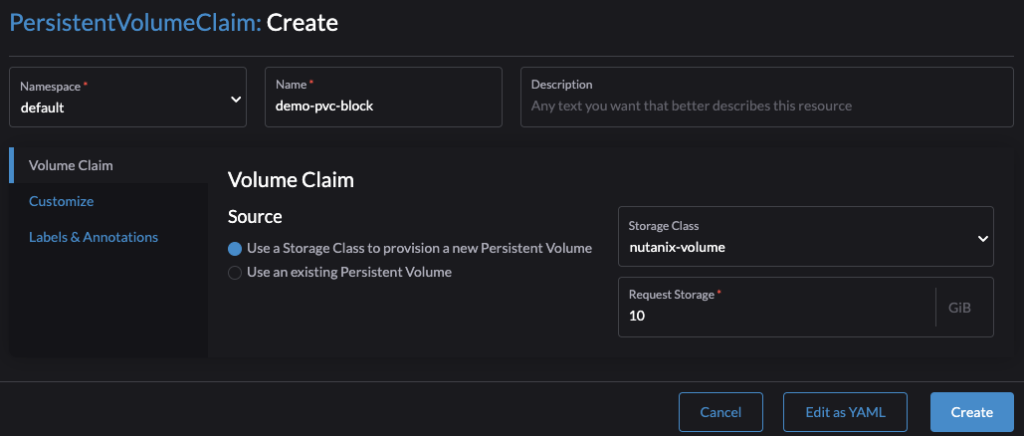
- Select the default namespace.
- Enter a name for the PVC, such as demo-pvc-block.
- In the Volume Claim section, select Use a Storage Class to provision a new Persistent Volume.
- Select nutanix-volume in the Storage Class dropdown menu.
- Enter a value for storage size in the Request Storage field.
- Click Create to create the PVC.
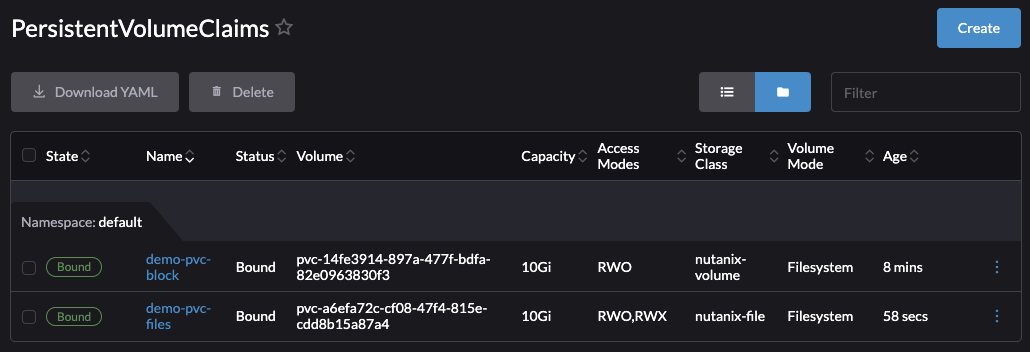
After a few seconds, you should see the PVC listed with Bound in the State column, indicating that it has been successfully provisioned and attached to the corresponding storage.
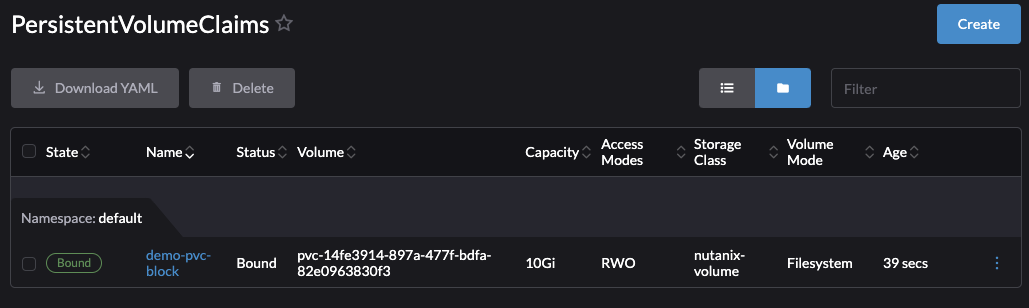
Note: You can also see the PVC in Prism Central.

File Storage PVC
To create a PVC for file storage and configure ReadWriteMany (RWX) access, follow these steps:
- On the Rancher dashboard, click Storage in the menu on the left side of the screen and select PersistentVolumeClaims.
- Click Create to create a new PVC.
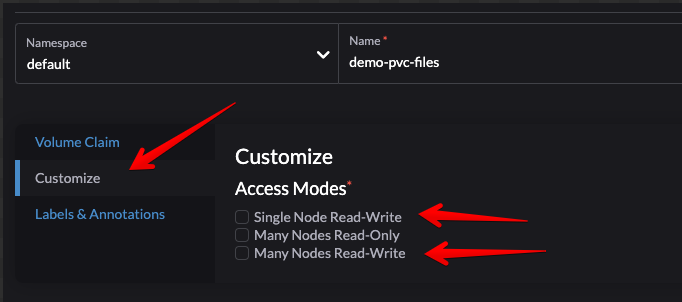
- Enter a name for the PVC, such as demo-pvc-files.
- In the Volume Claim section, select Use a Storage Class to provision a new Persistent Volume.
- Select nutanix-files in the Storage Class dropdown menu.
- Enter a value for storage size in the Request Storage field.
- In the Customize section, select Single Node Read-Write or Many Nodes Read-Write, depending on the application’s requirements. Nutanix Files supports both RWO and RWX.
- Click Create to create the PVC.
When creation is complete, you should see the new PVC listed with Bound in the State column. The PVC named demo-pvc-files indicates that it supports both RWO (ReadWriteOnce) and RWX access, validating the RWX configuration.
Note that because the file storage PVC uses the NFS specified during CSI installation, you don’t observe any actions in Prism Central. The worker nodes automatically mount the Nutanix Files file server to provide access.
Dynamic File Storage PVC
To create a PVC for dynamic file storage, follow these steps:
- On the Rancher dashboard, click Storage in the menu on the left side of the screen and select PersistentVolumeClaims.
- Click Create to create a new PVC.
- Enter a name for the PVC, such as demo-pvc-dynfiles.
- In the Volume Claim section, select Use a Storage Class to provision a new Persistent Volume.
- Select nutanix-dynfiles in the Storage Class dropdown menu.
- Enter a value for storage size in the Request Storage field.
- Click Create to create the PVC.

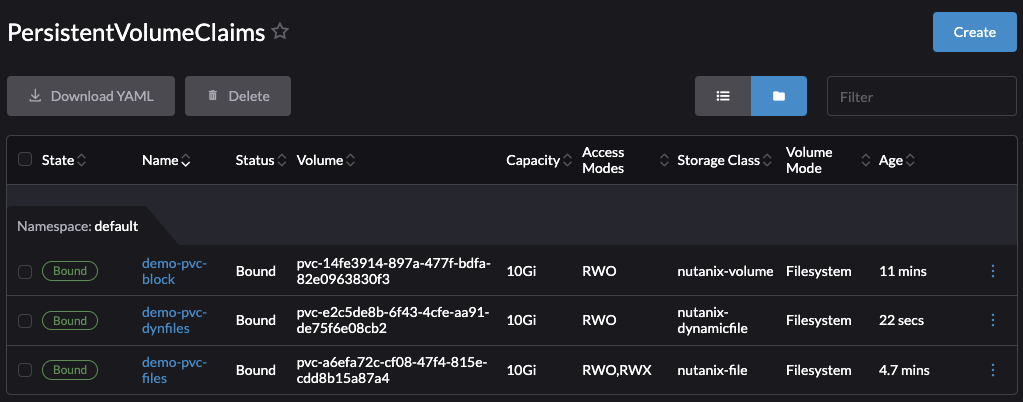
When creation is complete, you should see the new PVC listed with Bound in the State column, that it has been successfully provisioned and attached to the corresponding storage.
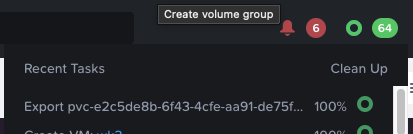
In Prism, you can see a notification of a completed export task. This task is part of PVC share creation and ensures the necessary NFS mount and access to the Nutanix Files file server.
When you access the Nutanix Files manager in Prism Central, you can see the newly created share. The description field of the share provides information about the PVC and the namespace associated with it, so you can identify its relationship to the PVC.

In the description field, we can see the PVC and namespace related to this share.

At this point, you have installed the Nutanix CSI Storage chart, configured the storage classes, and created PVCs for testing purposes.
Conclusion
In addition to the efficient container orchestration and storage management capabilities that Nutanix infrastructure provides, deploying a Rancher environment on Nutanix delivers value to your business in several key ways:
- Simplified deployment and management. By following the steps outlined in this blog series, deploying a resilient Rancher cluster on Nutanix becomes a streamlined process that eliminates the need for manual intervention. This simplified deployment approach saves valuable time and resources, so IT teams can focus on other critical tasks.
- Enhanced performance and reliability. Nutanix infrastructure provides high-performance storage and computing resources, ensuring optimal performance for Rancher and containerized applications. The combination of Rancher’s container orchestration capabilities with the robust Nutanix robust infrastructure enhances reliability, minimizes downtime, and delivers a consistently high-quality user experience.
- Cost savings. Nutanix infrastructure offers cost savings through its consolidated hardware and software approach. By deploying Rancher on Nutanix, organizations can benefit from reduced hardware and licensing costs, lower power and cooling requirements, and simplified infrastructure management. These cost savings can be significant, especially for businesses operating at scale or planning to expand their containerized workloads.
- Scalability and flexibility. The Nutanix scale-out architecture allows organizations to easily scale their Rancher clusters based on changing demands. As the business grows, Nutanix infrastructure can seamlessly accommodate increased workloads, ensuring that the Rancher environment remains agile and responsive. This scalability enables organizations to adapt to fluctuating business requirements efficiently and avoid unnecessary infrastructure investments.
- Centralized management and monitoring. Rancher’s comprehensive management capabilities, combined with Nutanix management tools, provide a unified and centralized view of the entire container environment. IT teams can easily manage and monitor Rancher clusters, storage resources, and other infrastructure components through a single interface. This centralized approach simplifies troubleshooting, enhances visibility, and improves overall operational efficiency.
These capabilities contribute to enhanced operational efficiency, cost savings, scalability, and agility, so organizations can meet their evolving business needs.
By following the outlined steps for deploying Rancher with Nutanix infrastructure capabilities, organizations can achieve a powerful container orchestration platform that optimizes resource utilization, simplifies operations, and enables faster application deployment. This integration of Nutanix and Rancher empowers businesses to benefit from containerization while maintaining a robust and scalable infrastructure foundation.